With Jarvi automations, speed up your sourcing, structure your outreach and ensure rigorous follow-up without repetitive manual work. Set up multi-channel sequences and scenarios tailored to each profile in just a few minutes, while preserving personalisation and communication security.
Create and configure an automated sequence
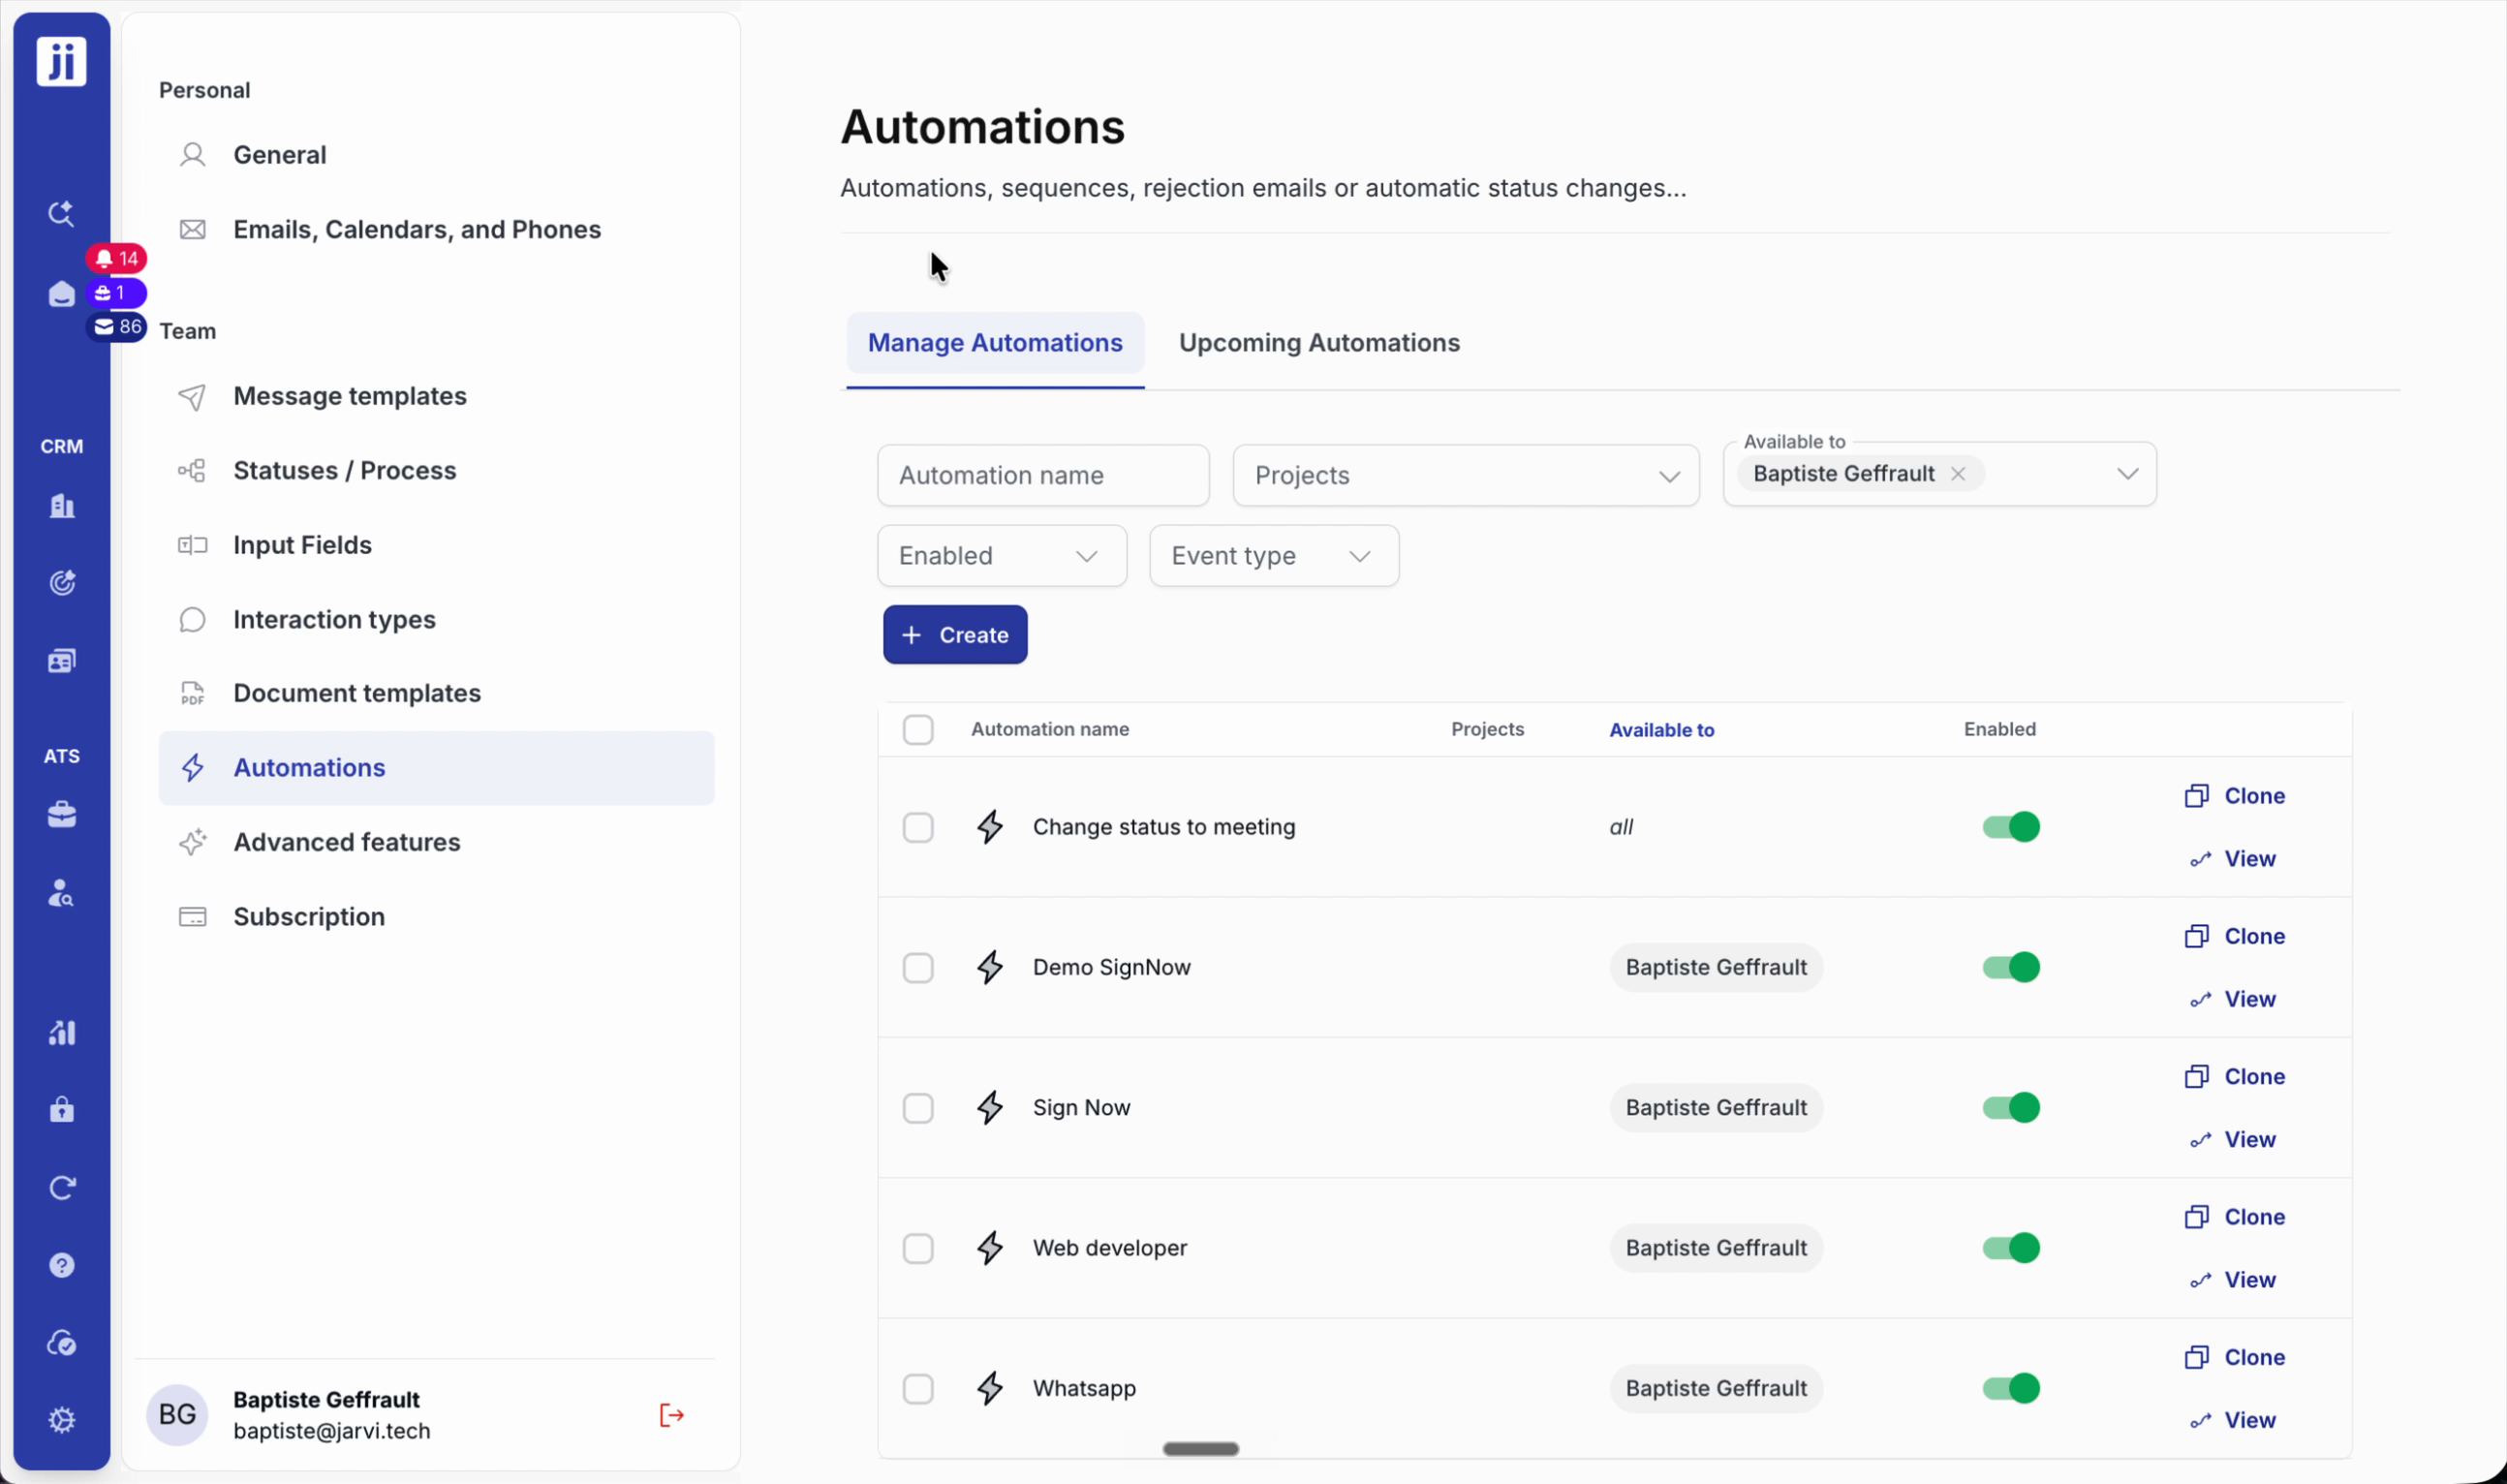
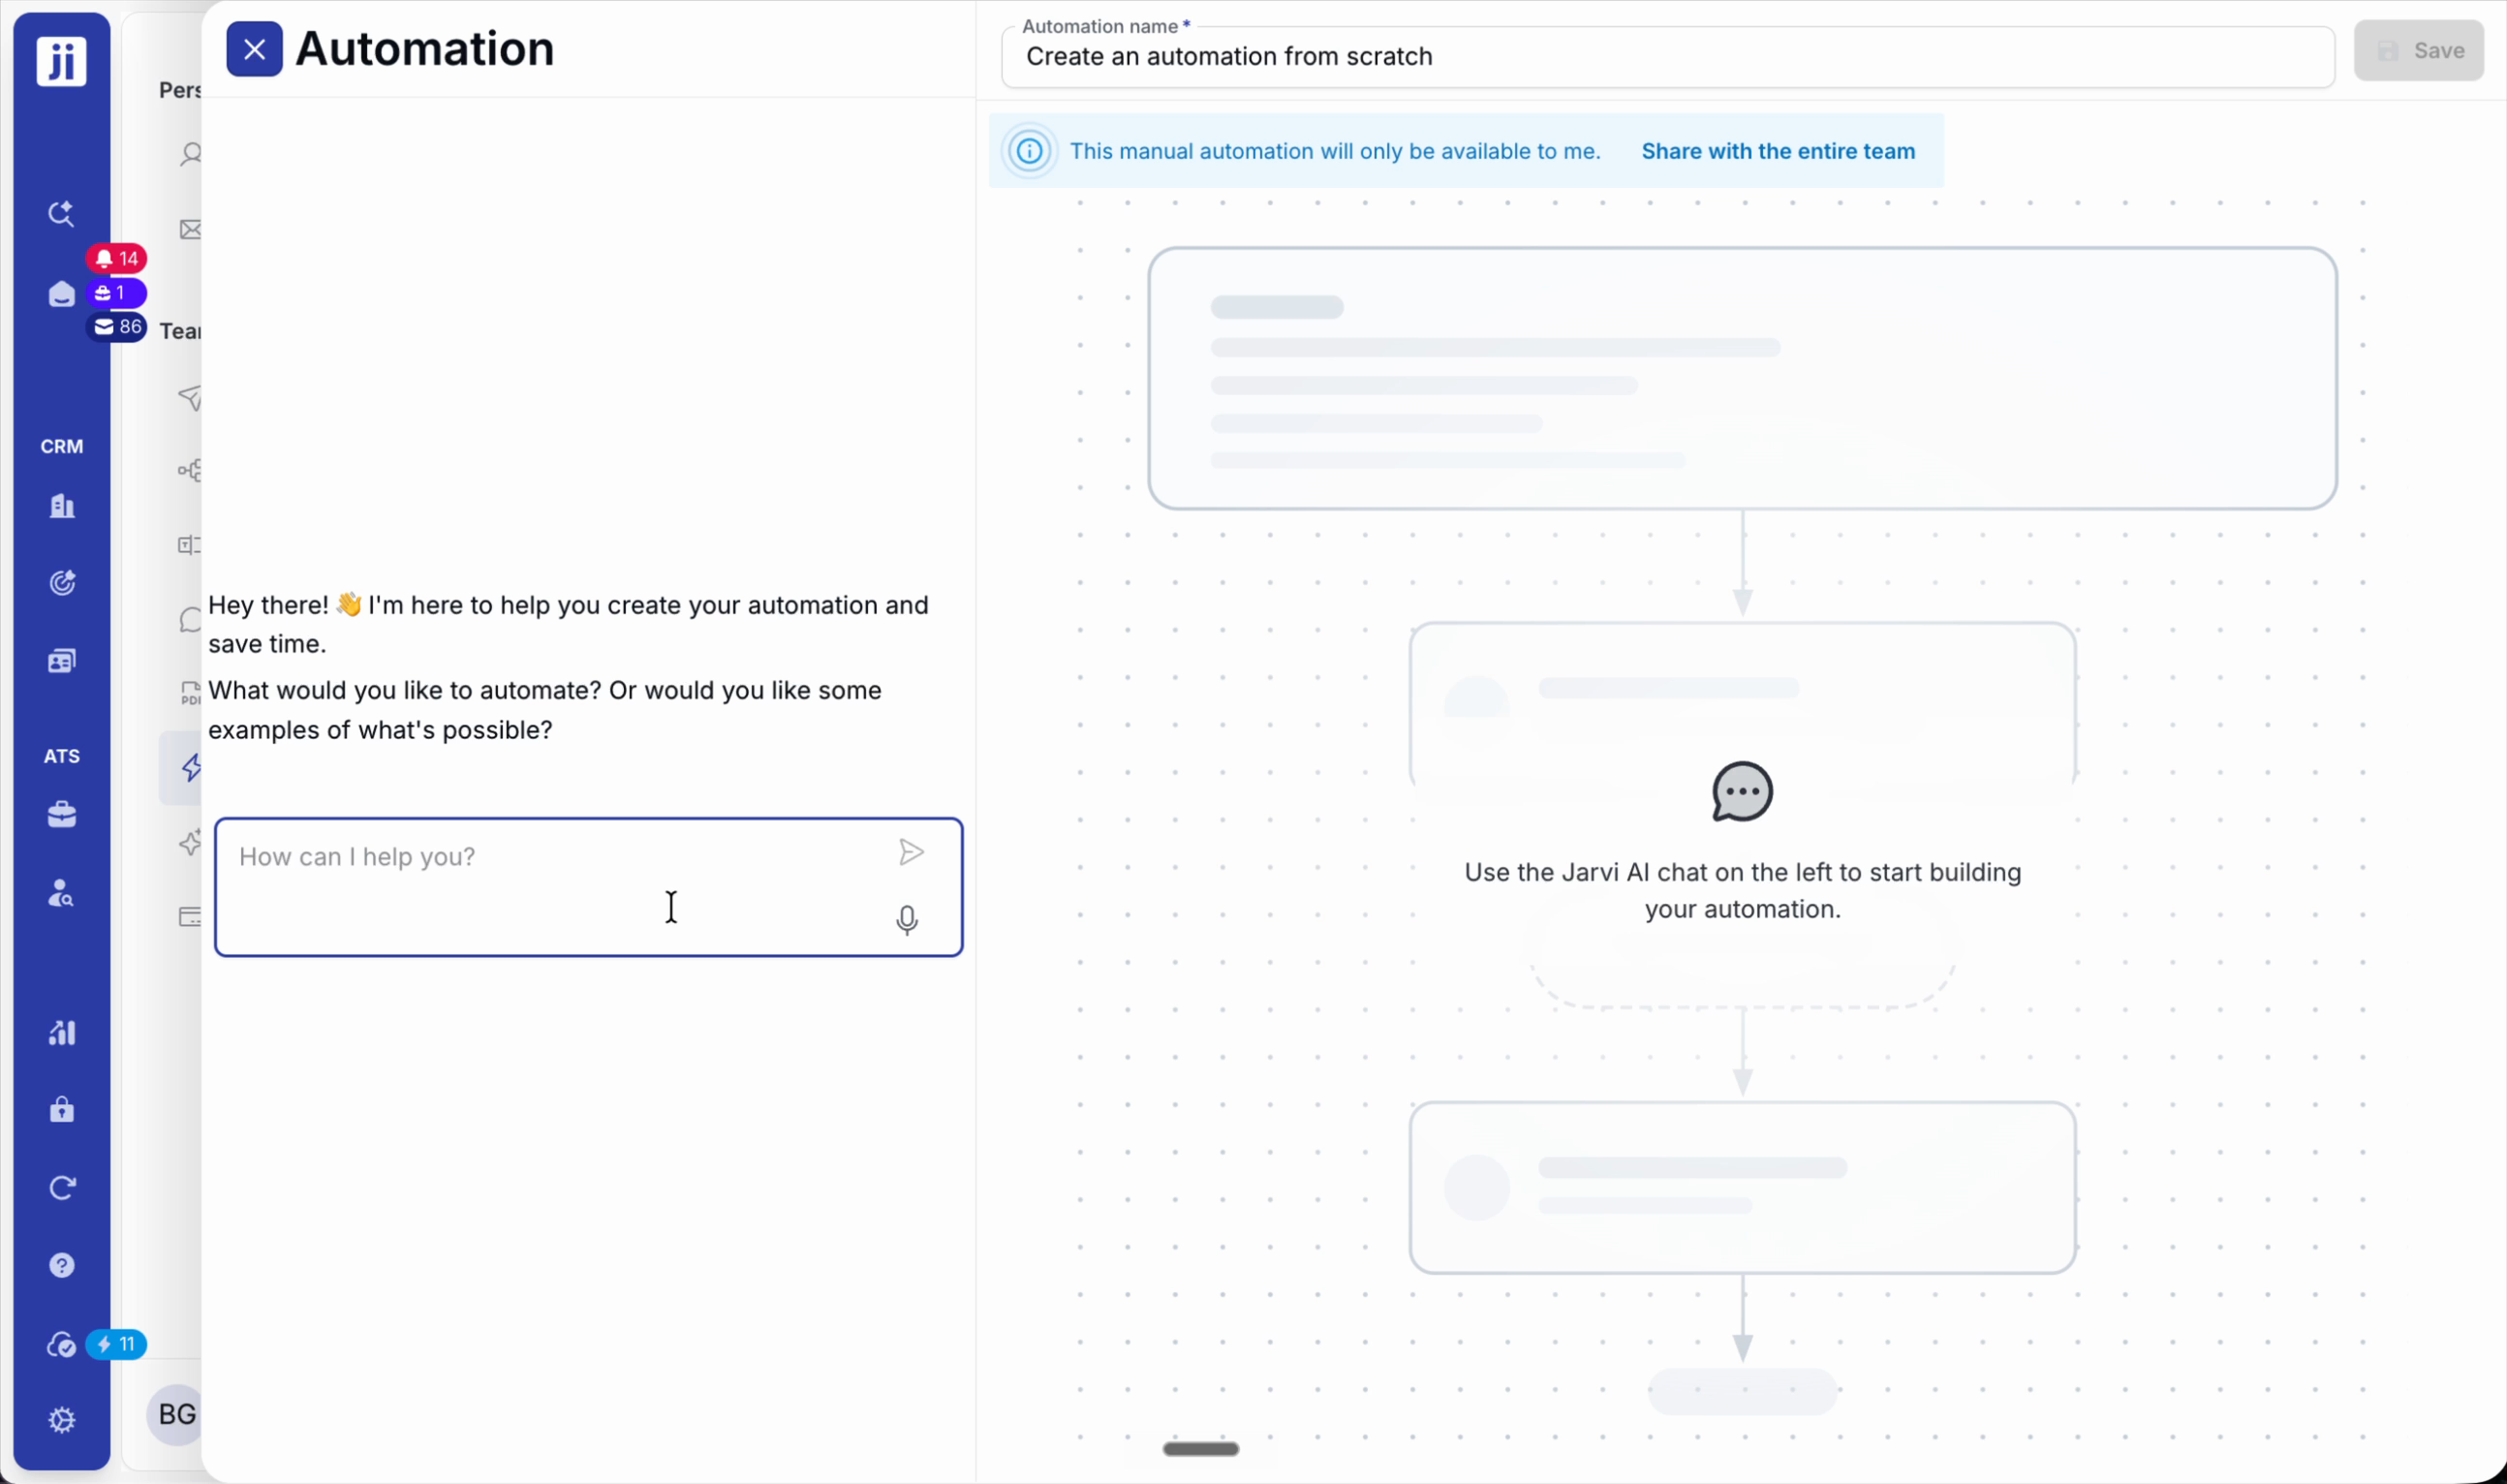
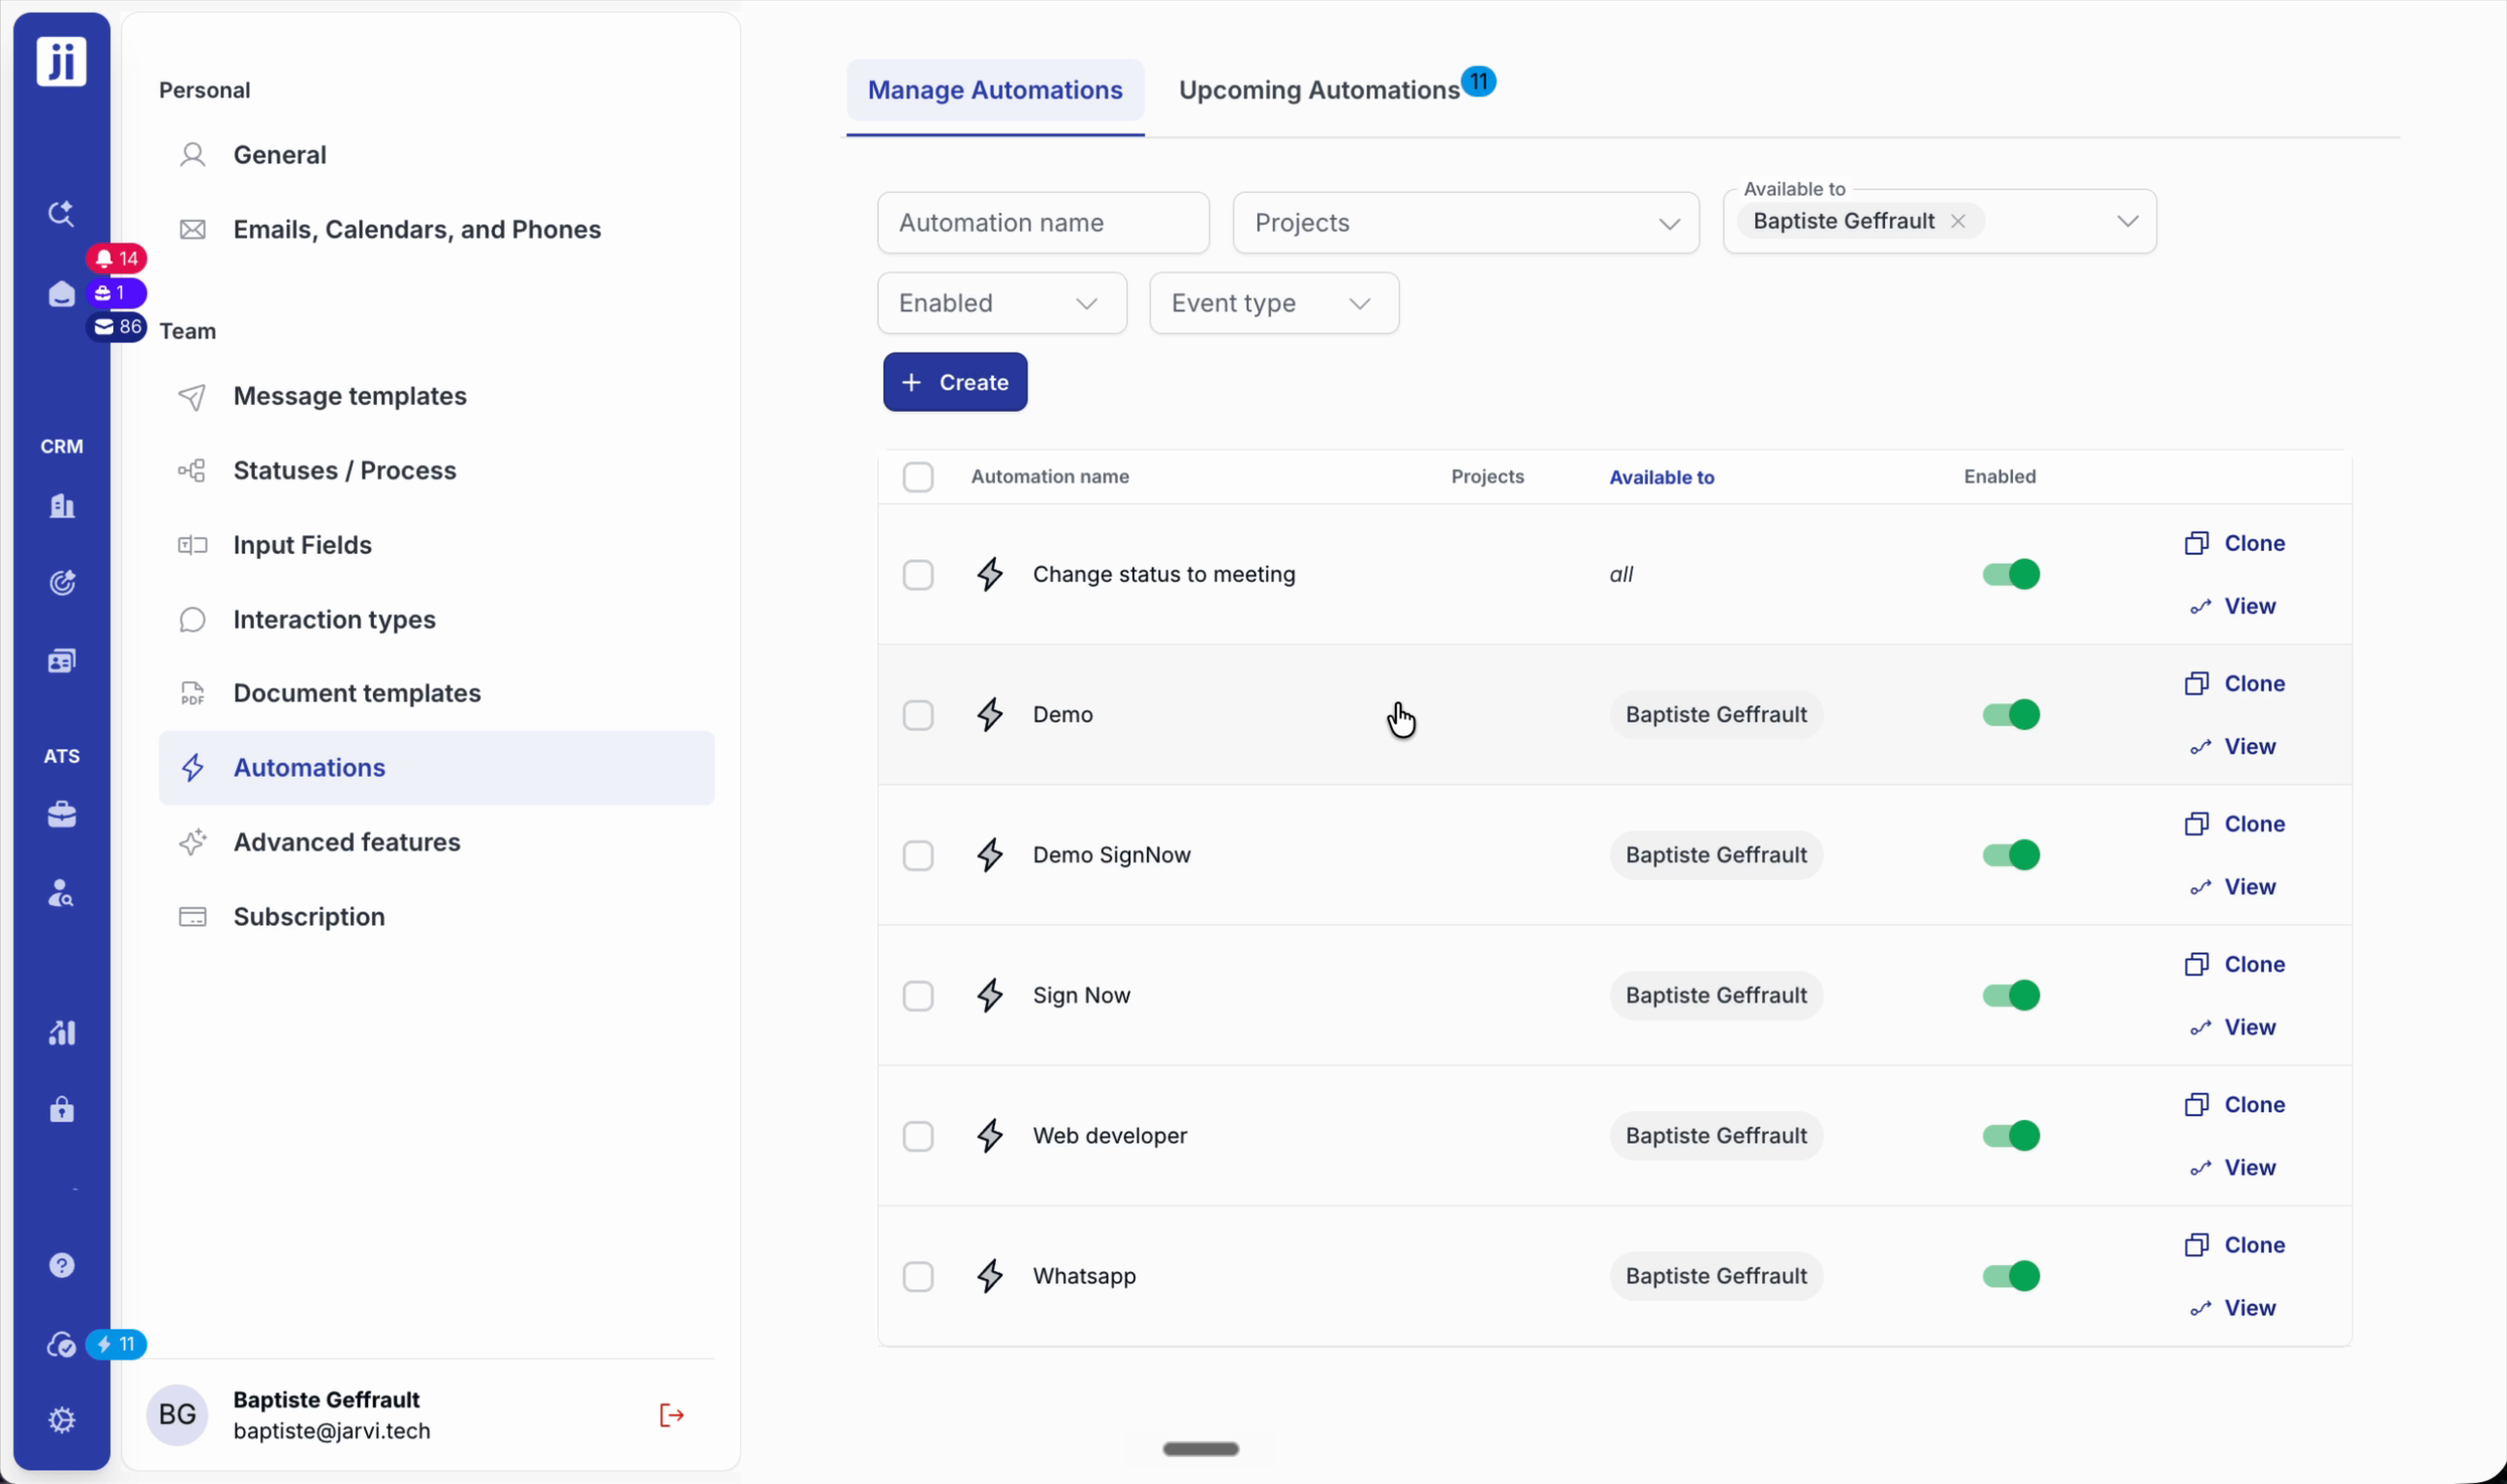
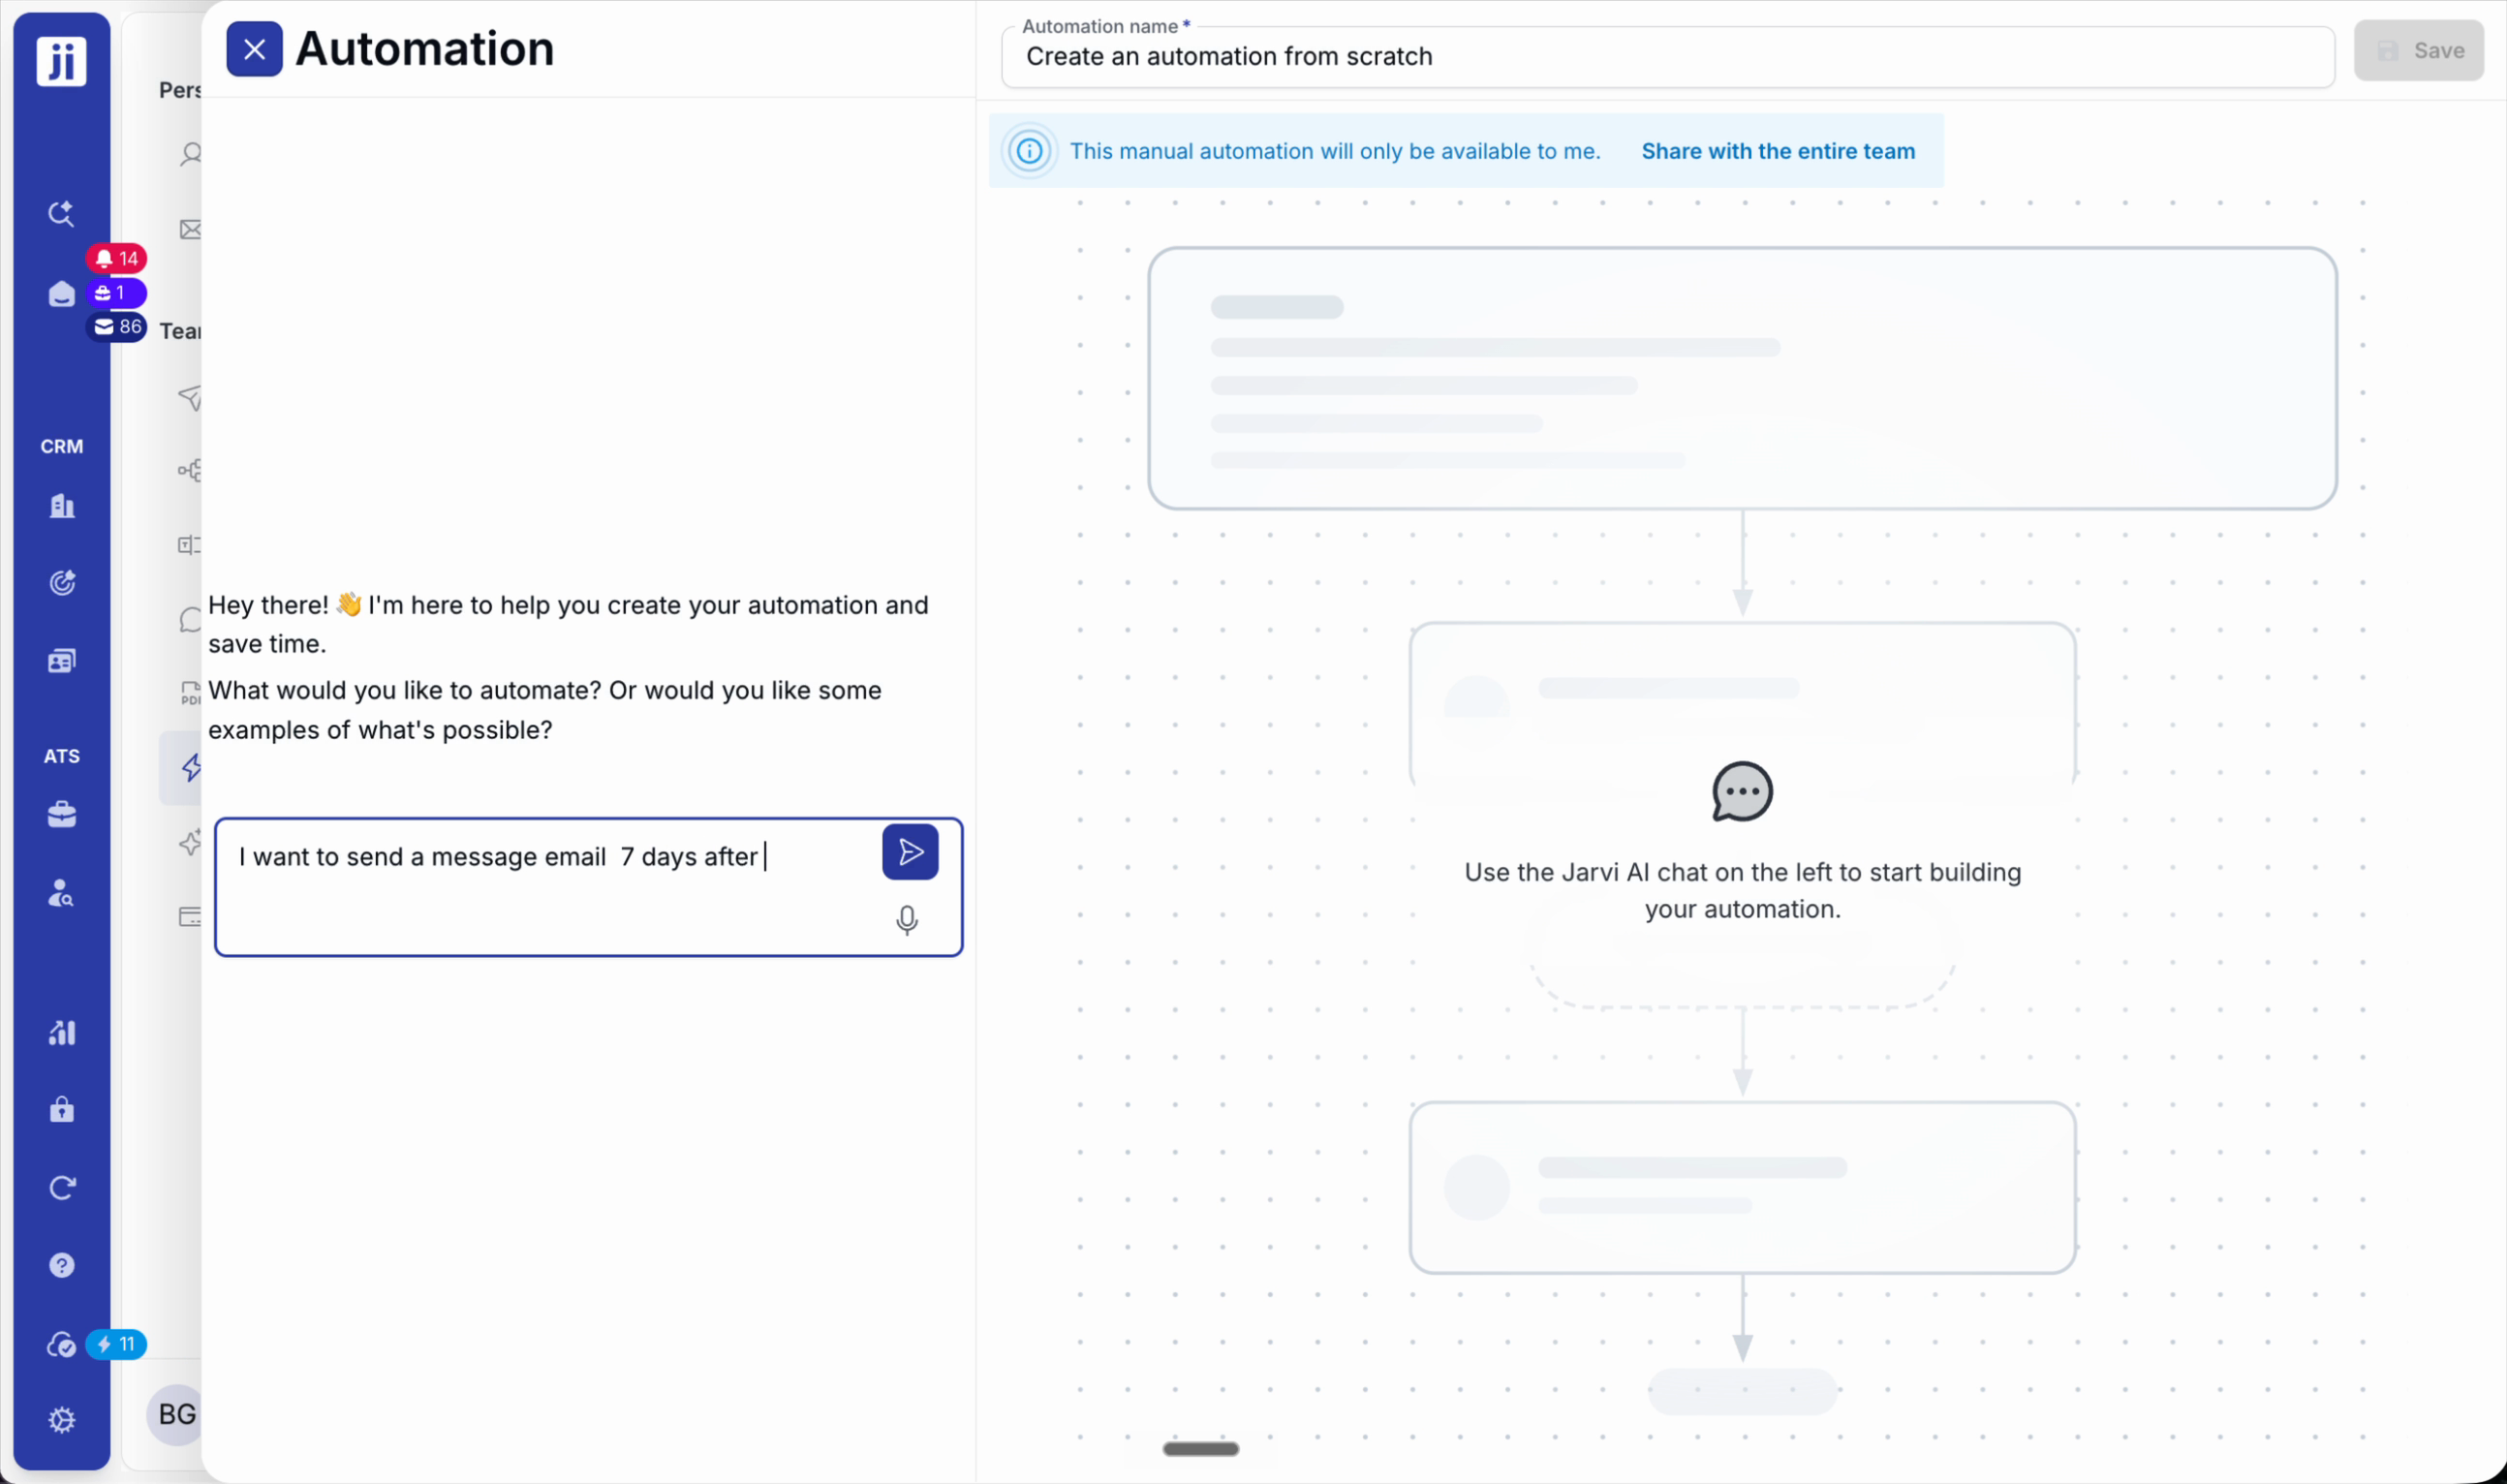
Step 1: Open My Preferences, then click Automation and the Create button.
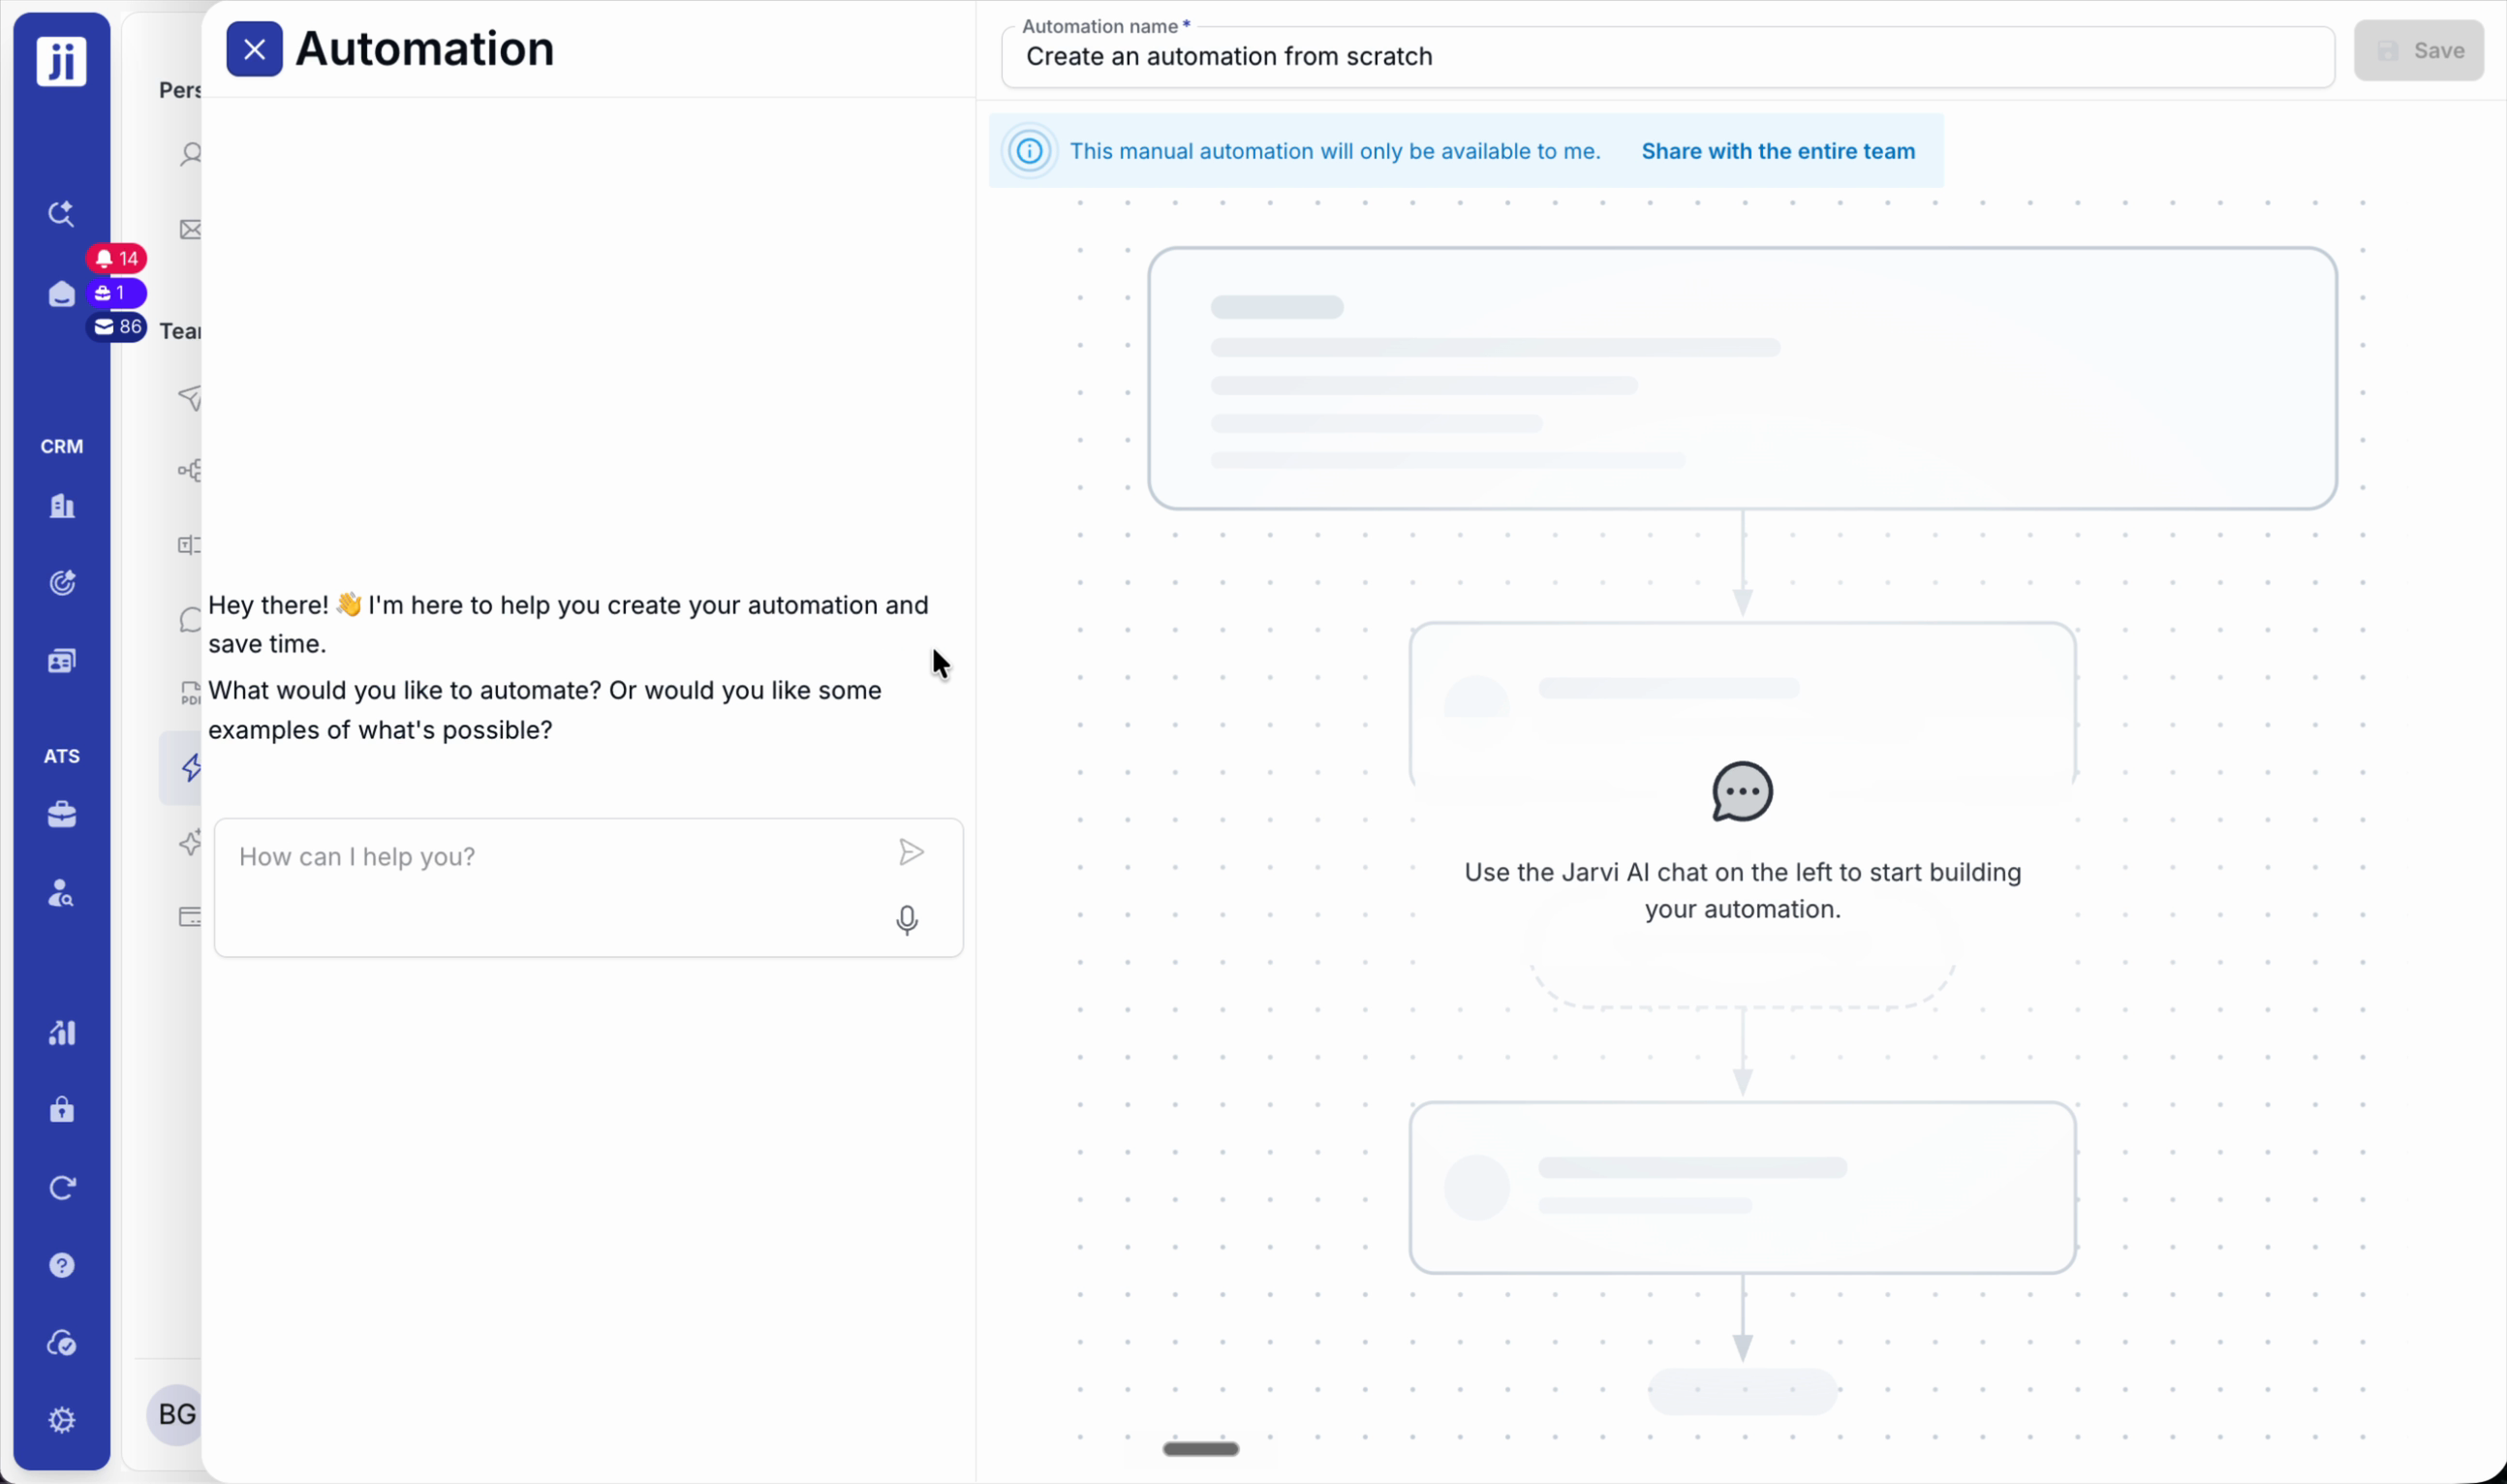
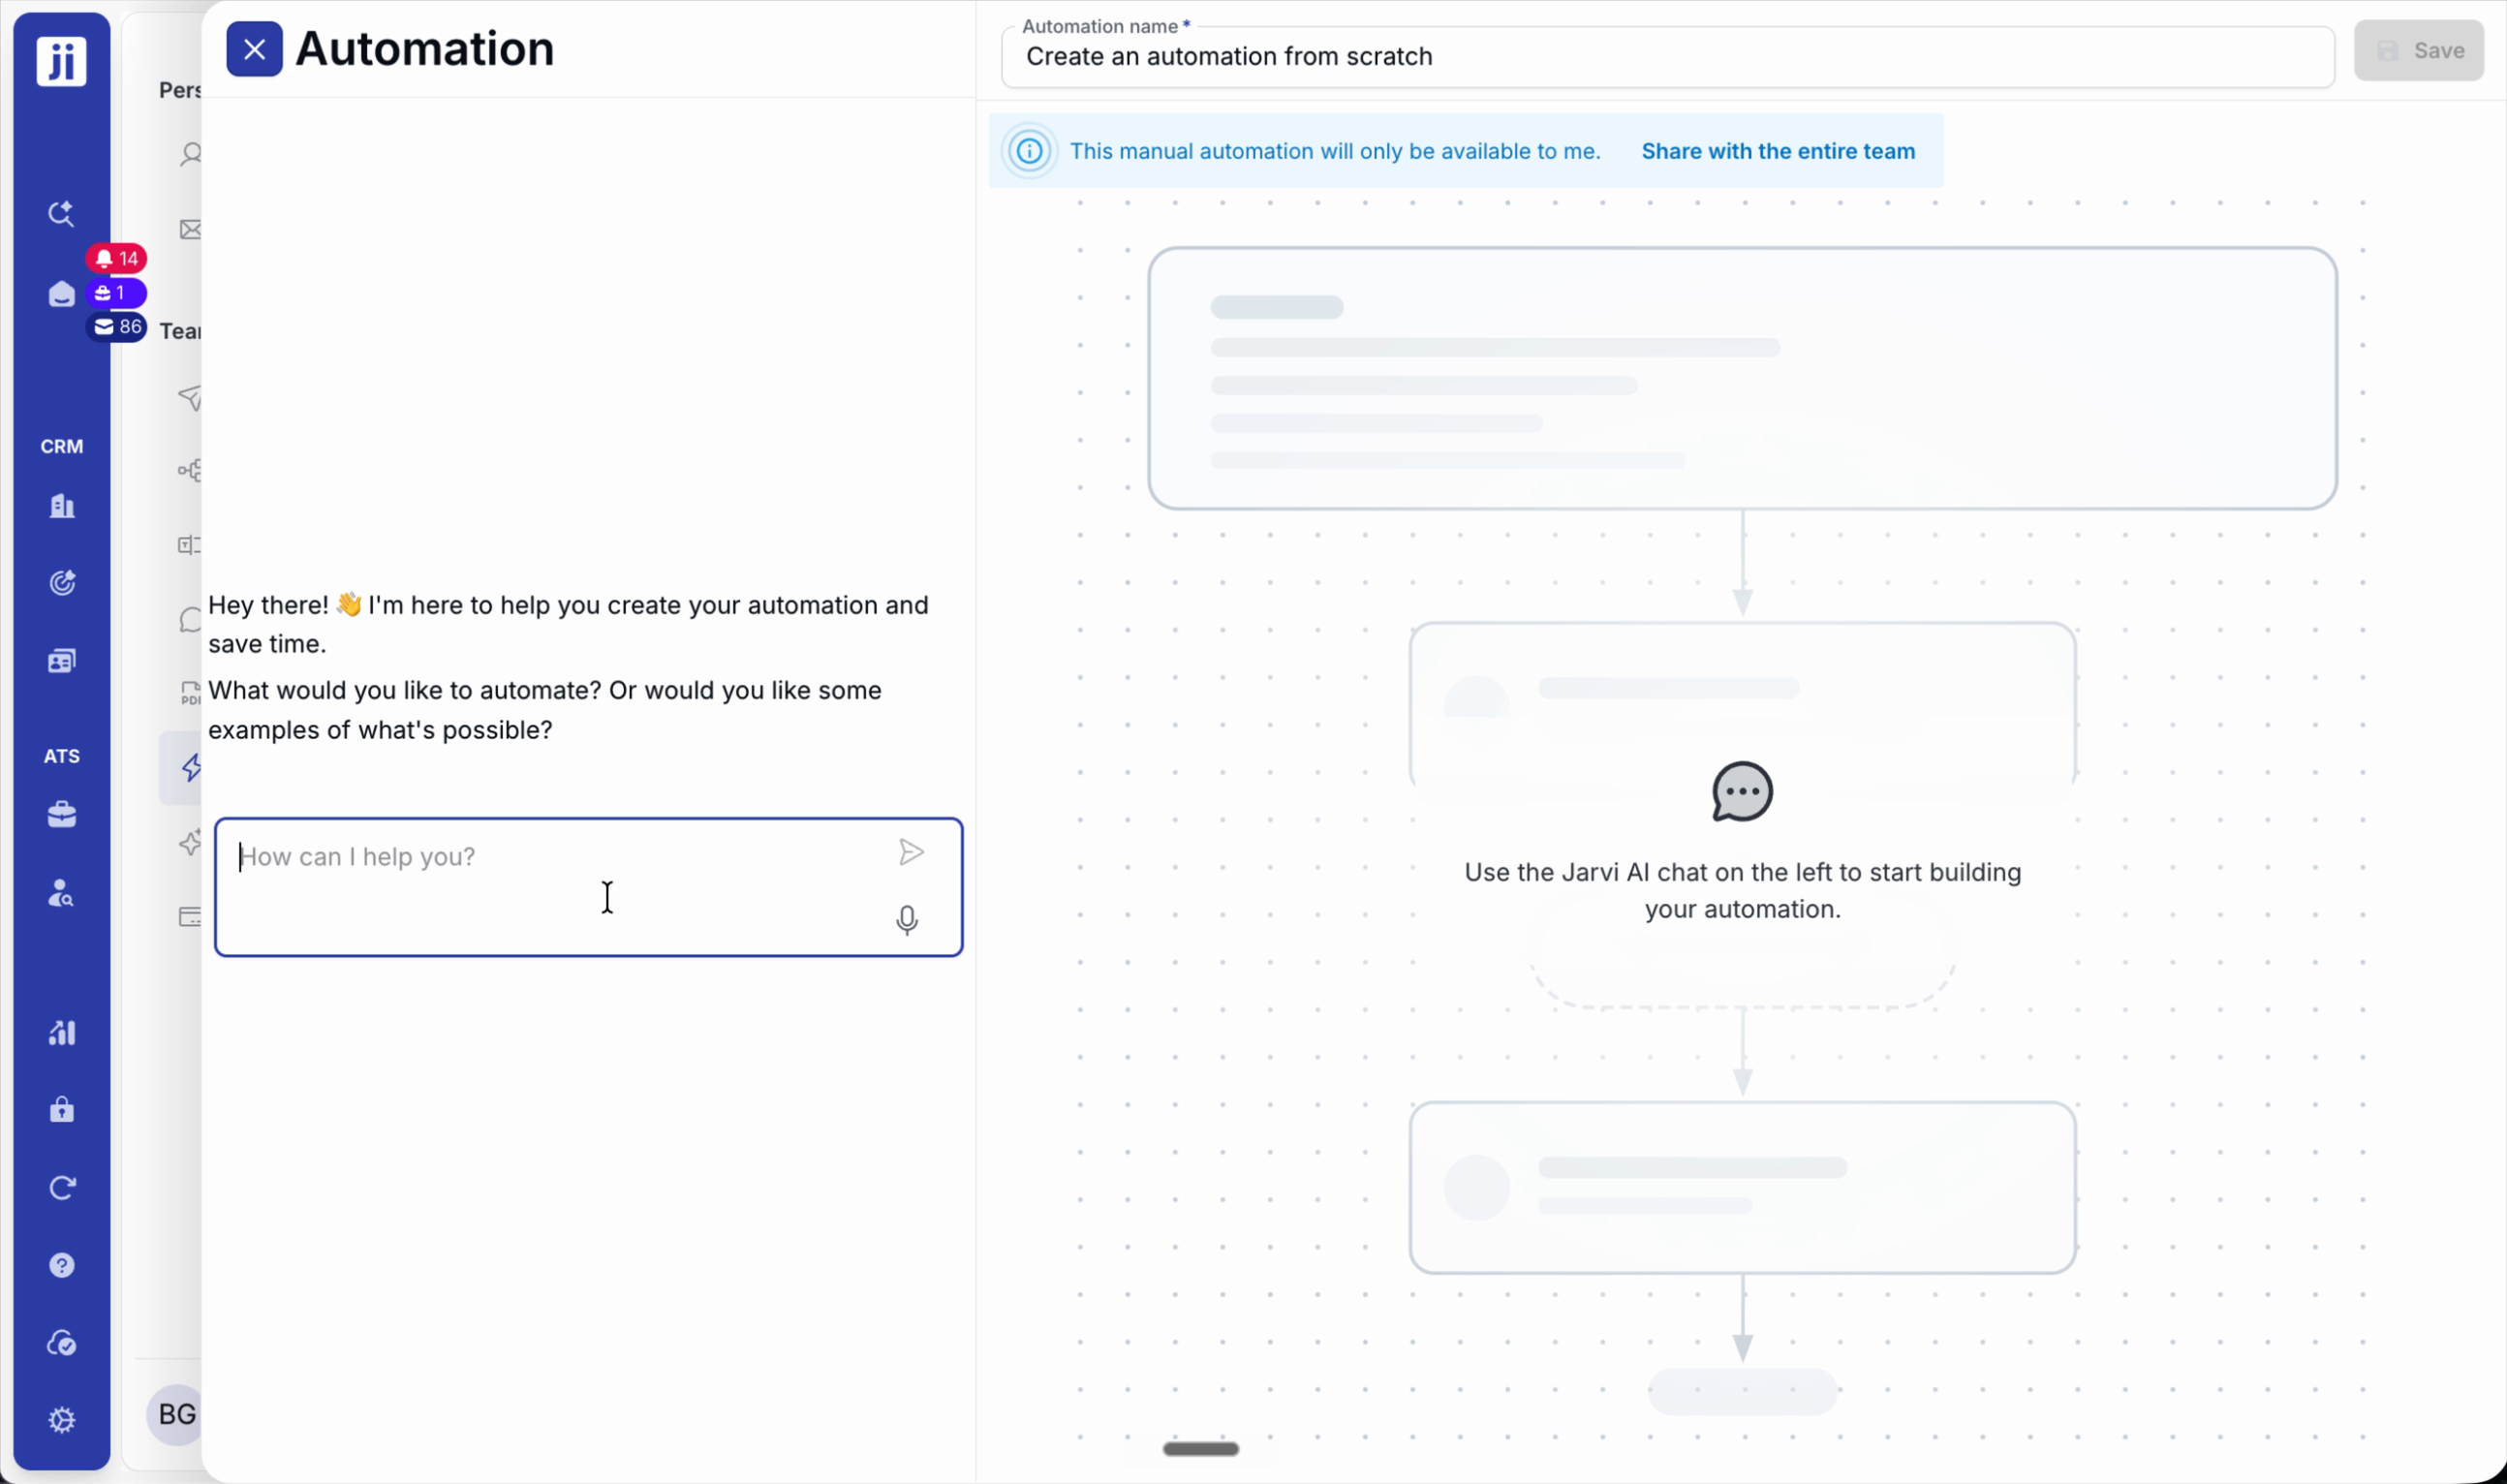
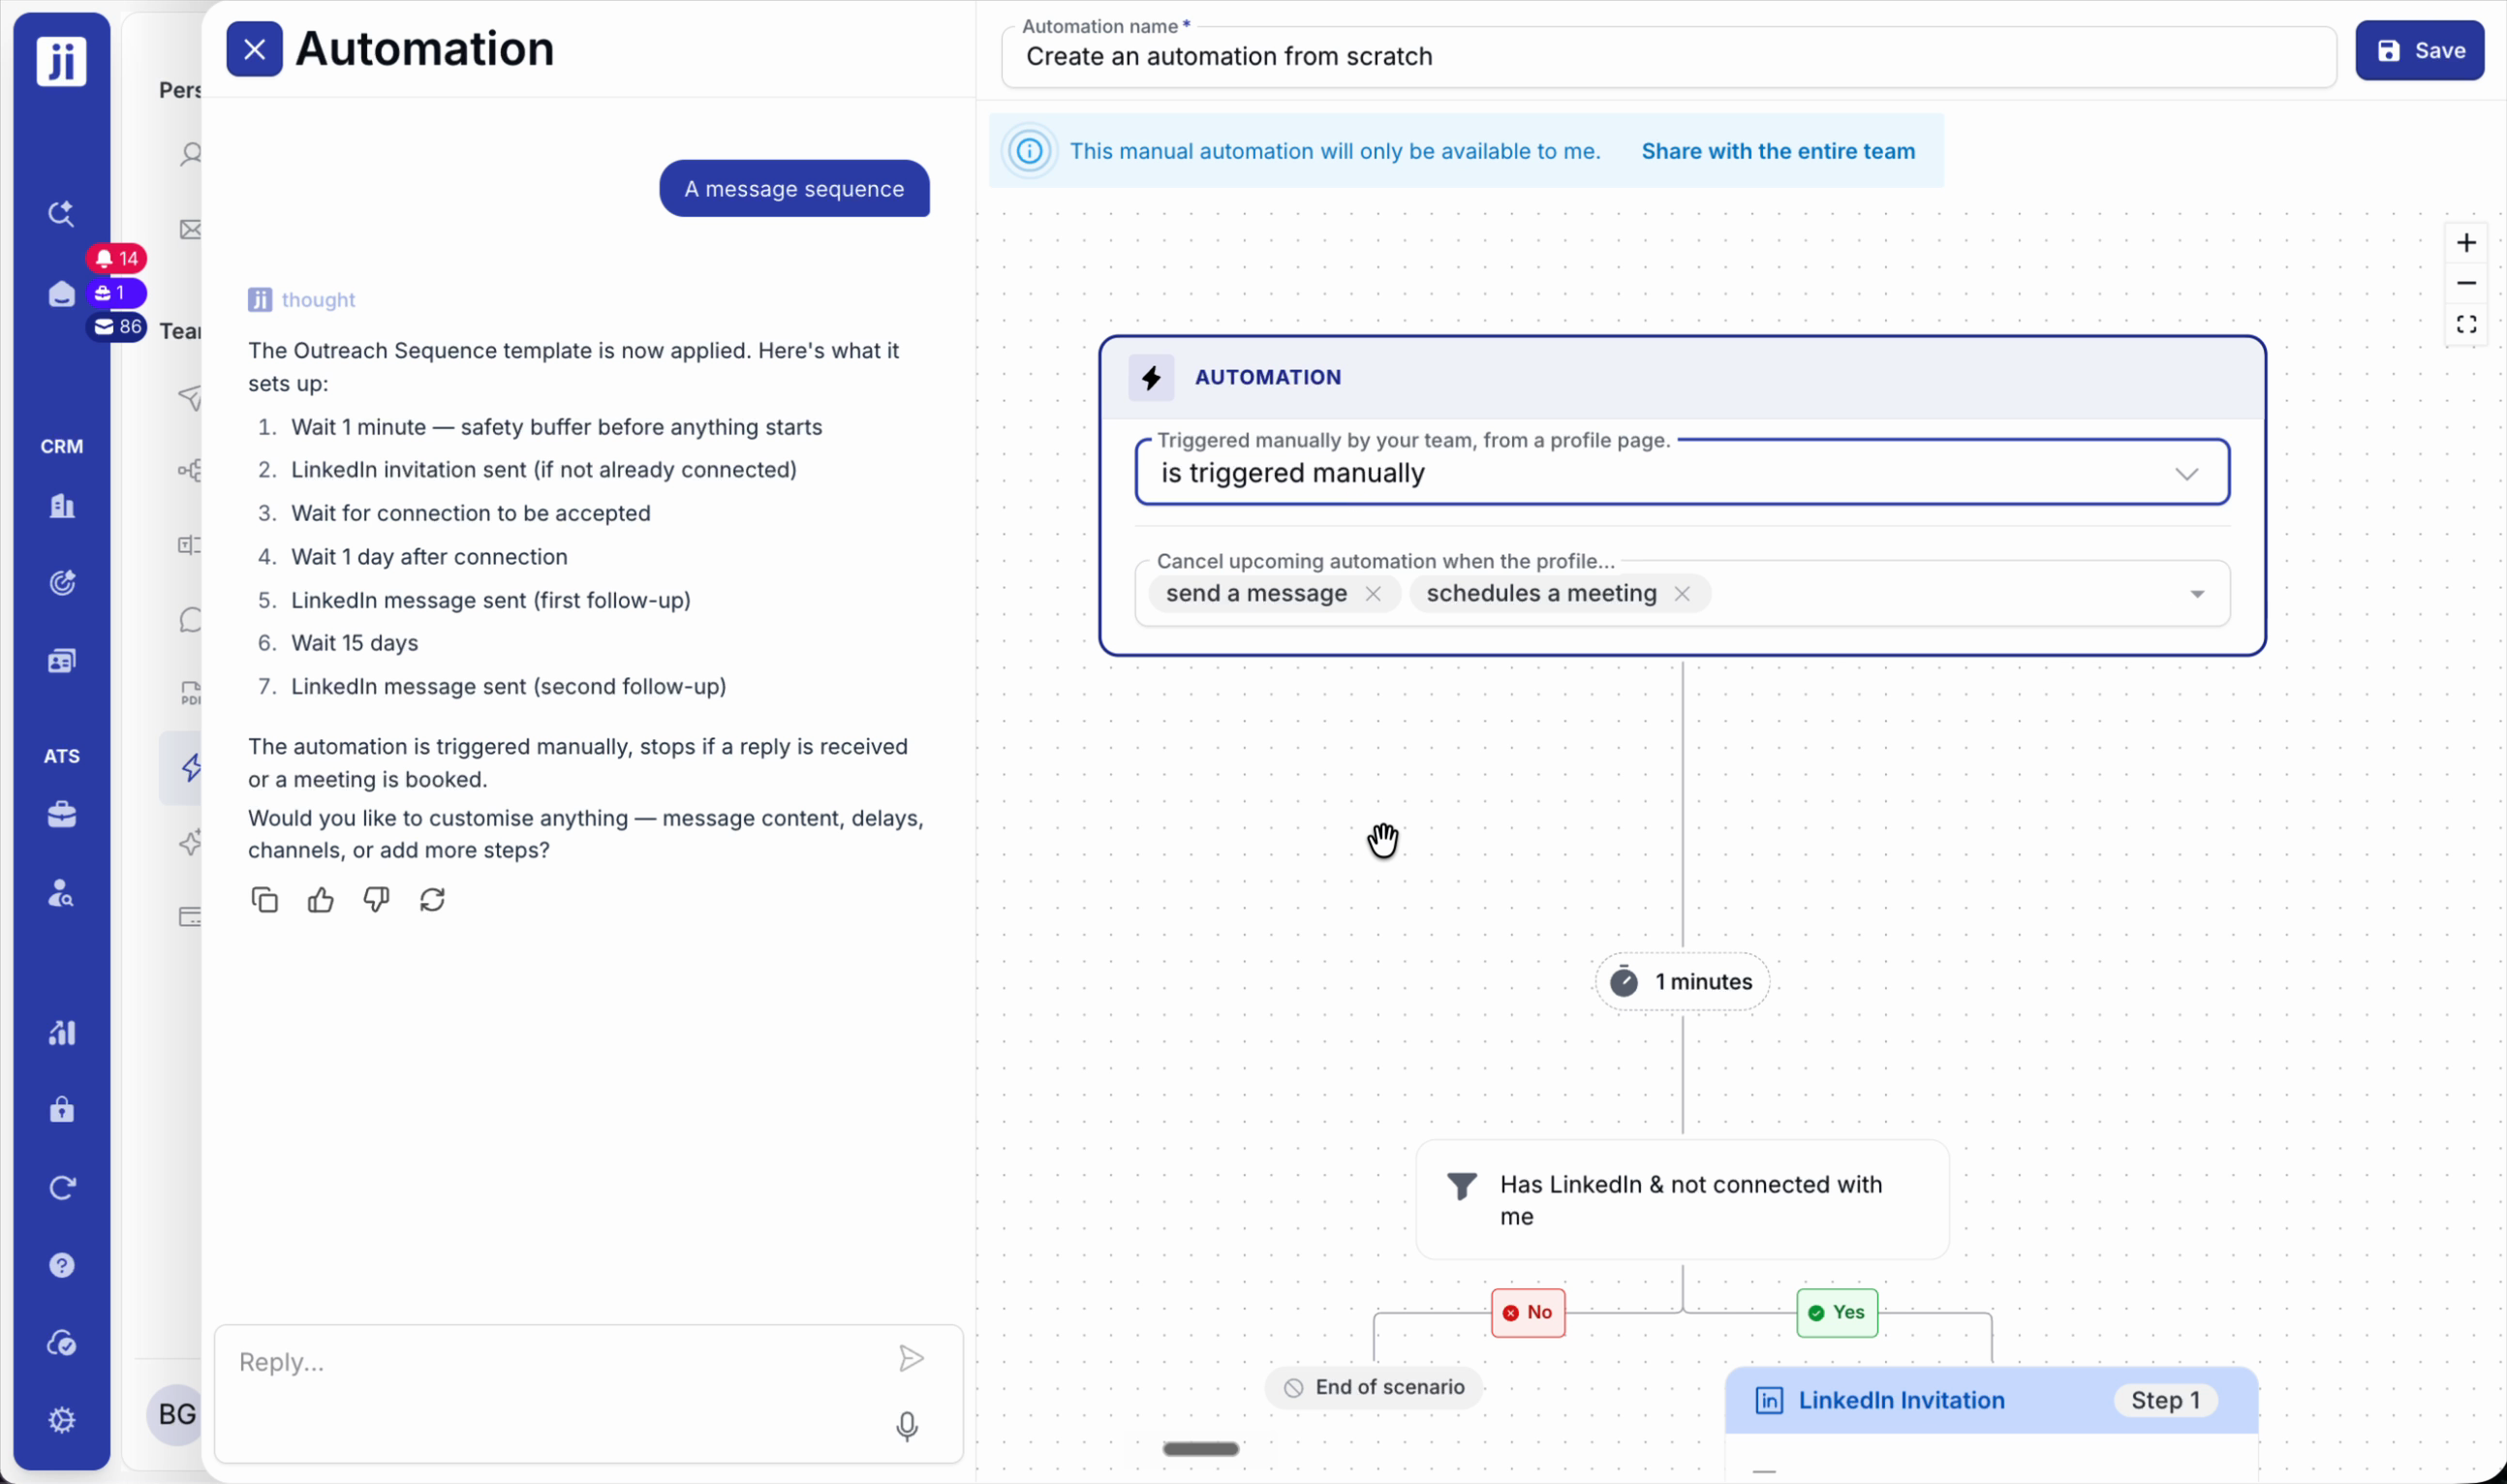
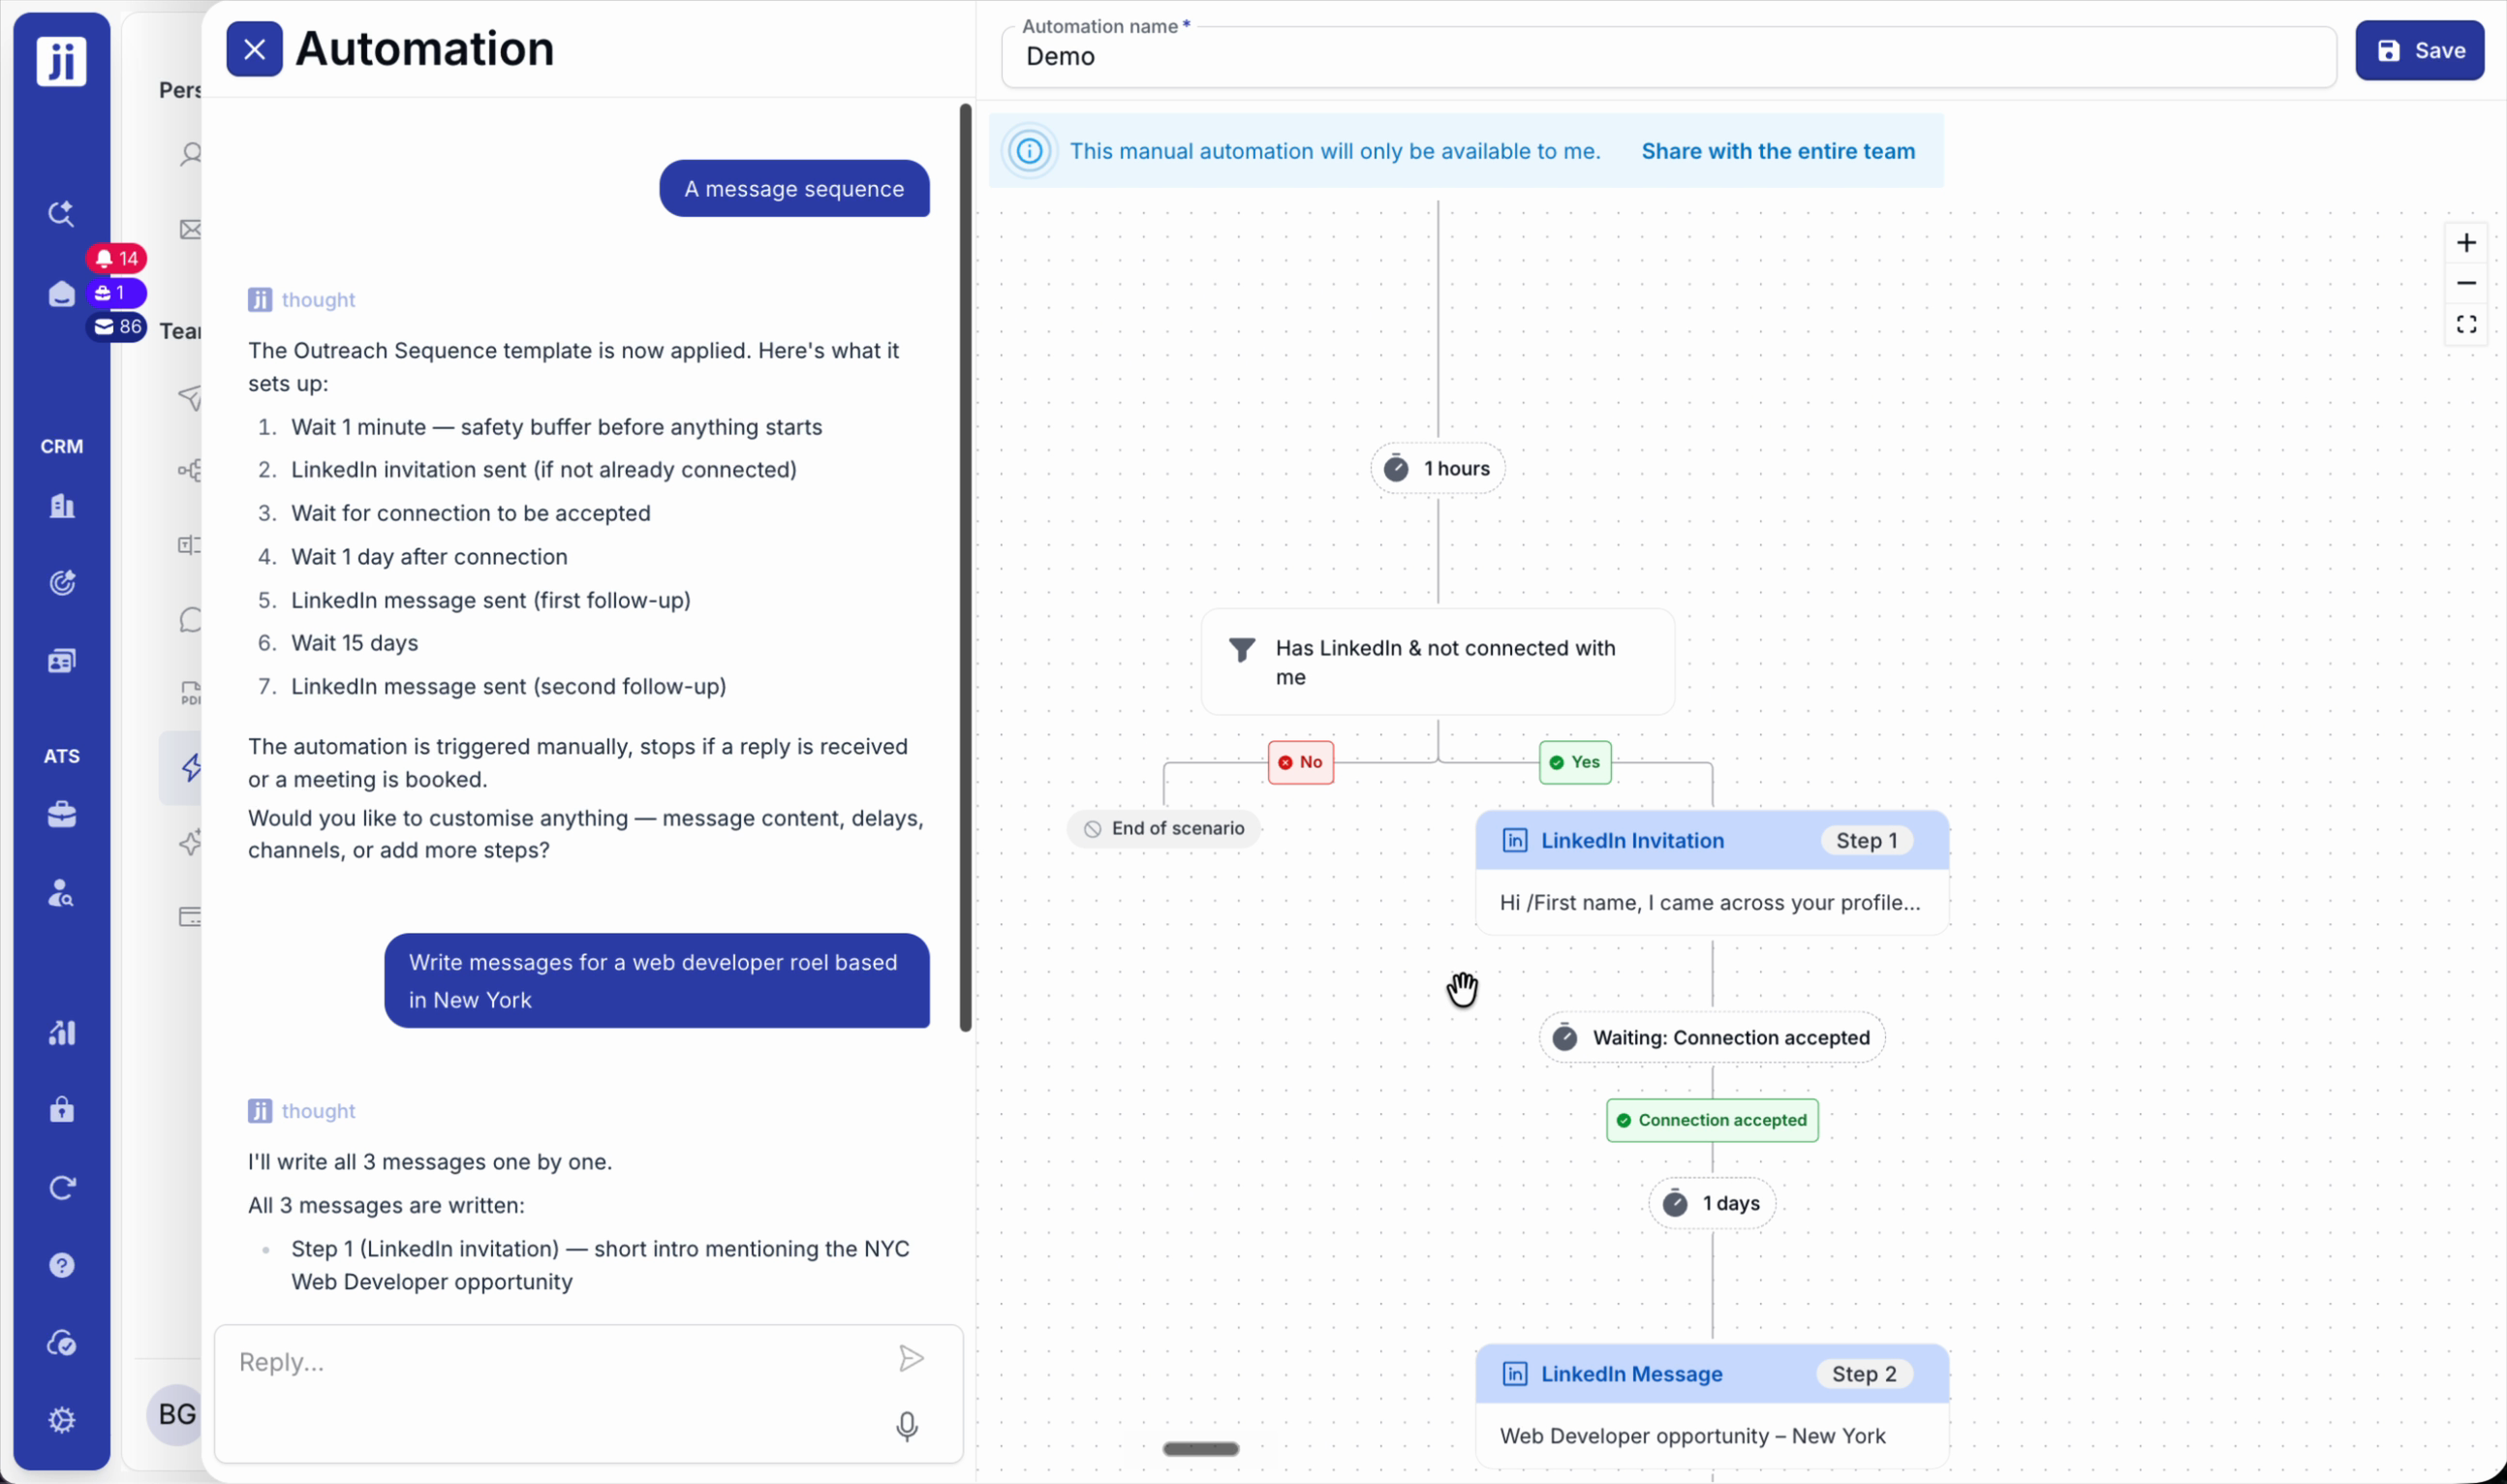
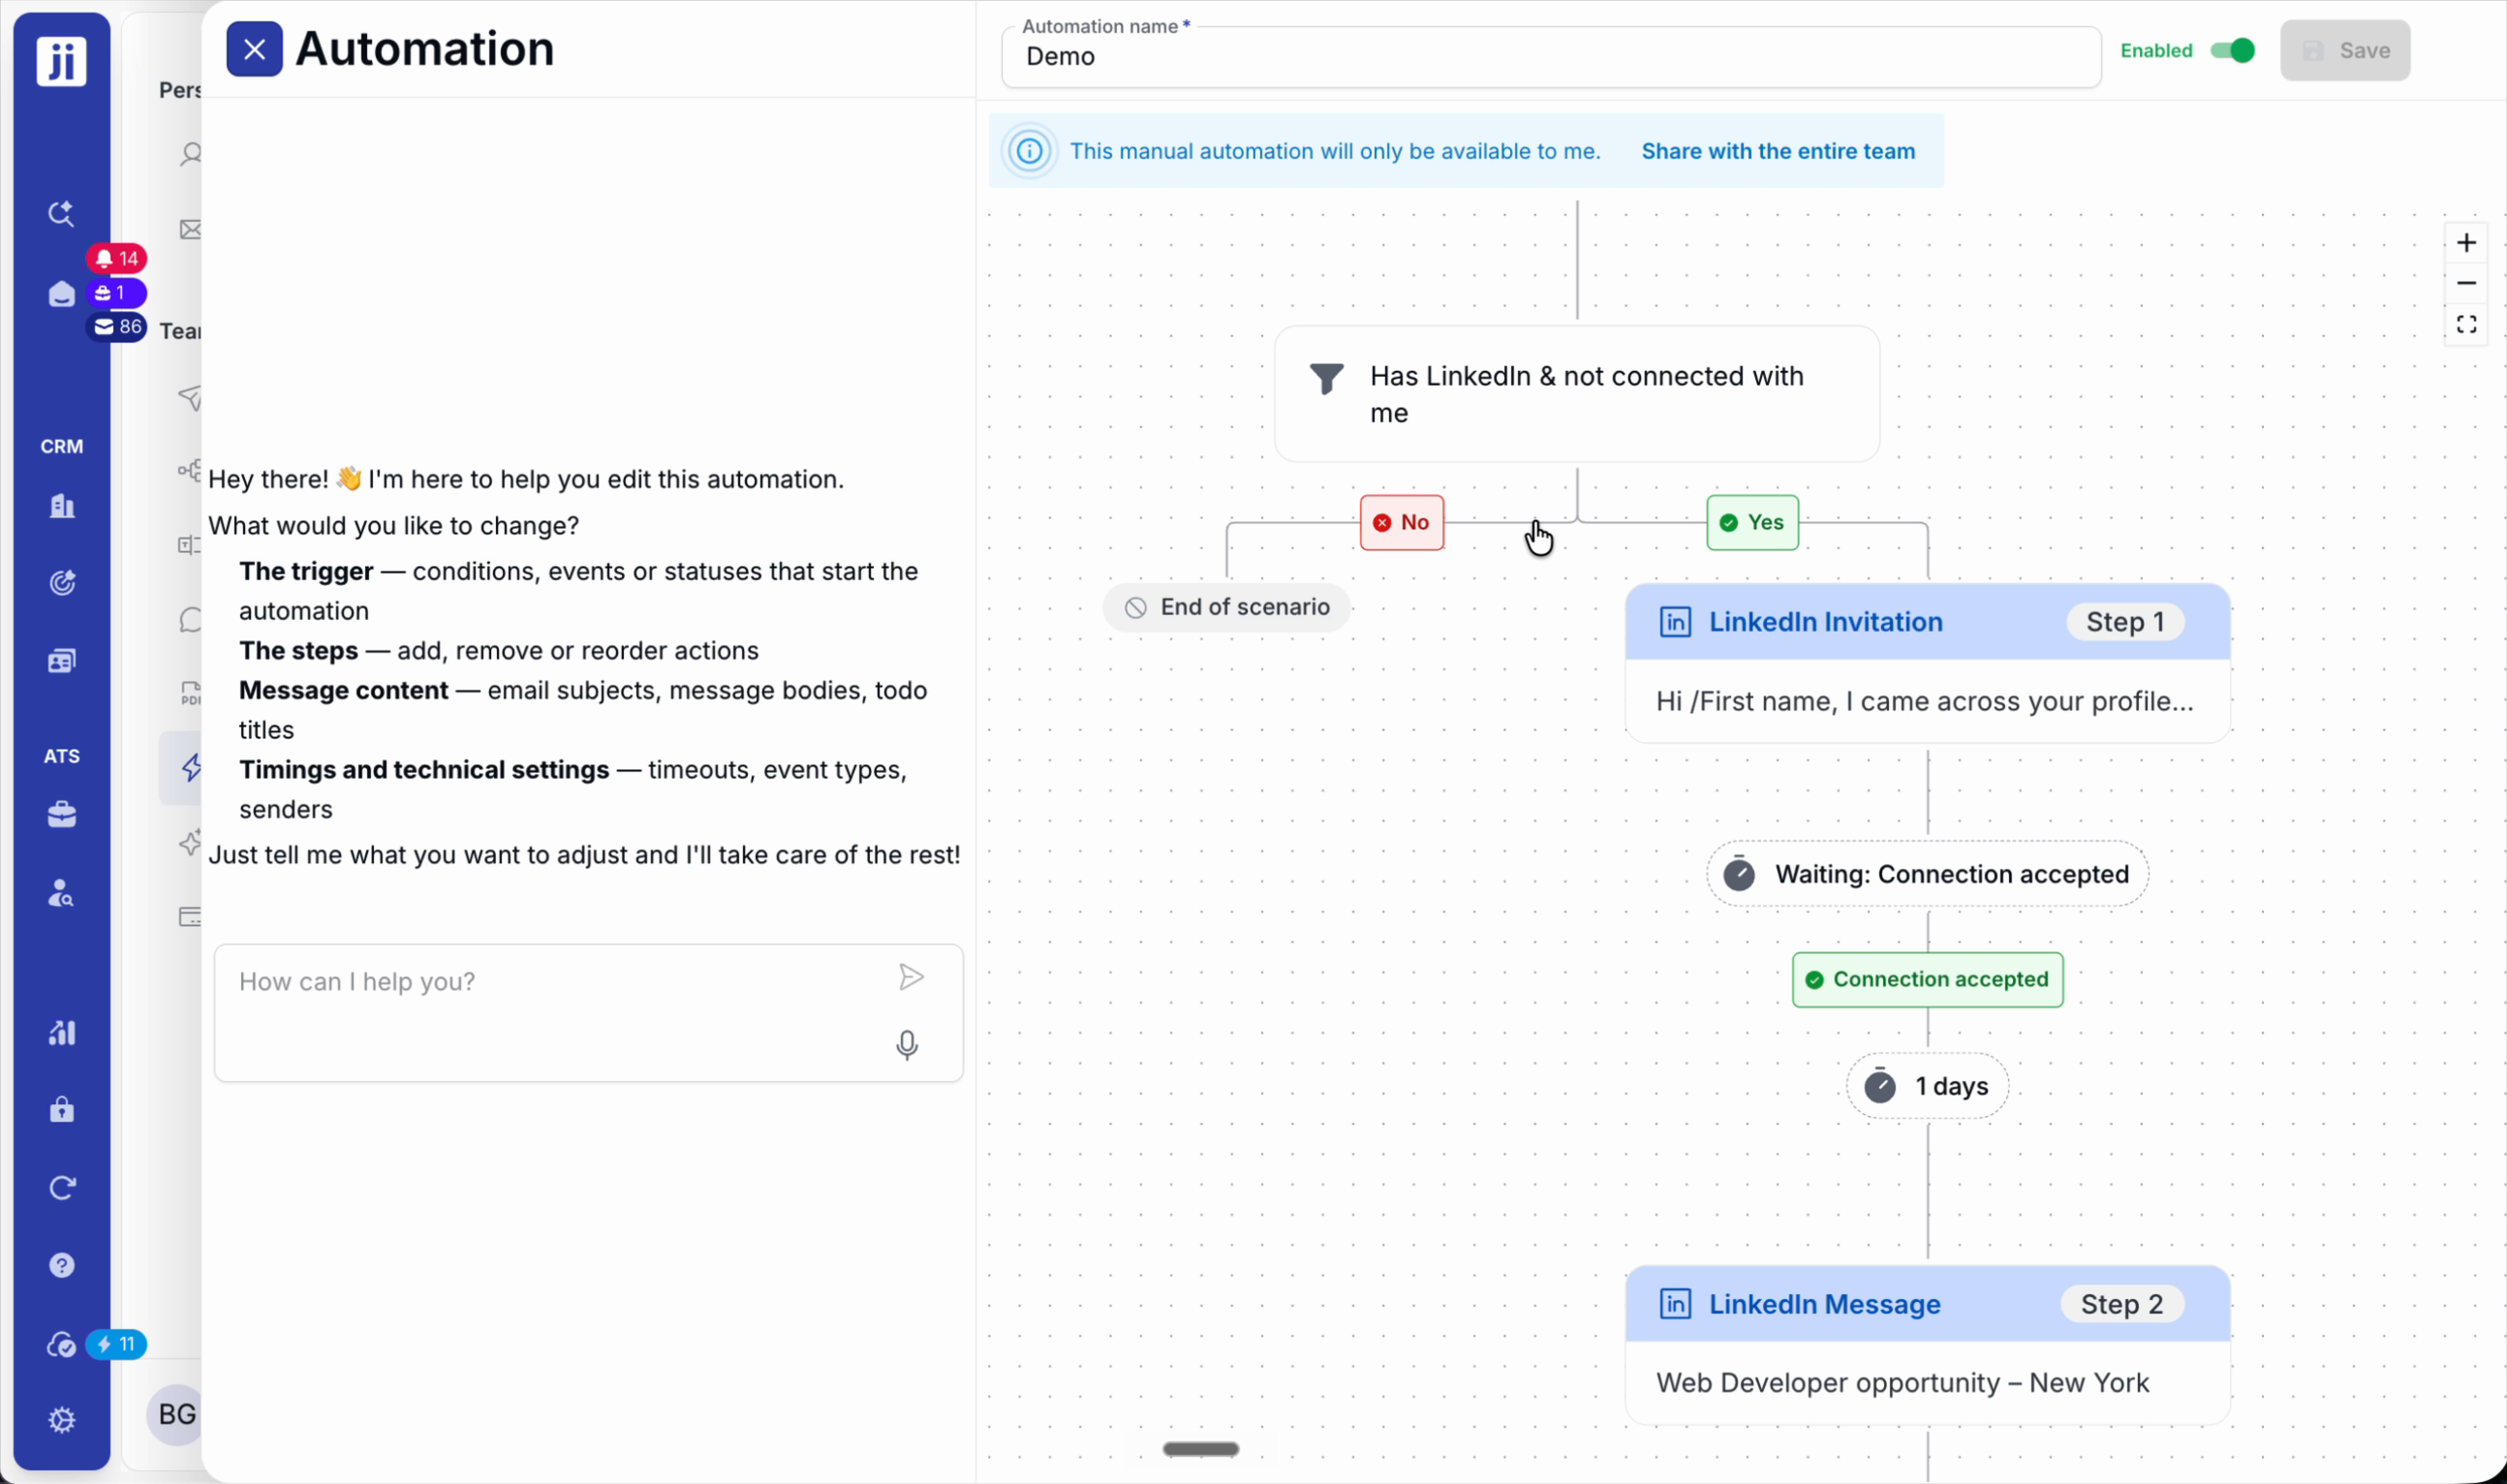
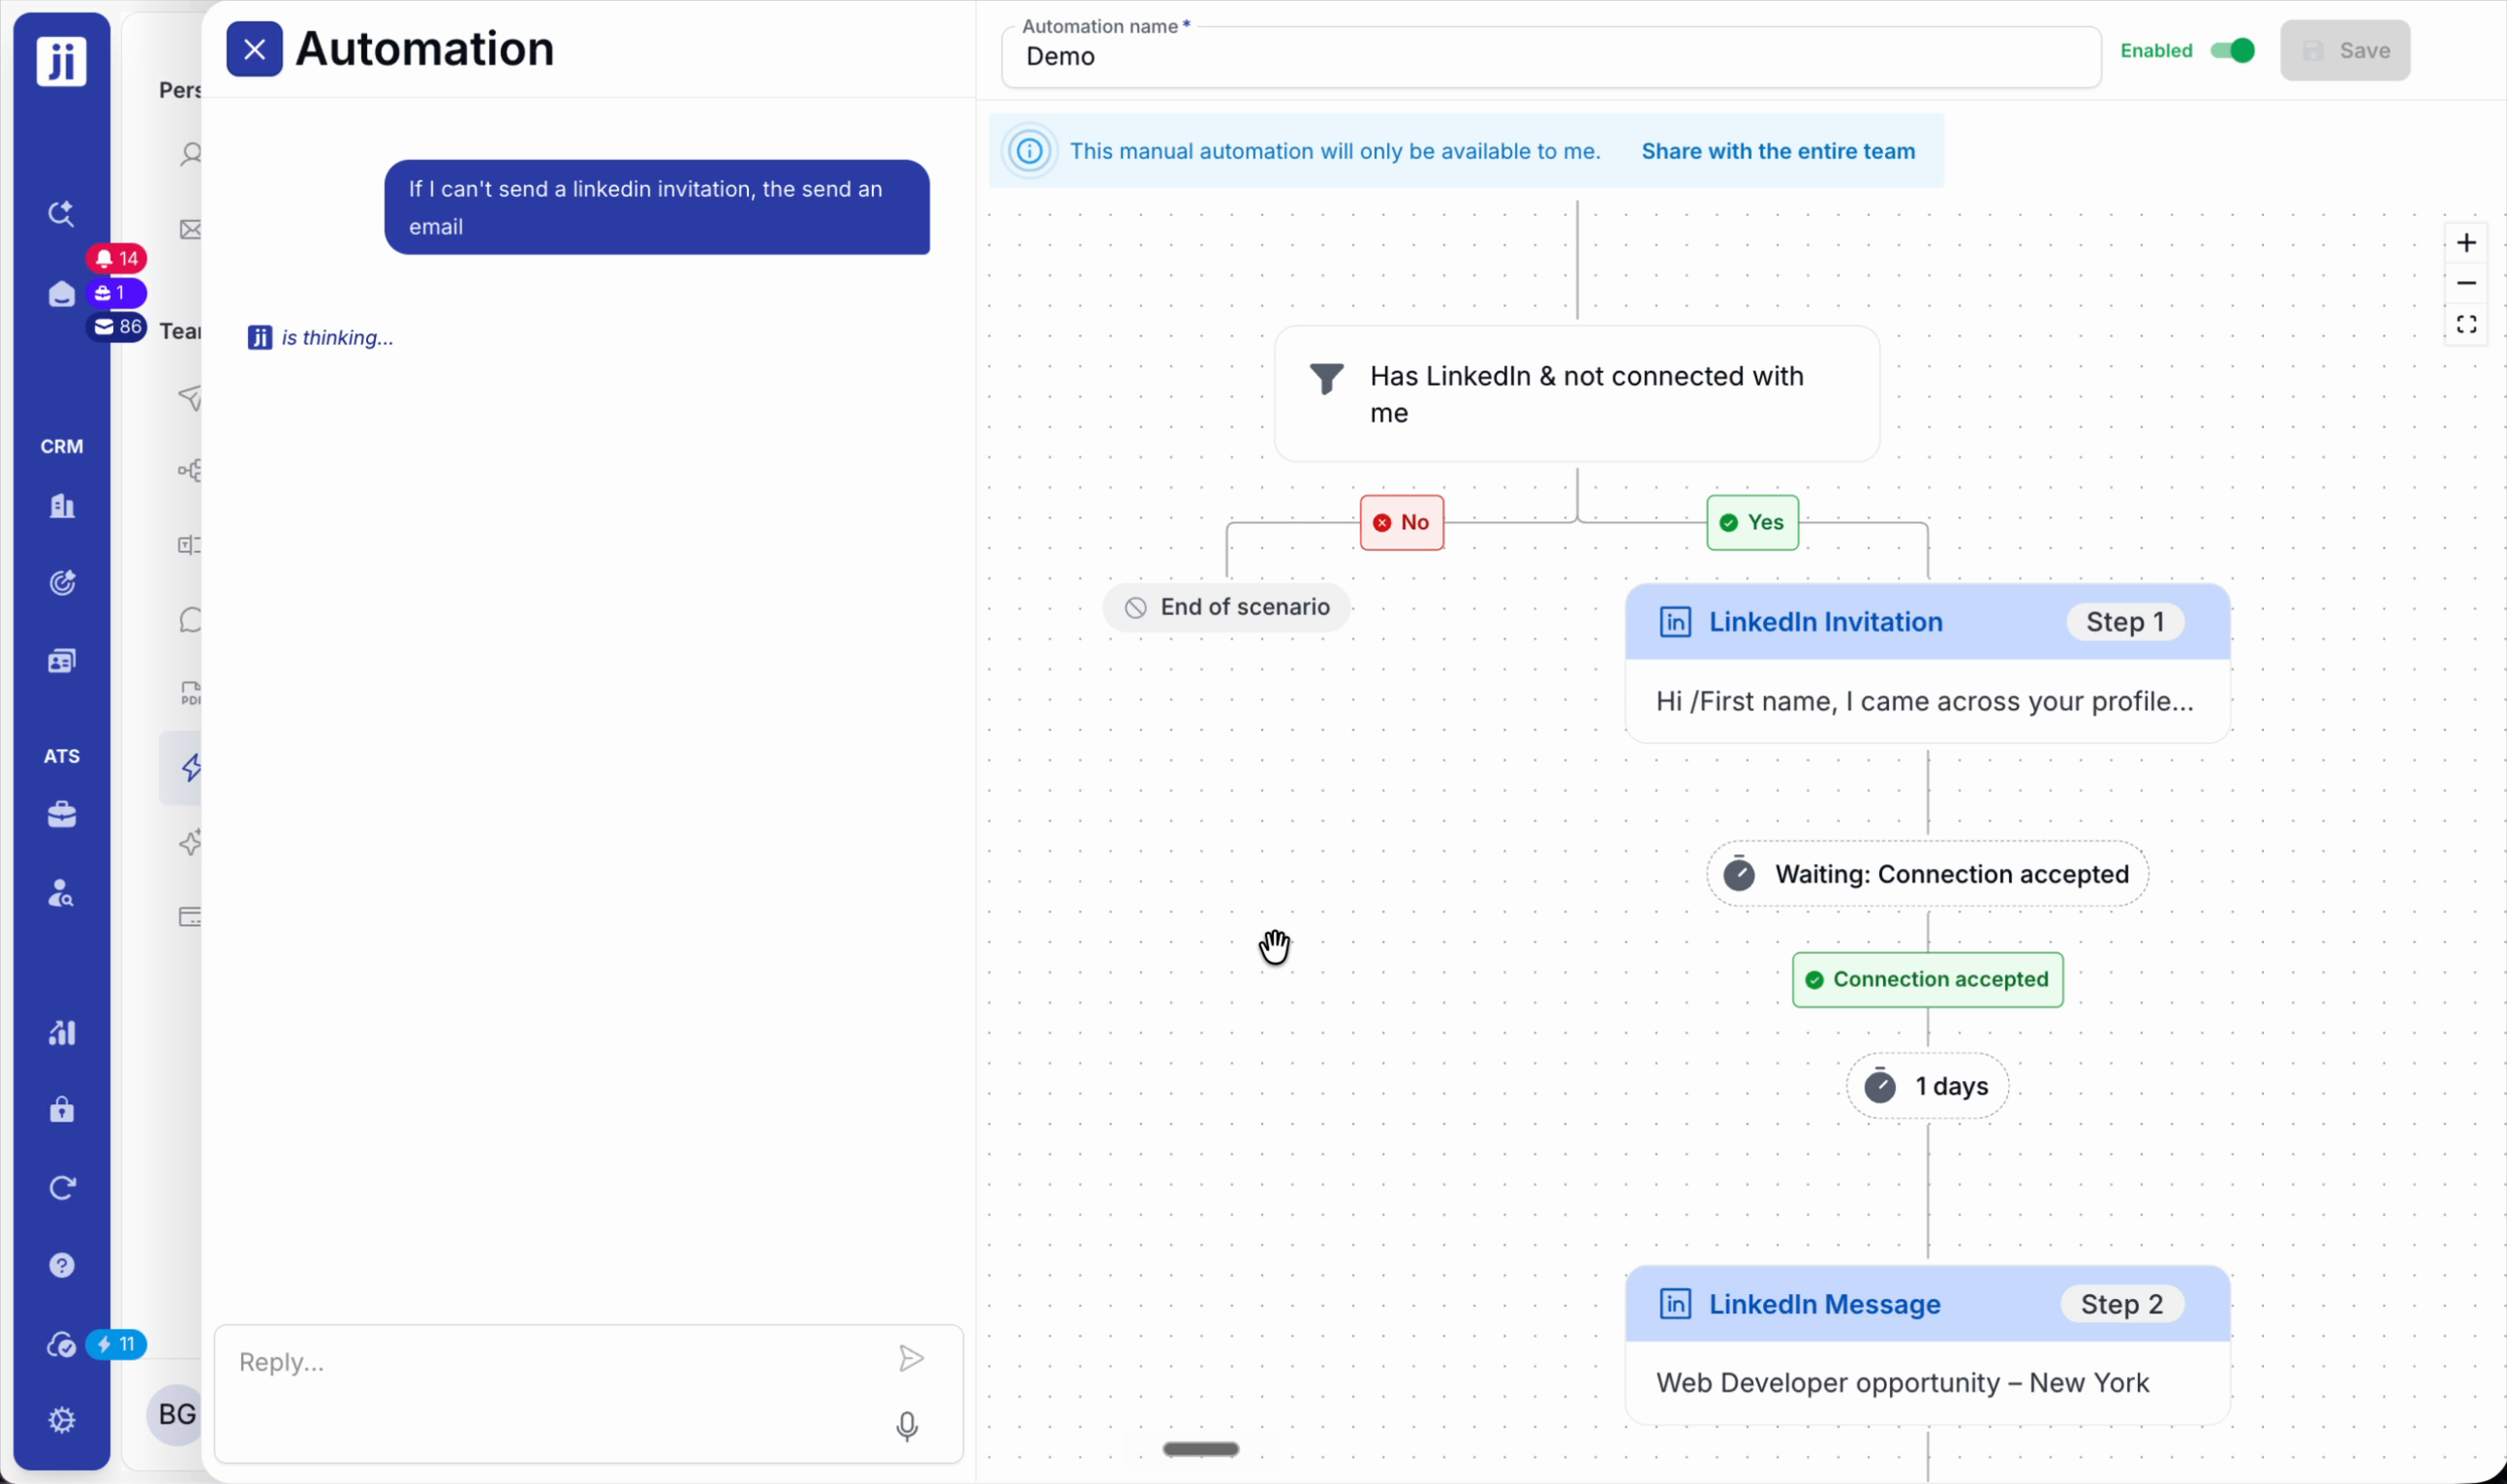
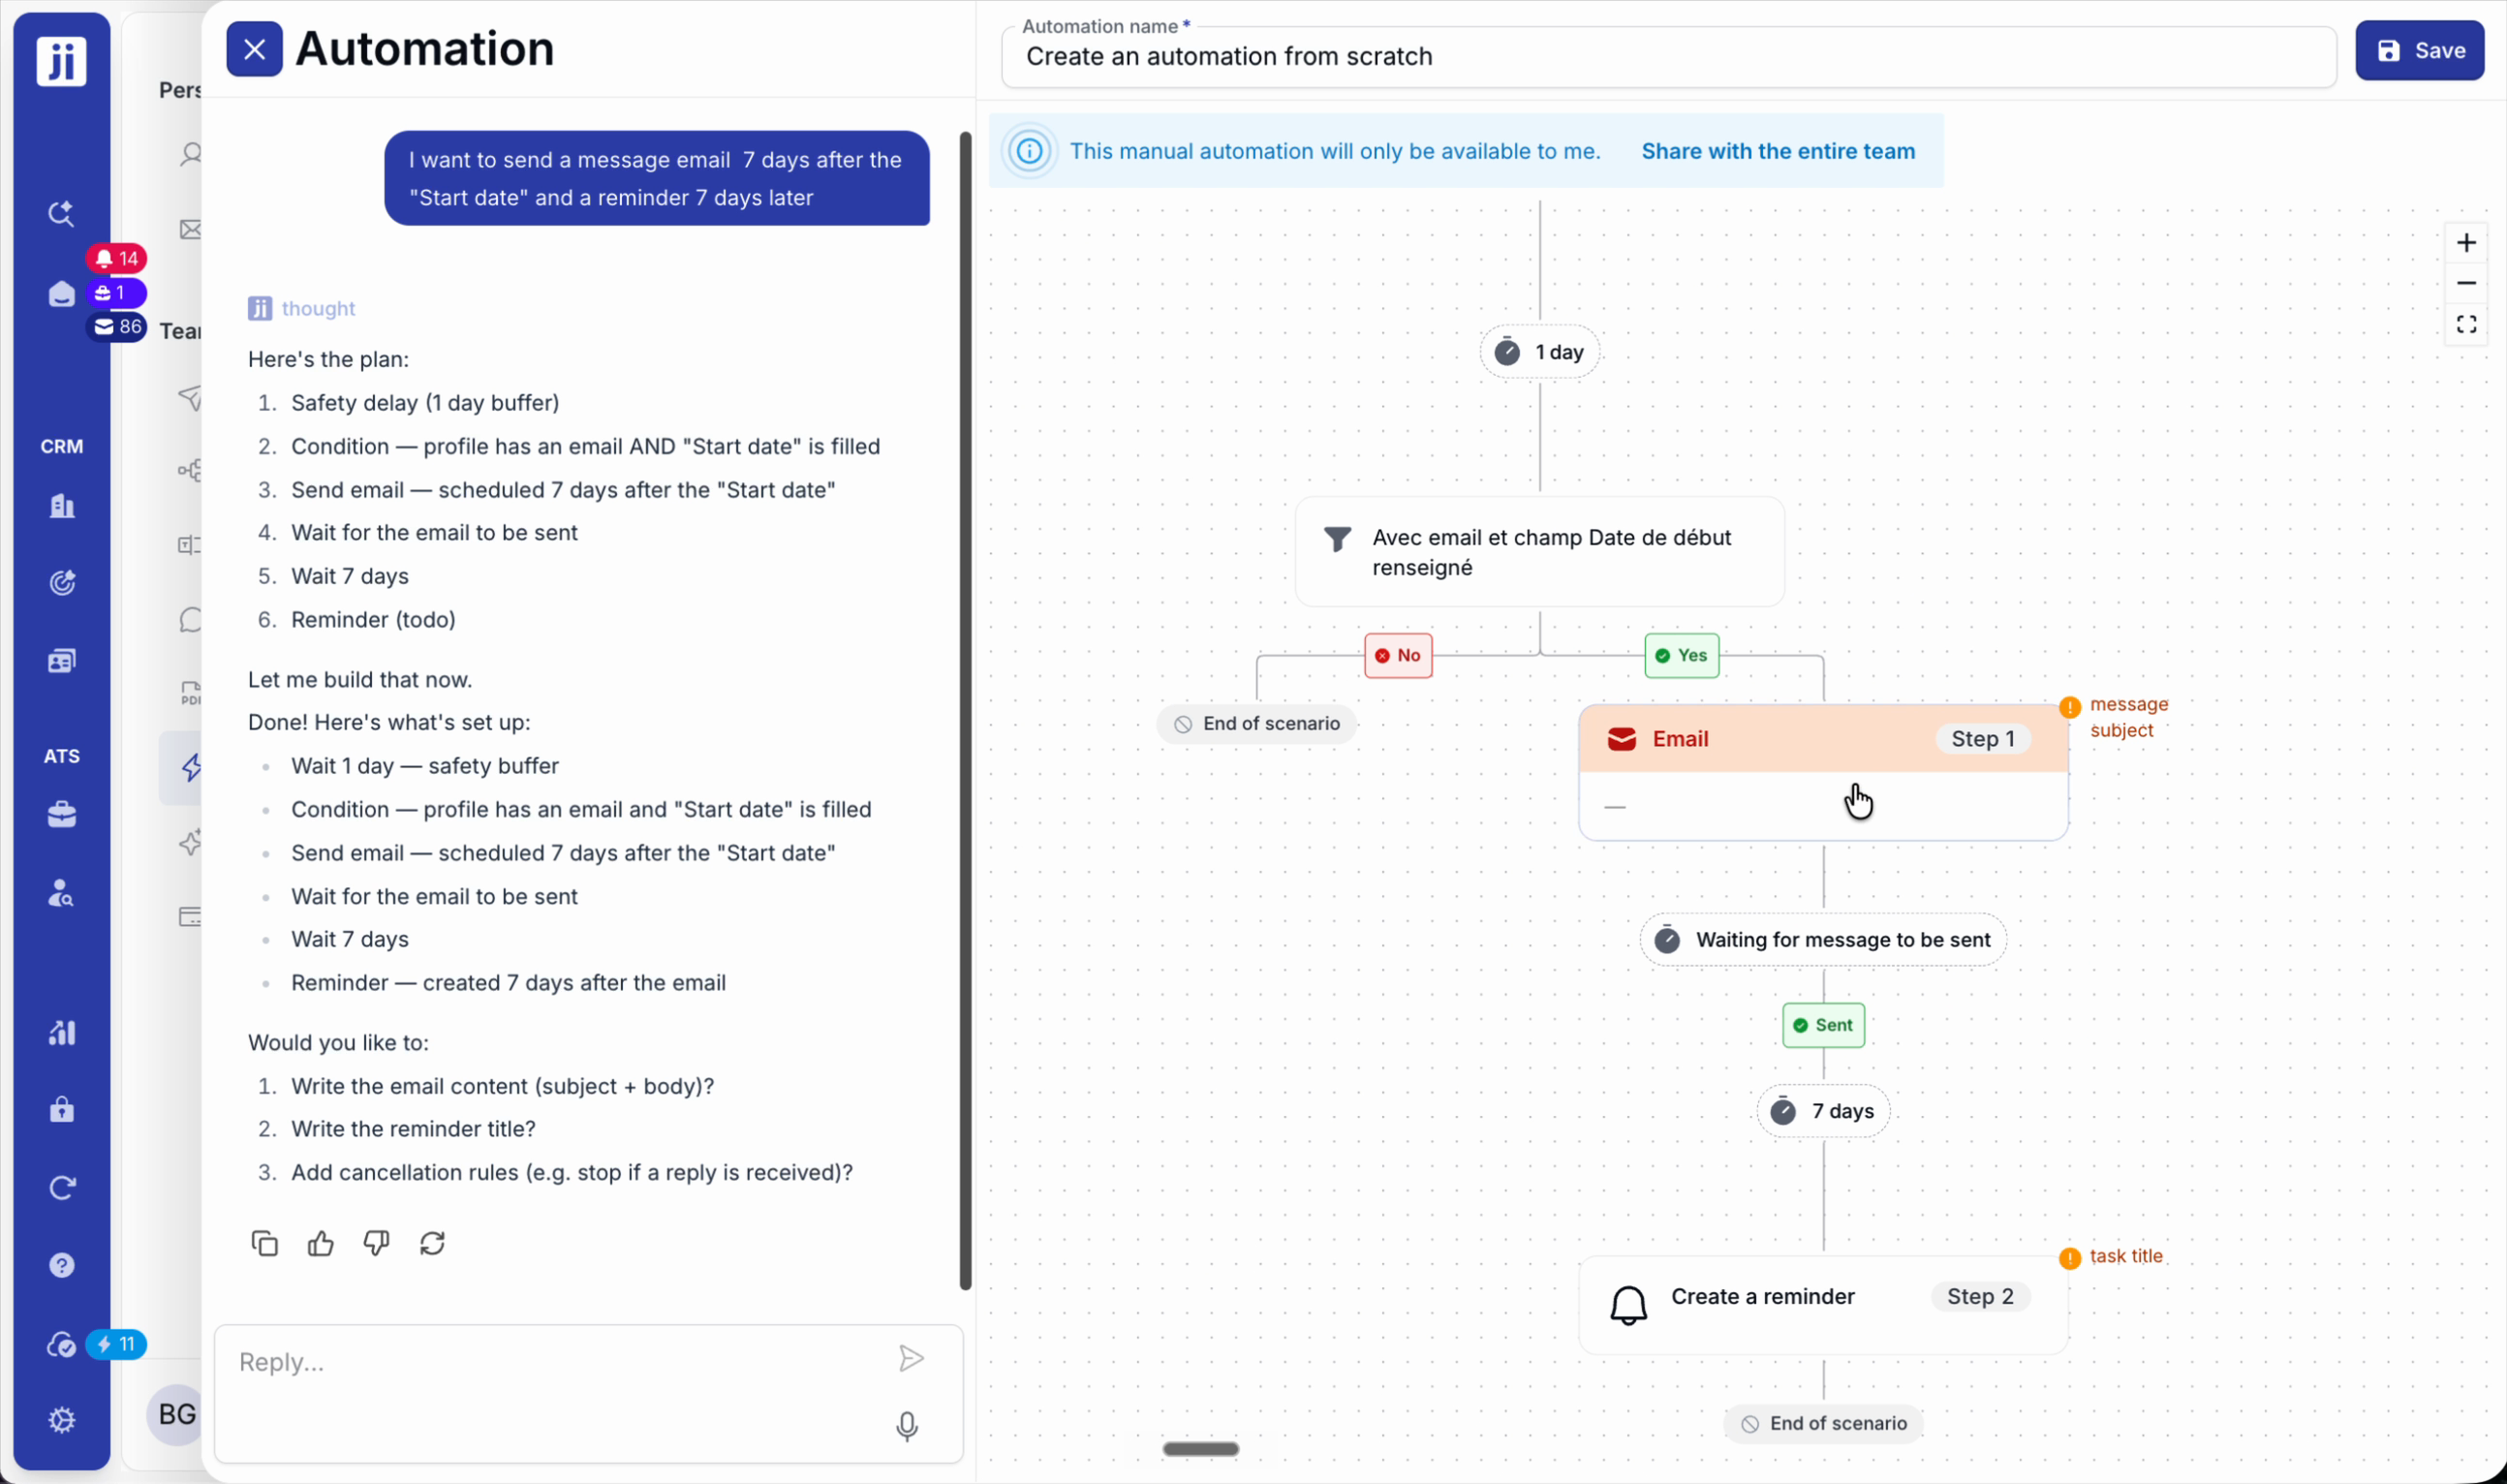
Step 2: On the left, chat with the assistant to describe your need (e.g. a message sequence). The right column displays the generated sequence.
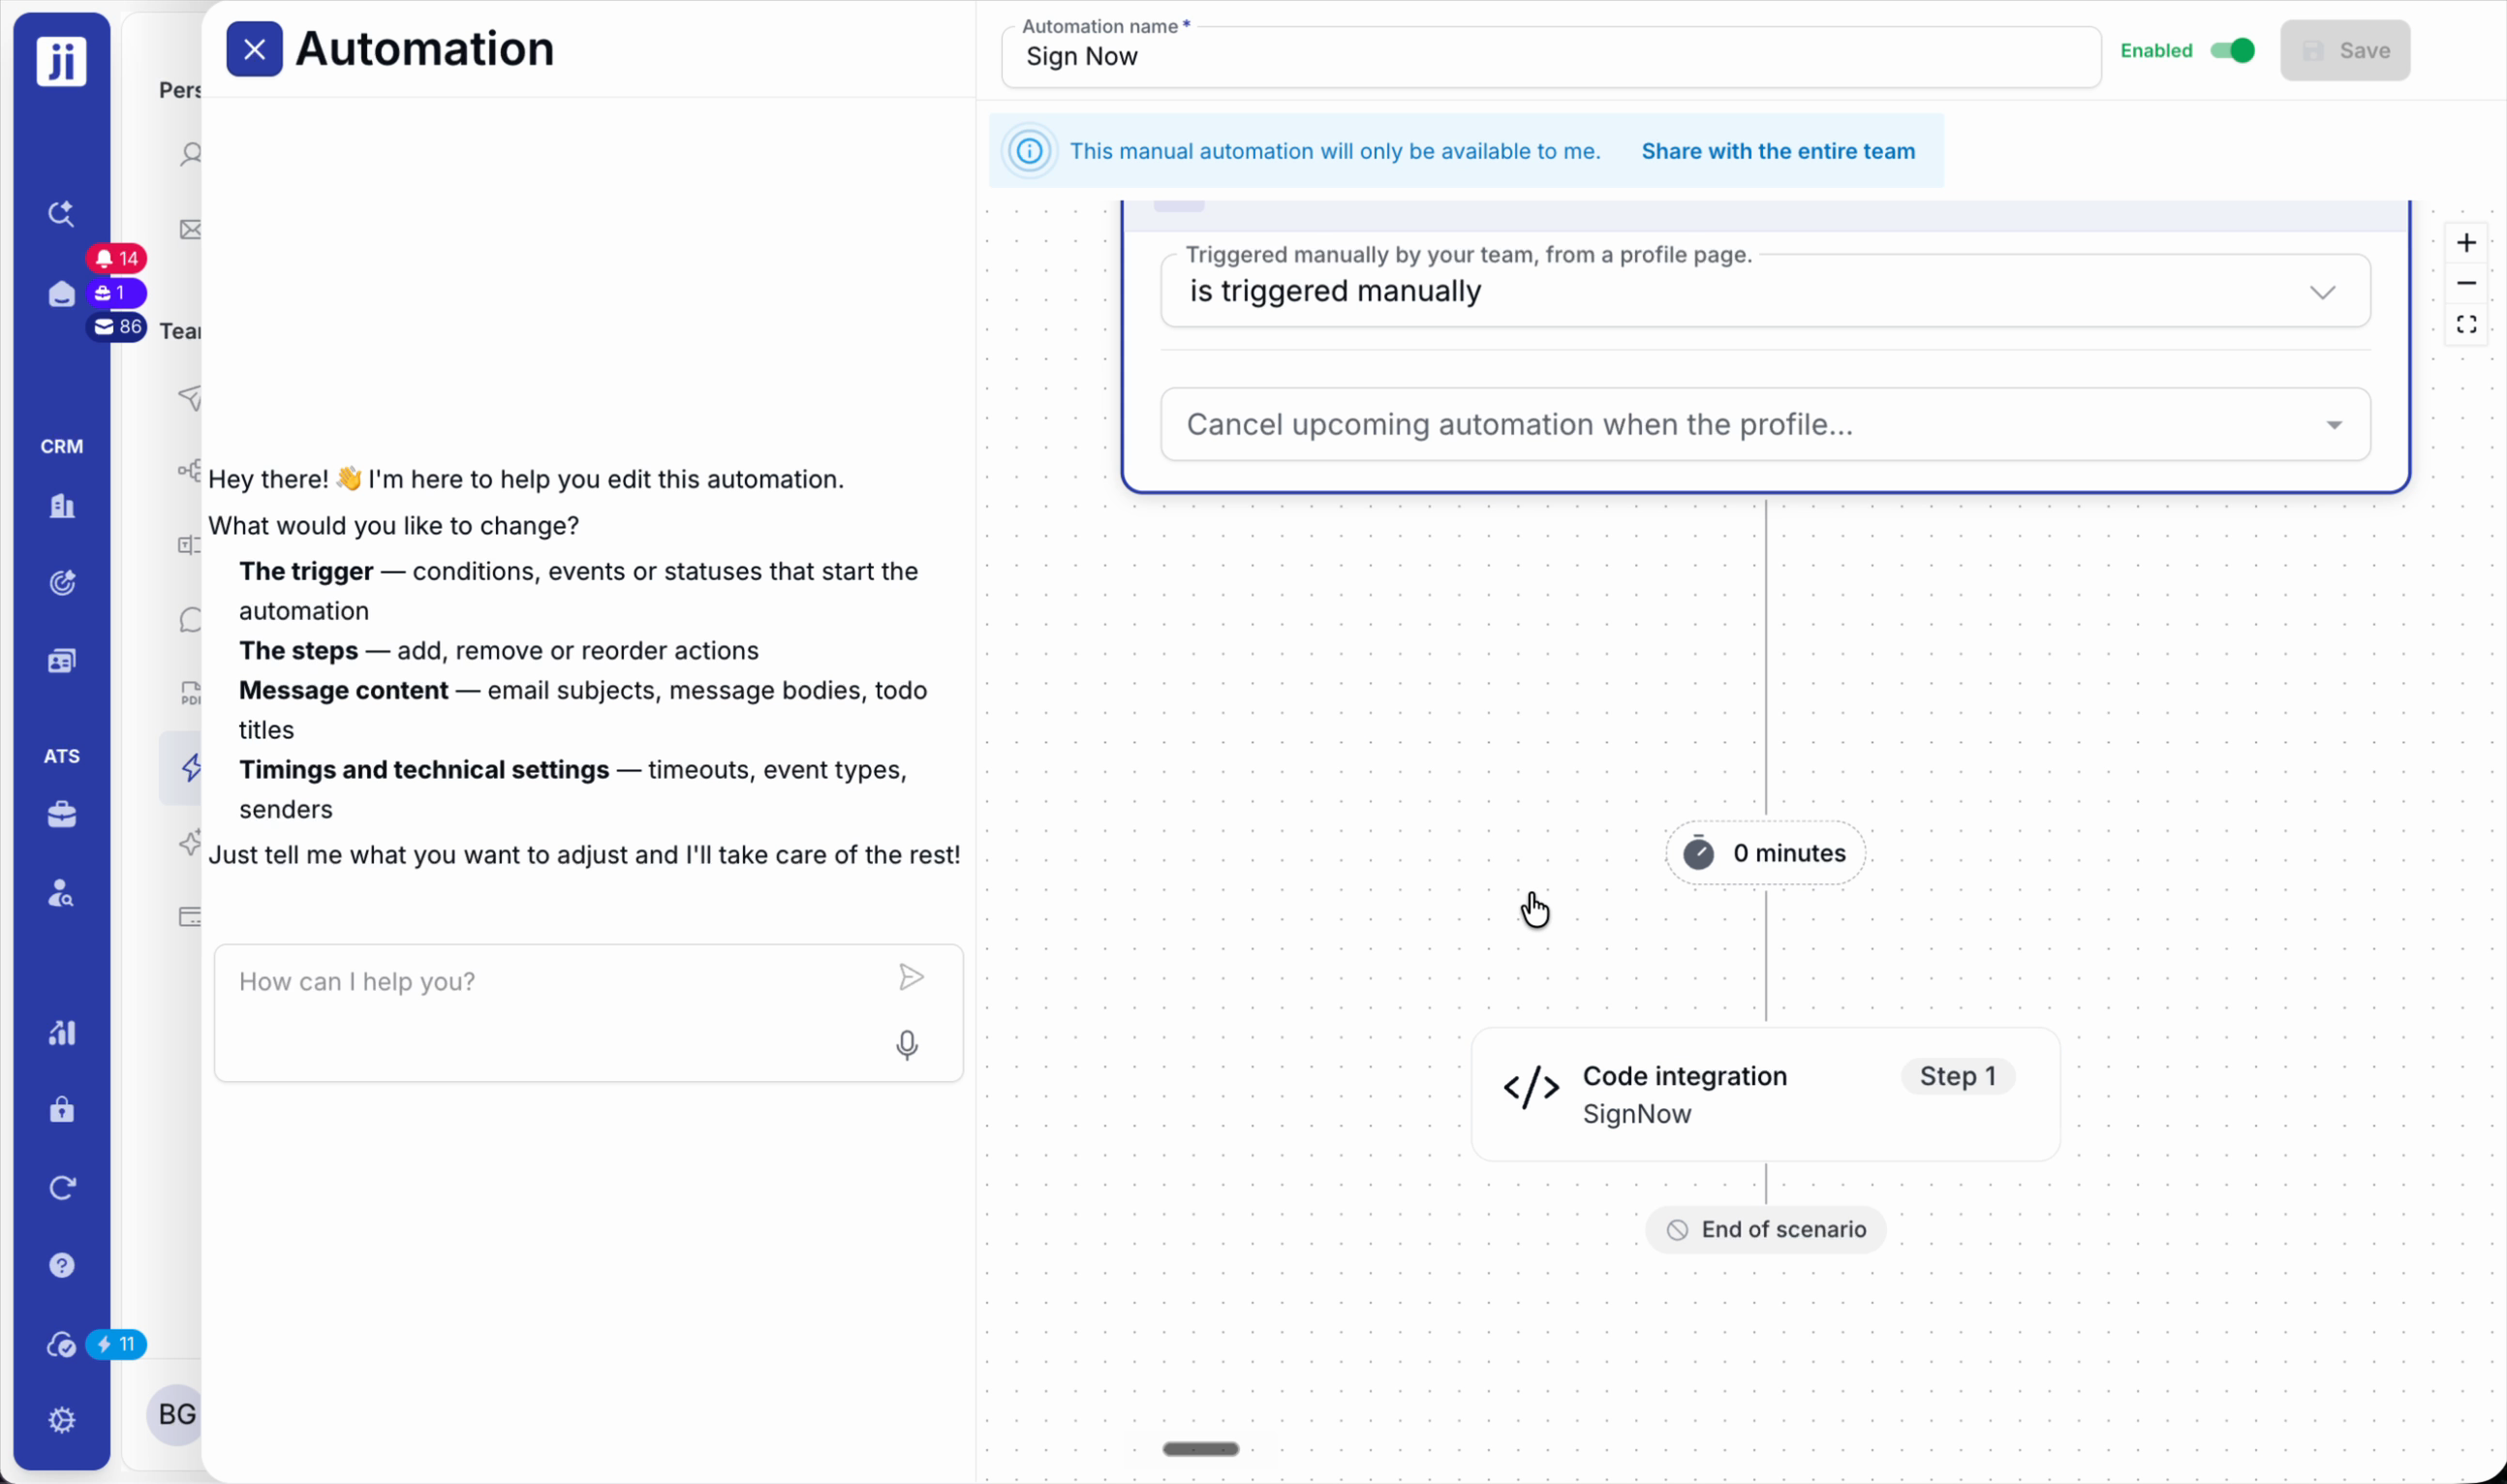
Step 3: Select a trigger mode. To get started quickly, choose Manual trigger and then select the list of profiles to contact.
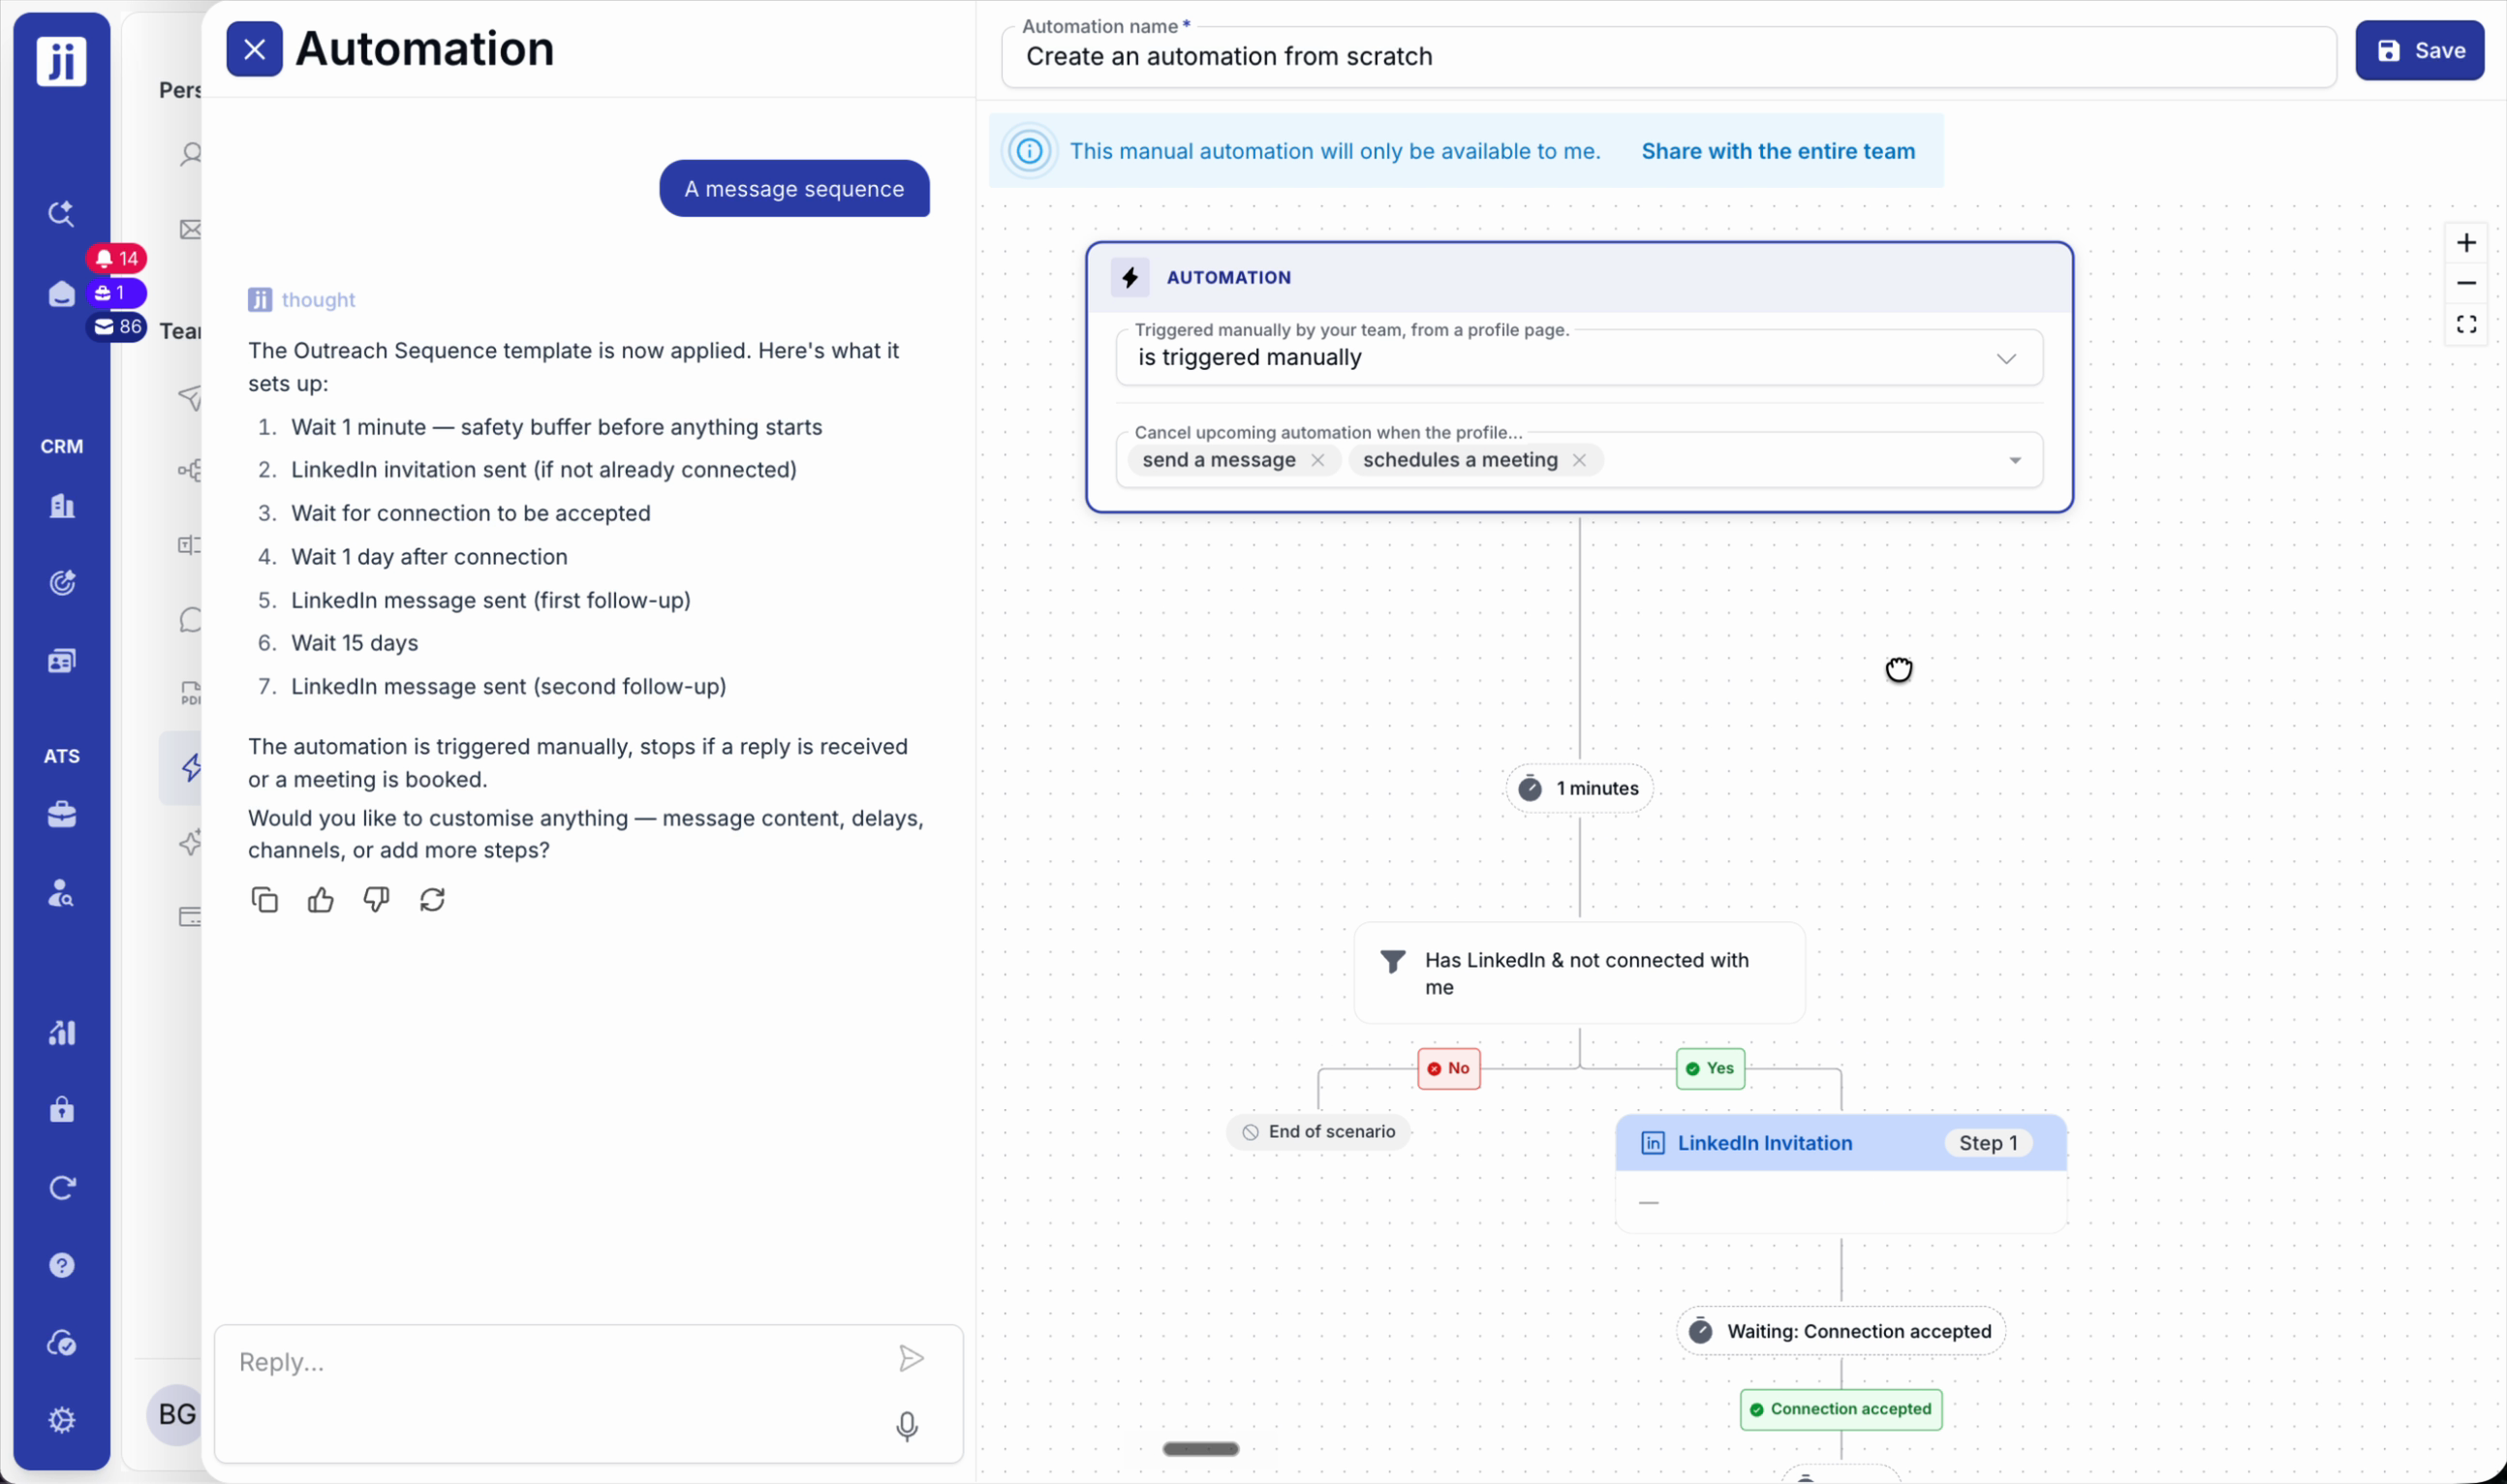

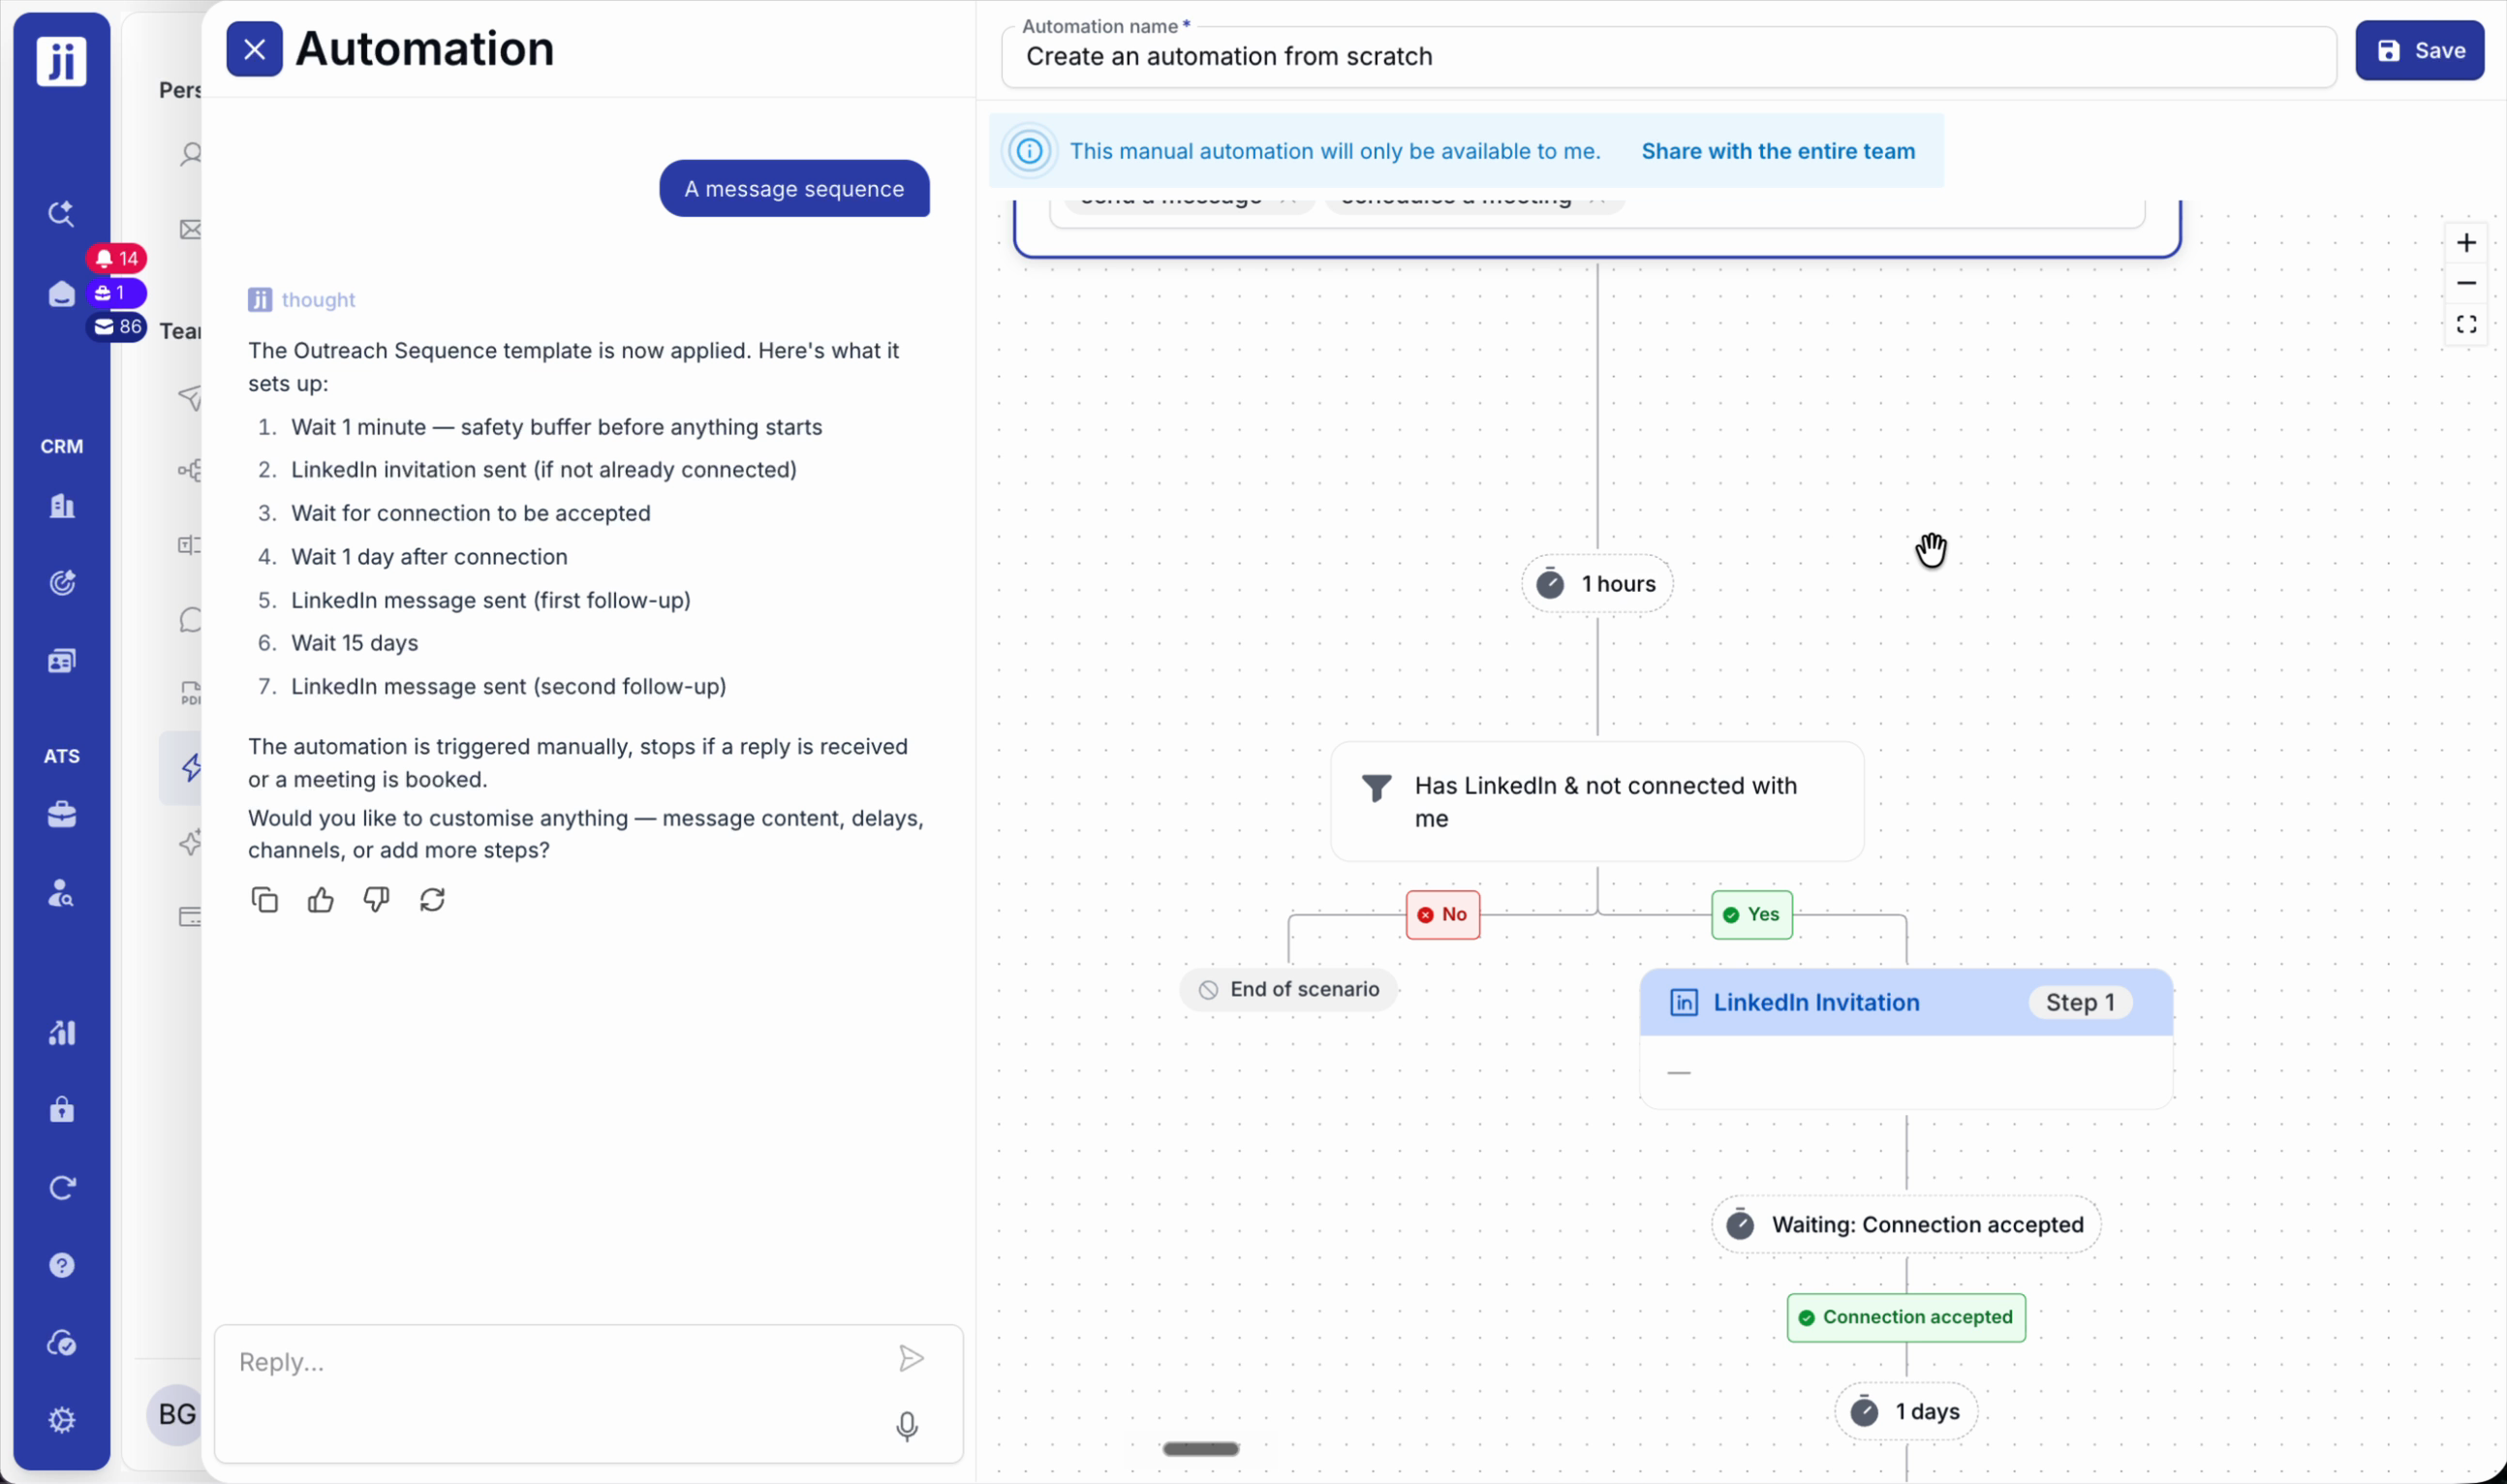
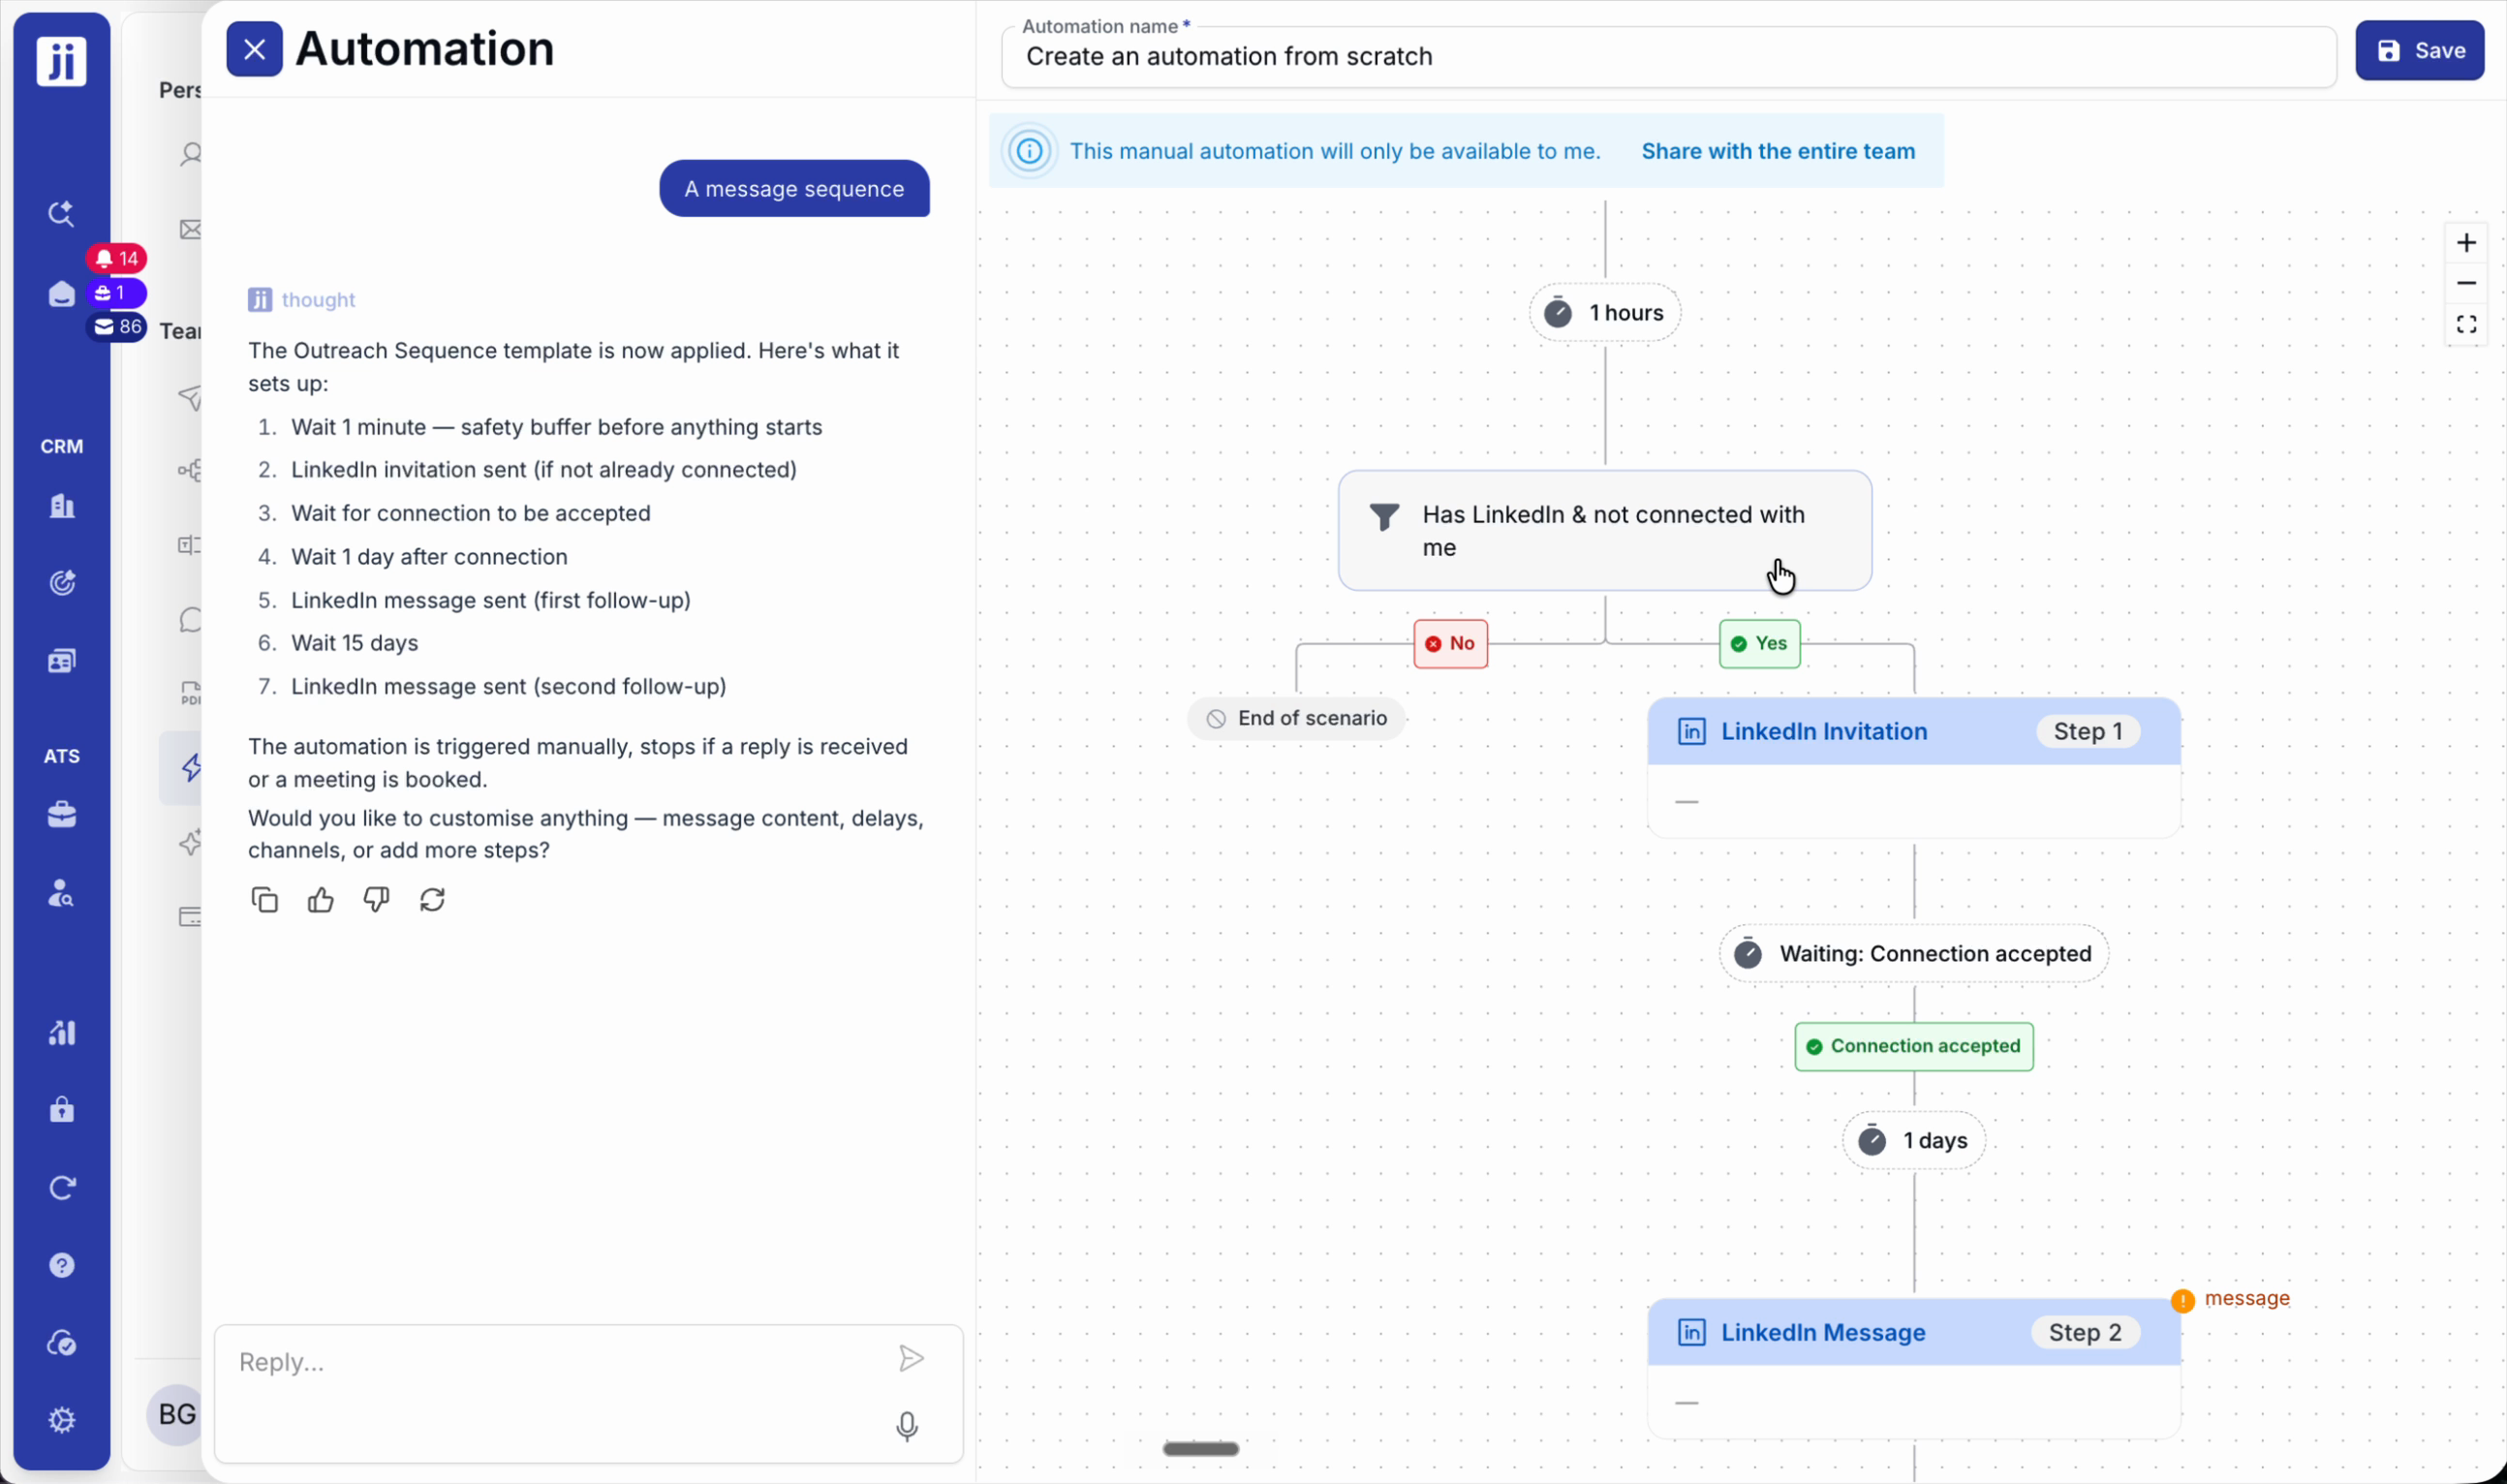
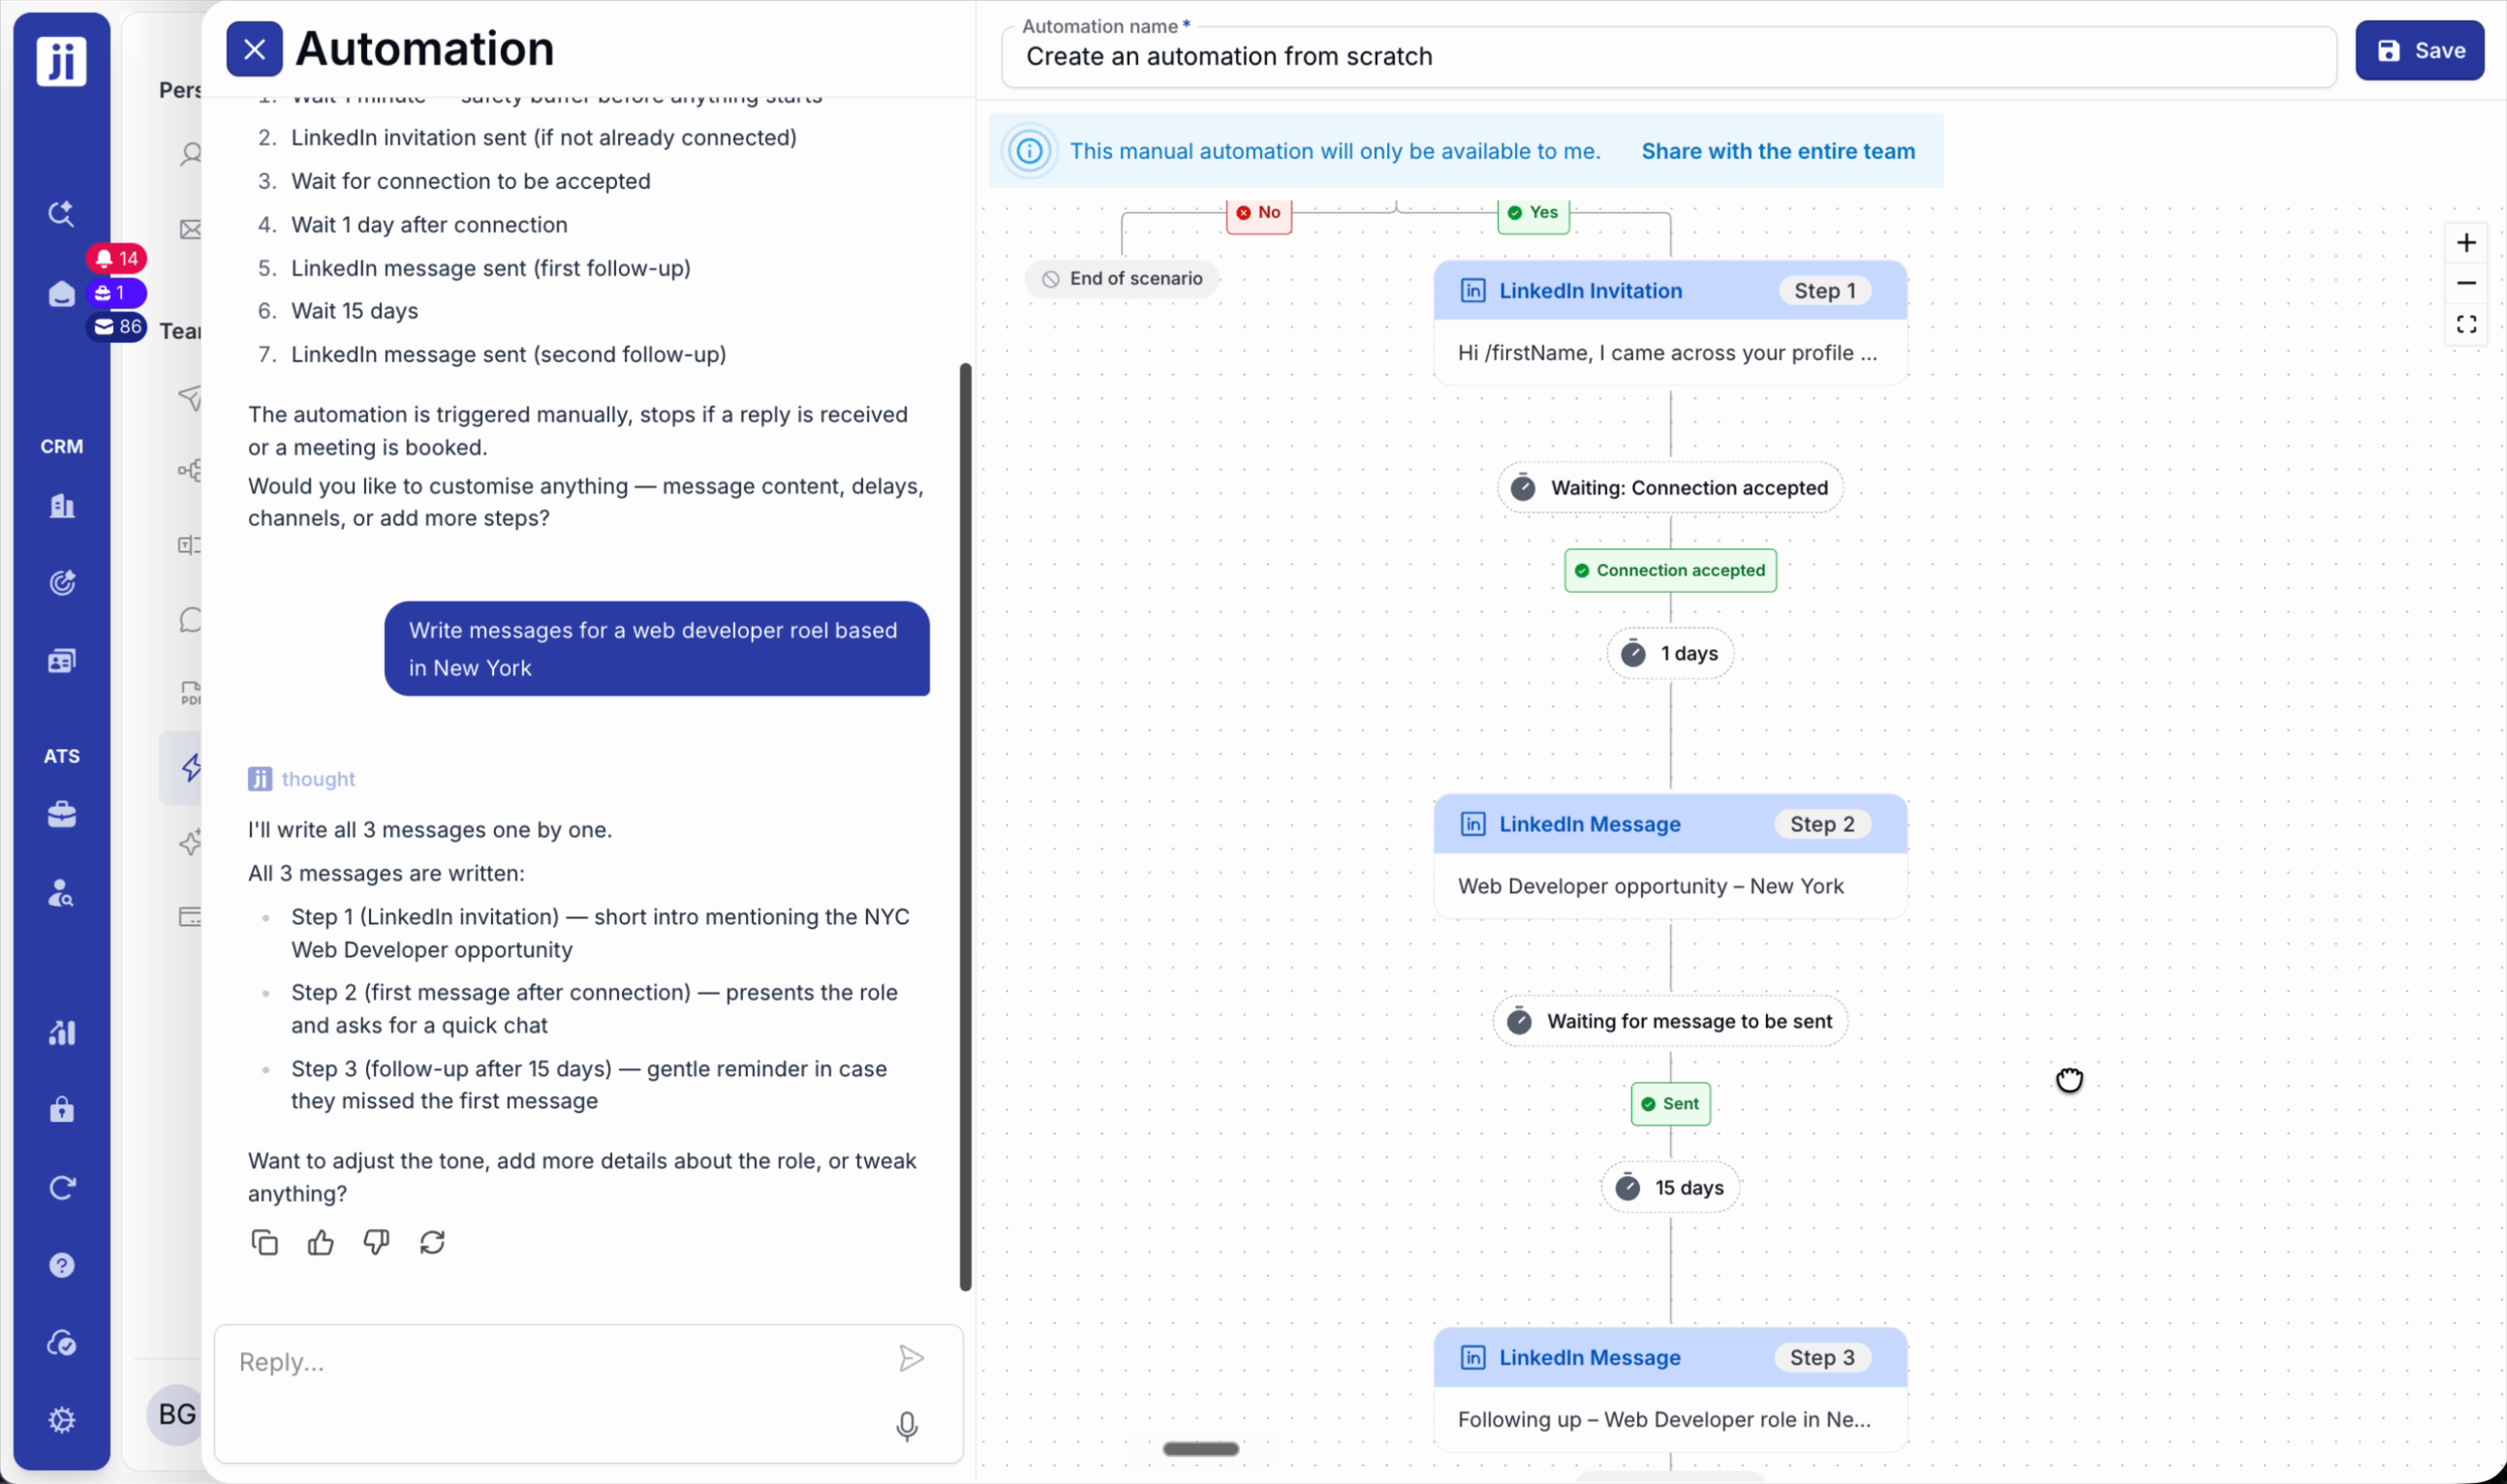
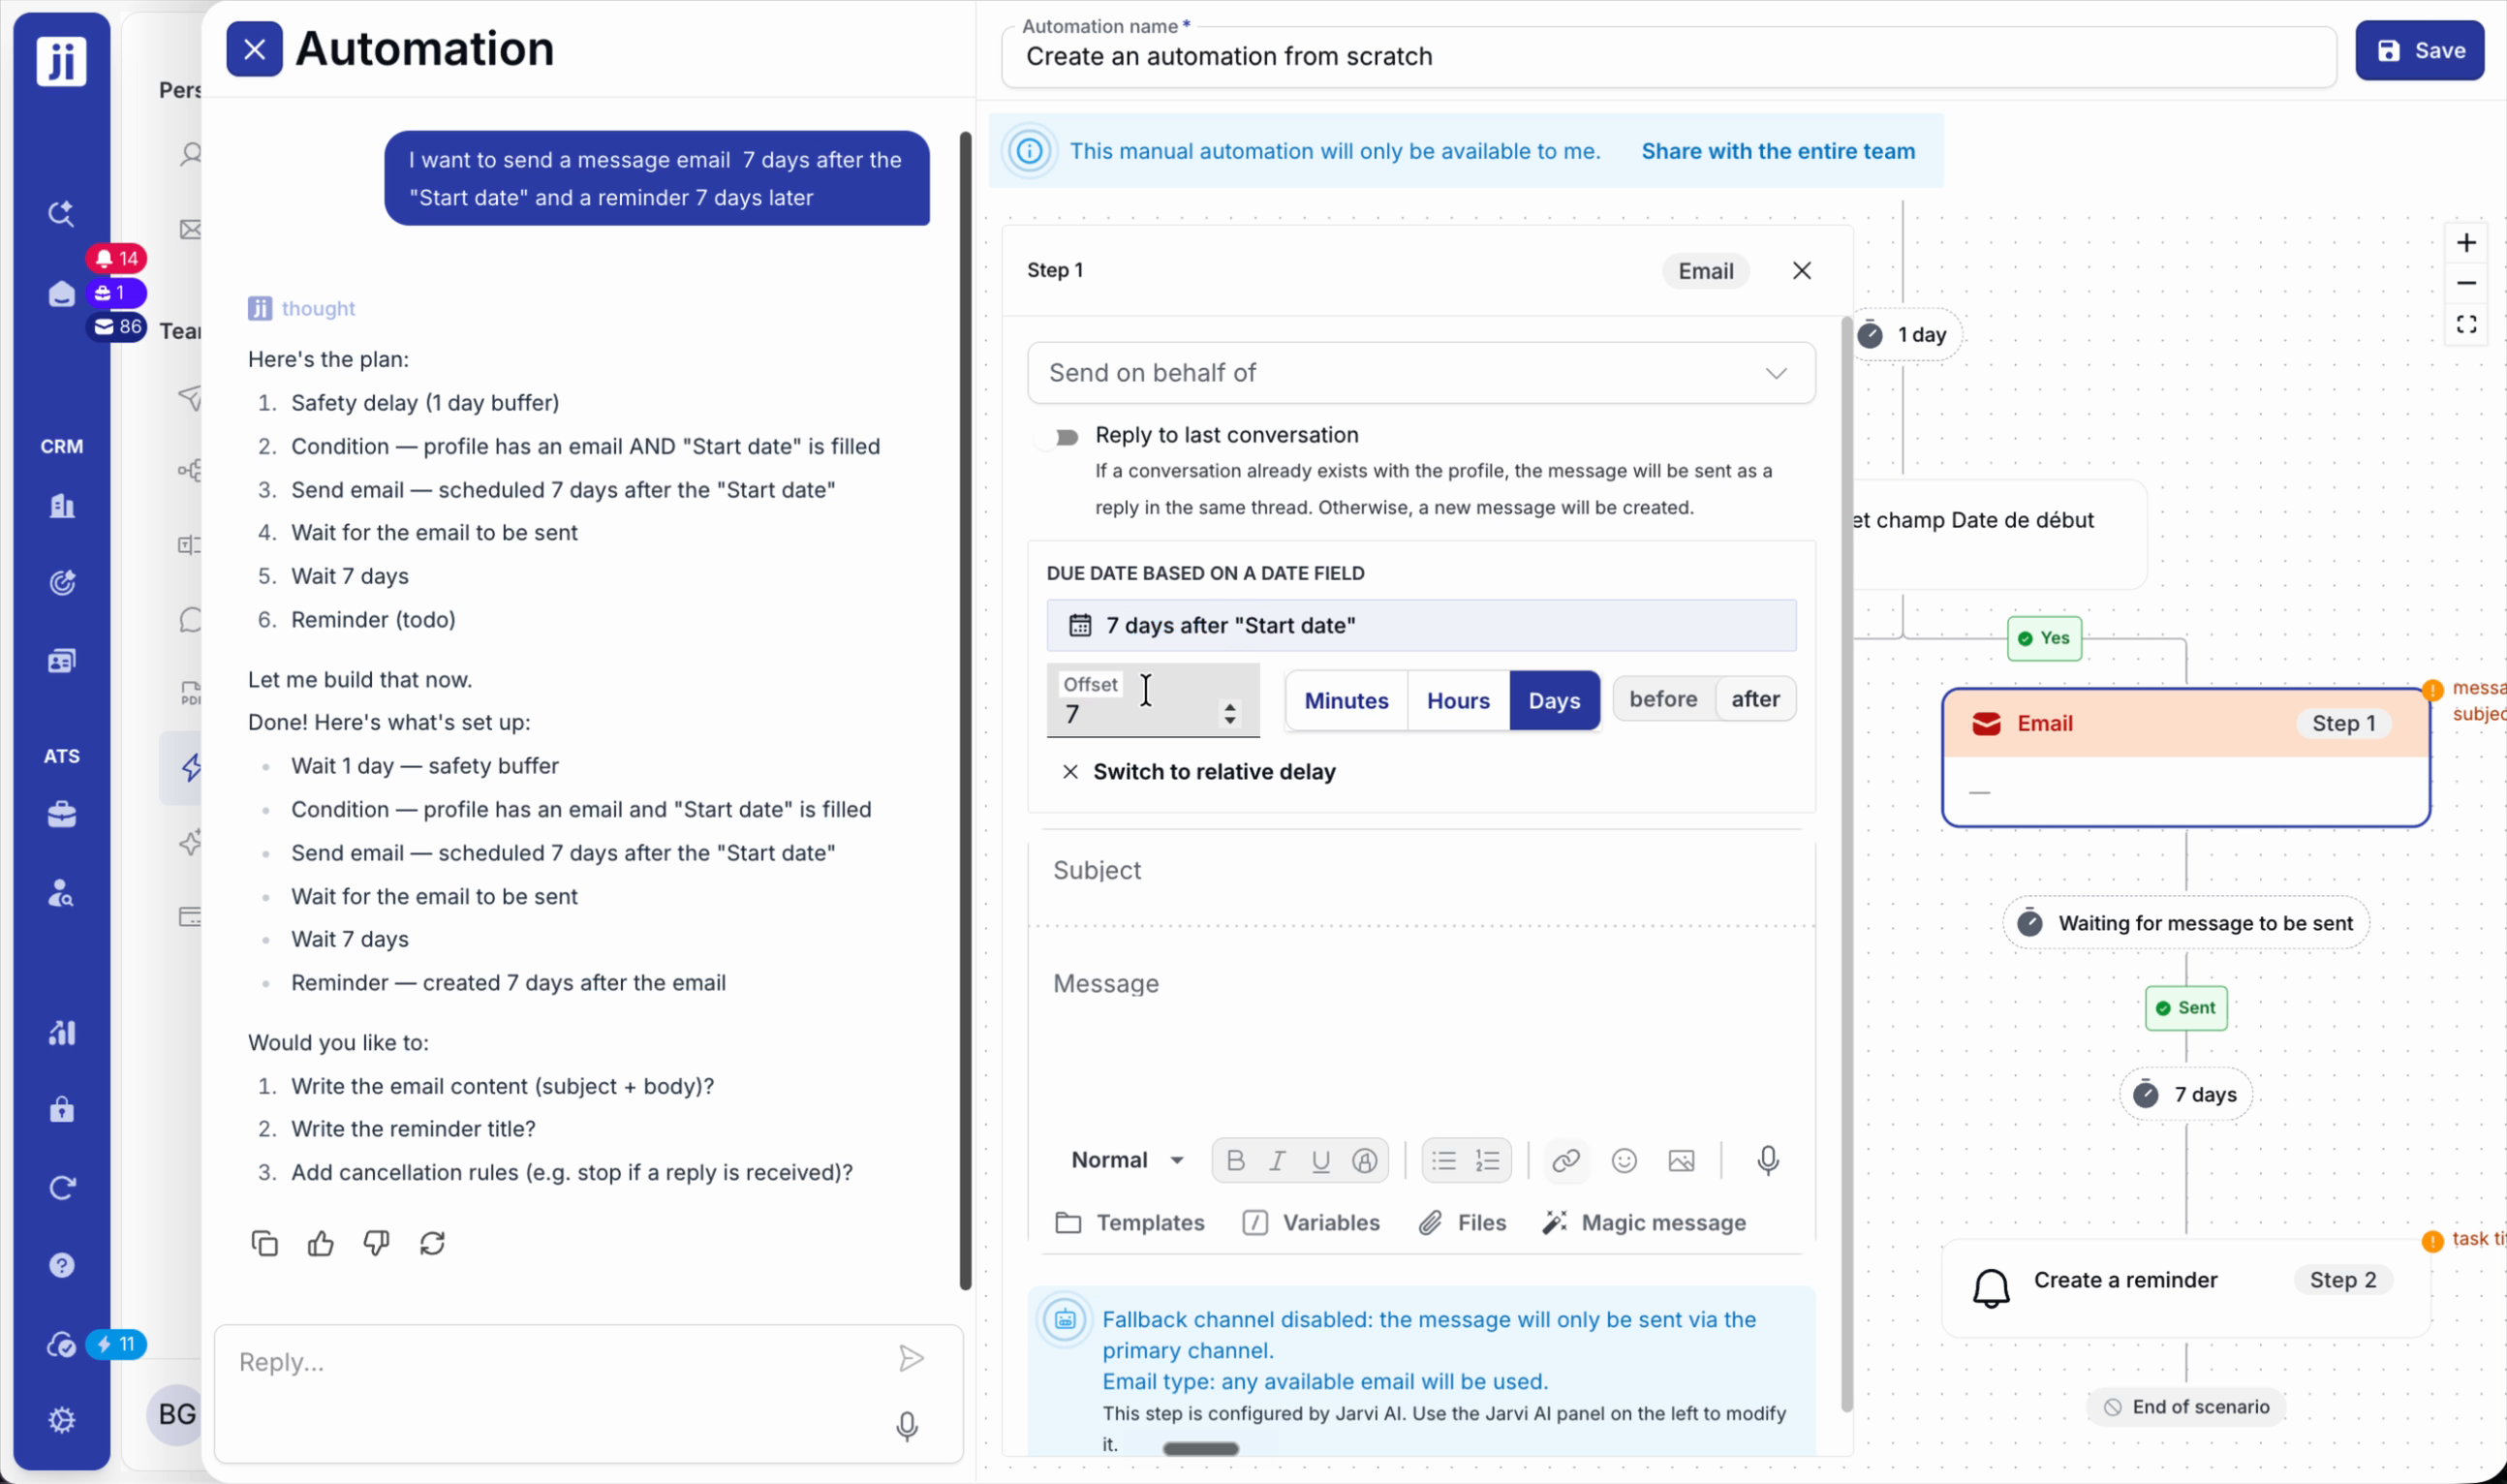
Step 4: Add action blocks: wait, conditions (e.g. LinkedIn profile available), send invitations, messages or emails depending on the scenario.
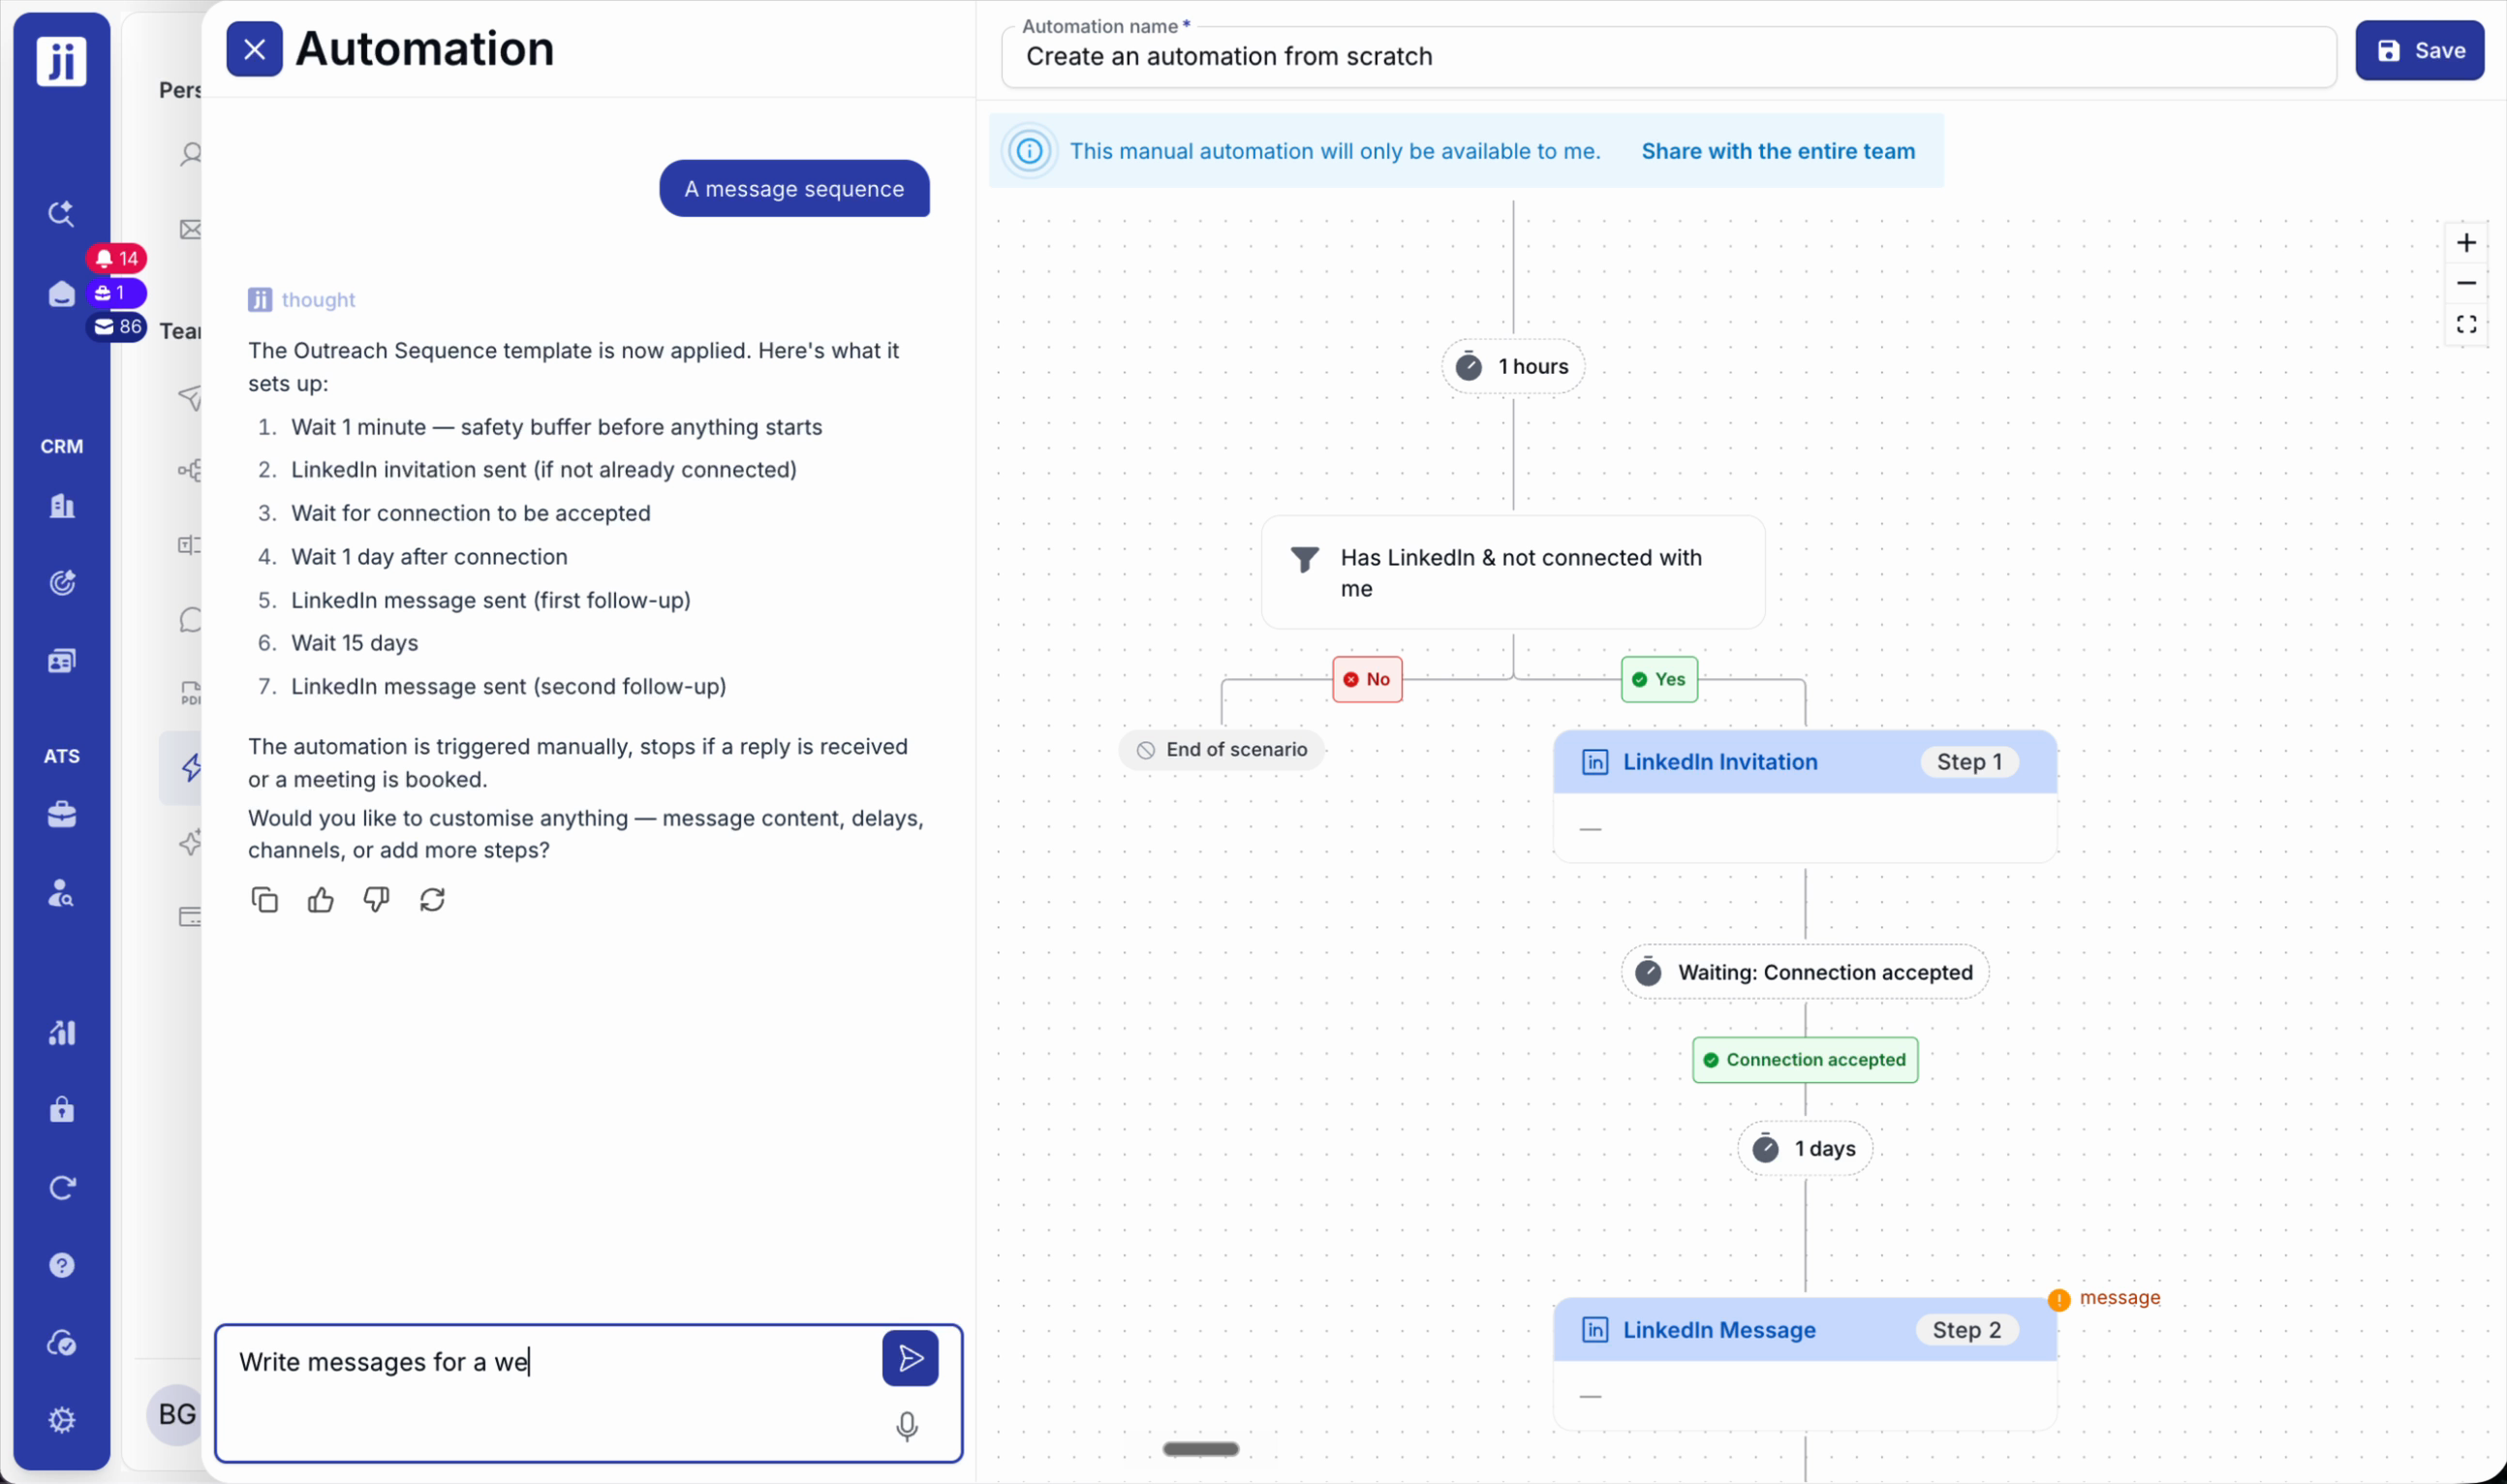
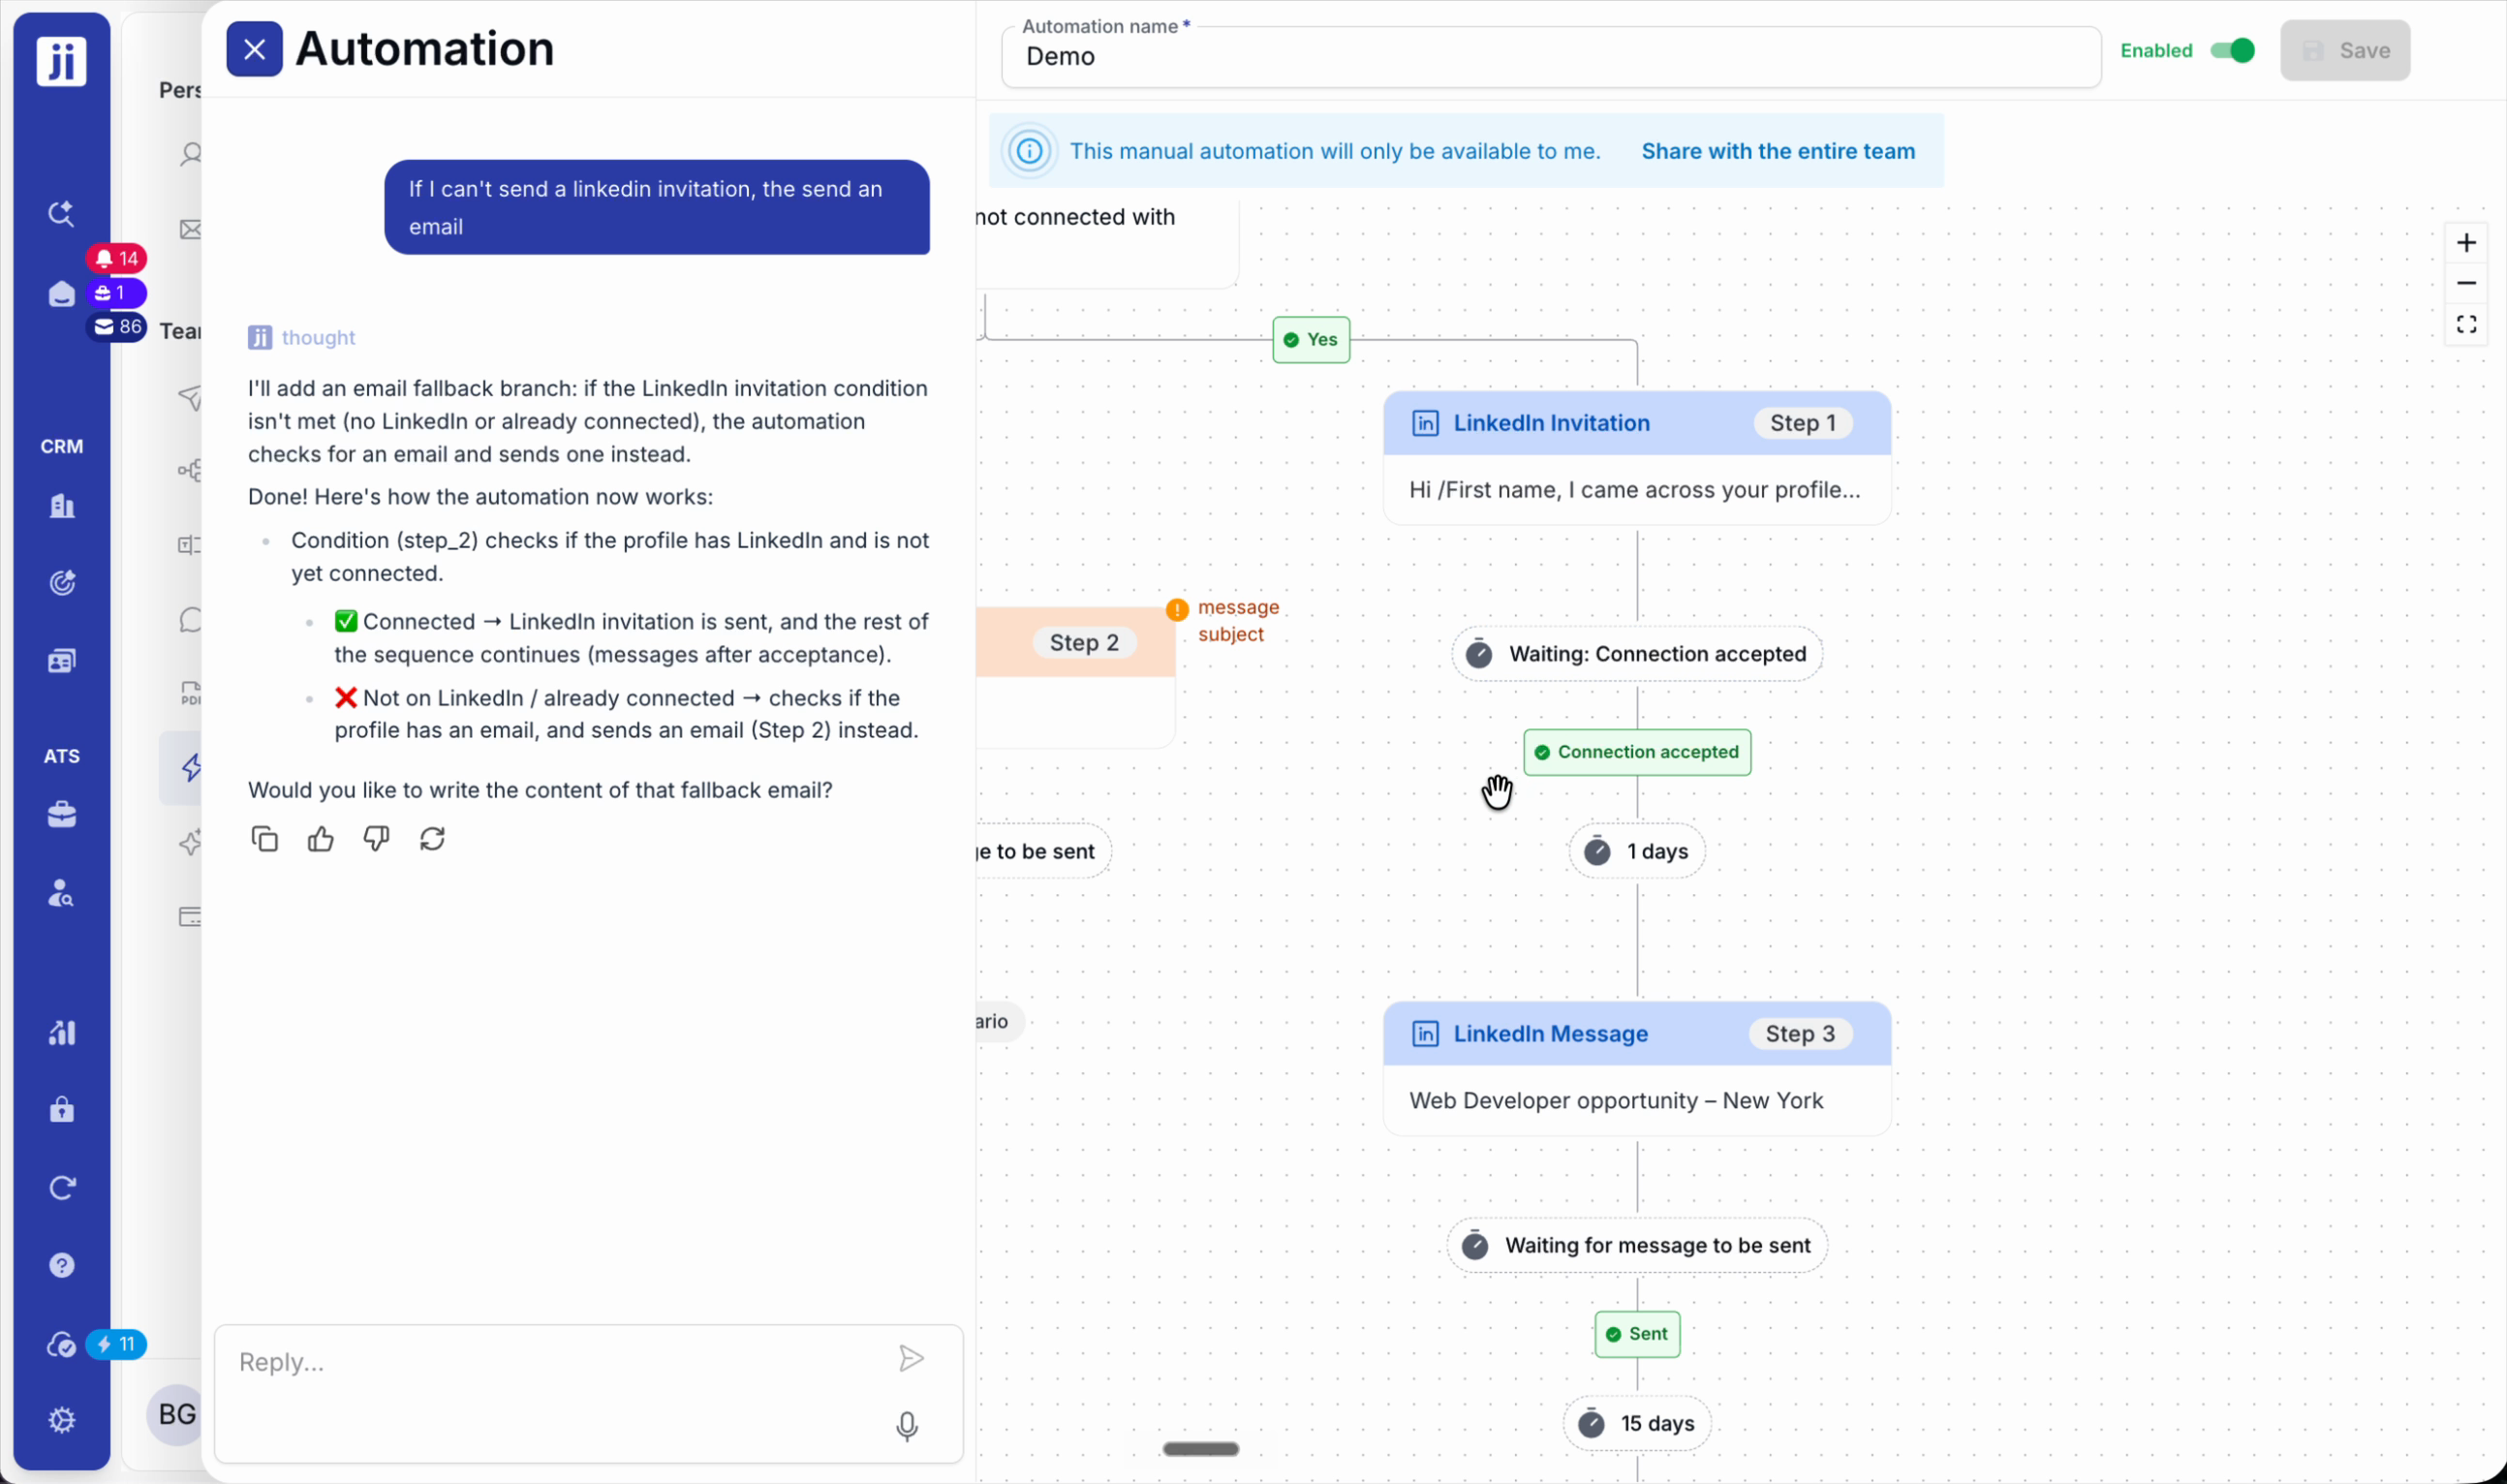
Step 5: Personalise your messages. Ask the AI assistant to draft for a specific role, then edit or complete as needed.
Launch the automation on a project
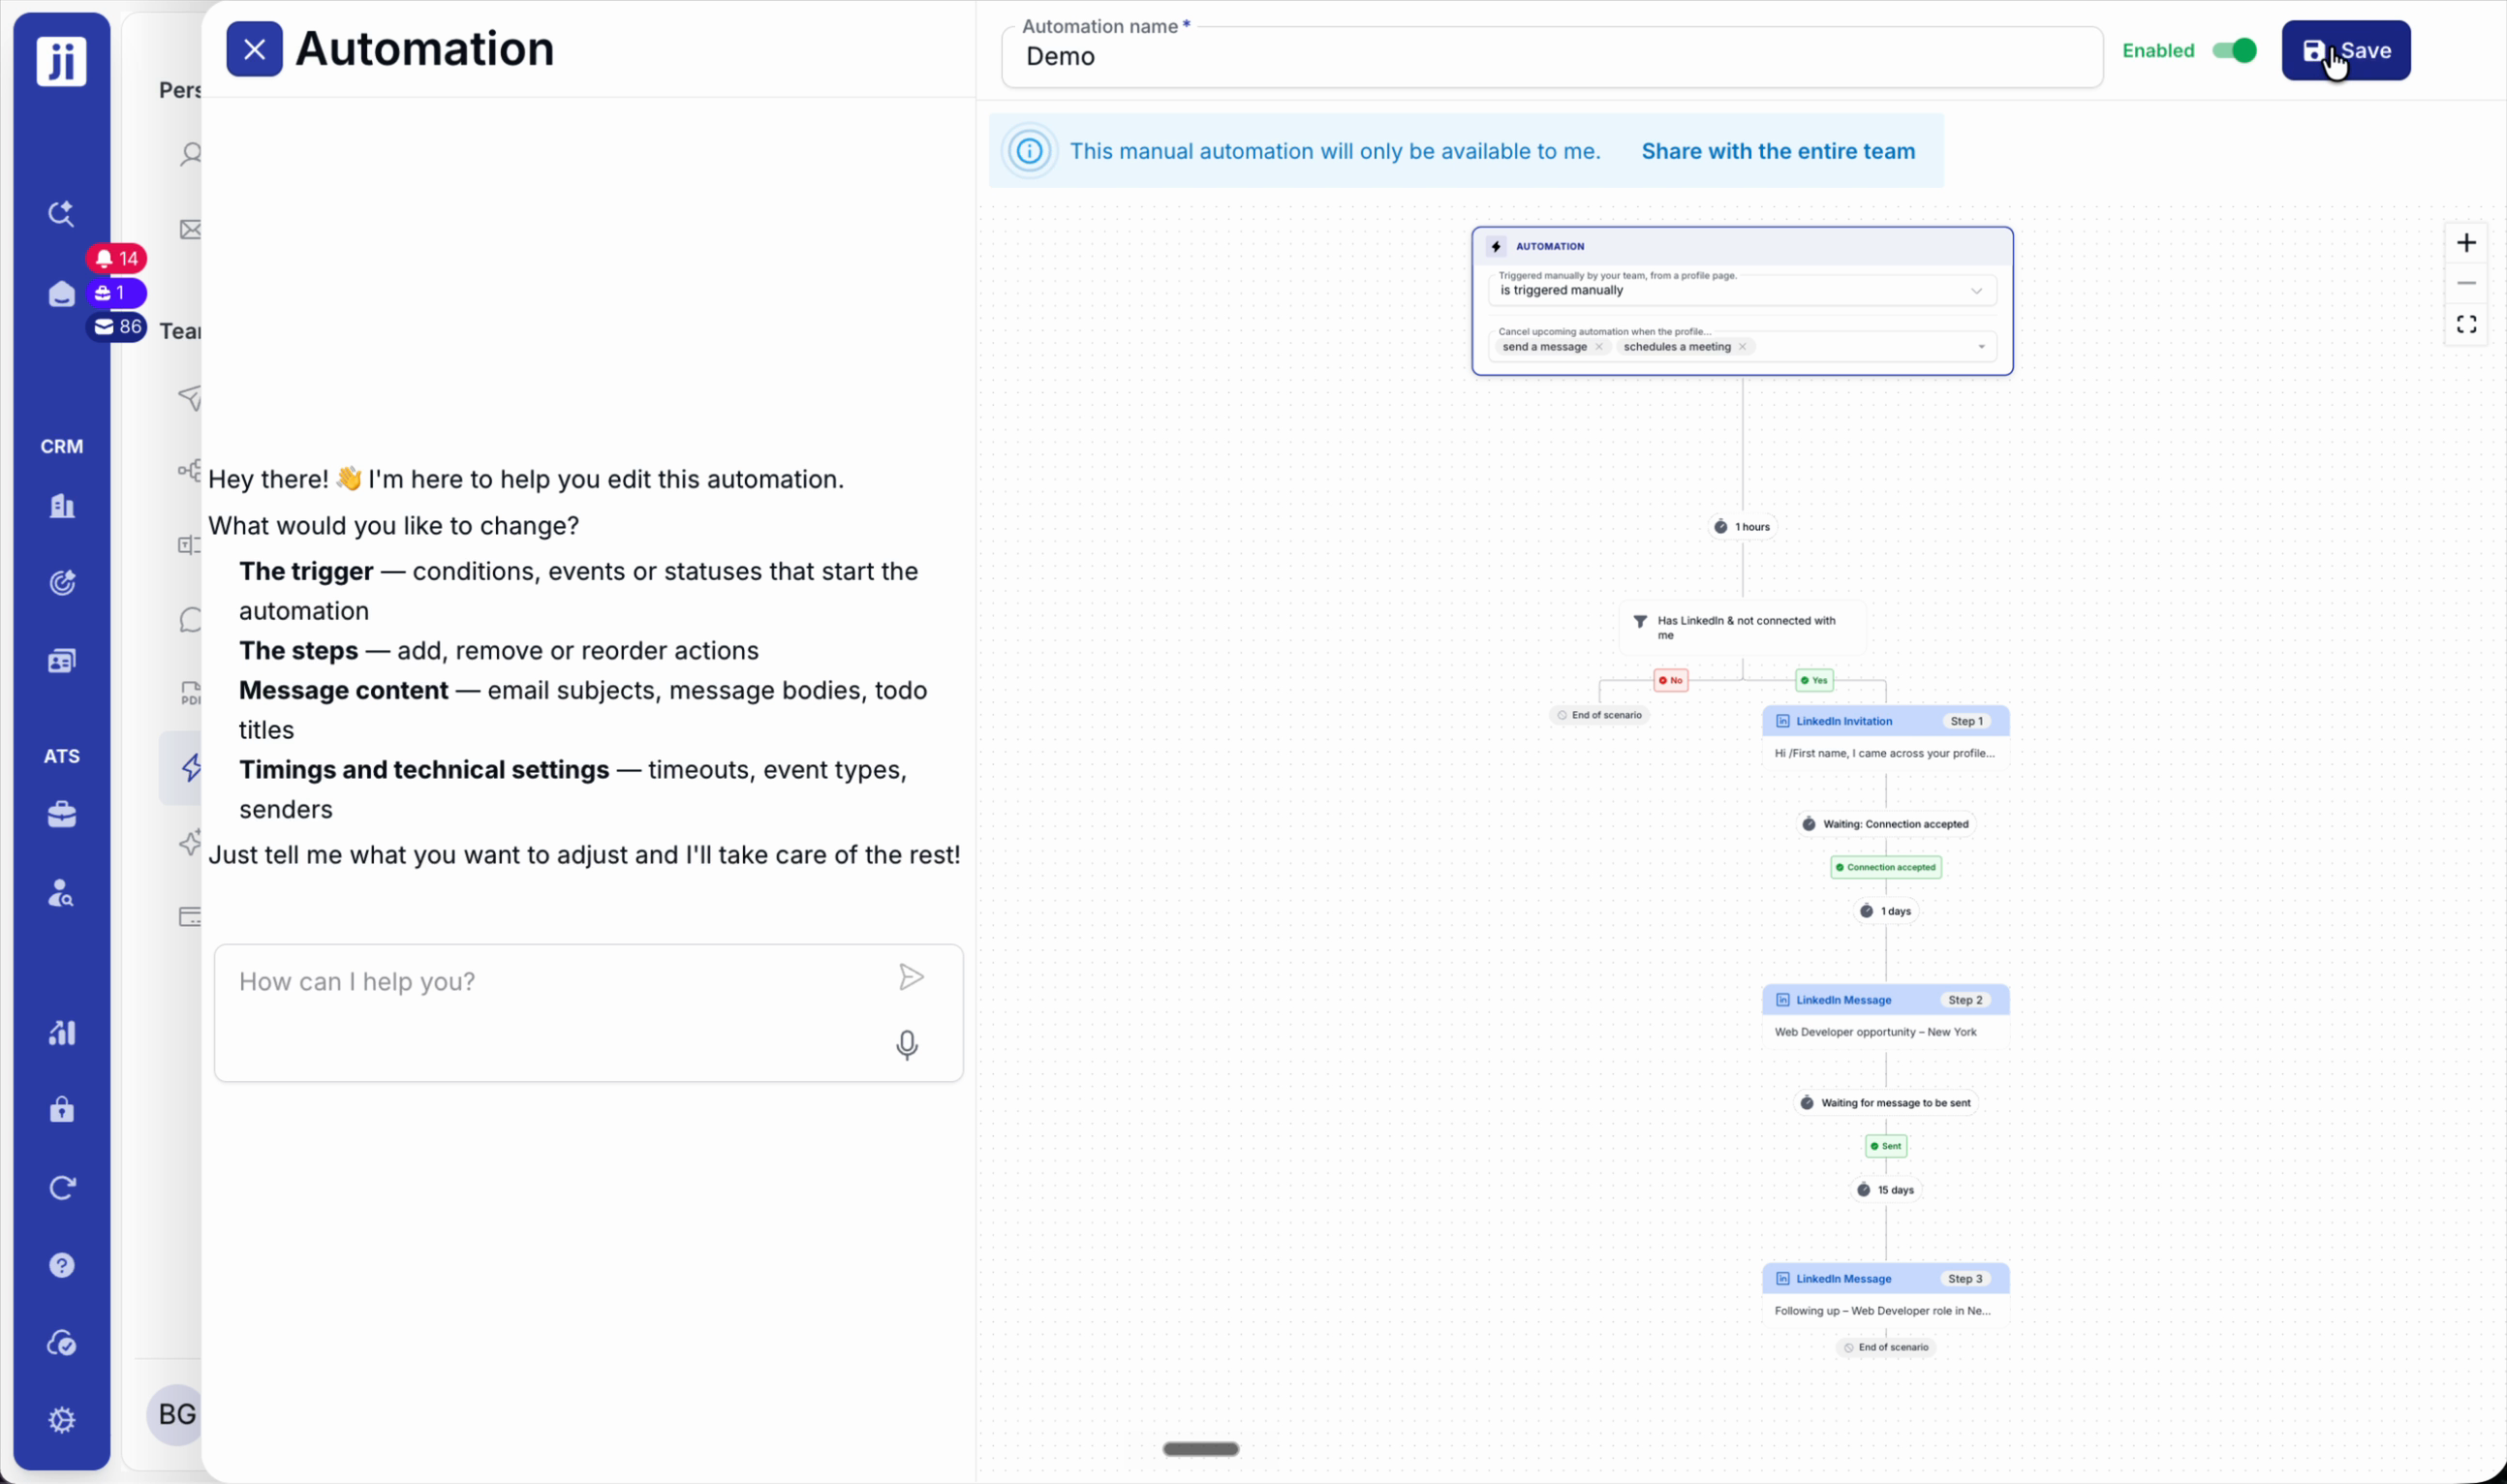
Step 1: Name your sequence, activate it and save.
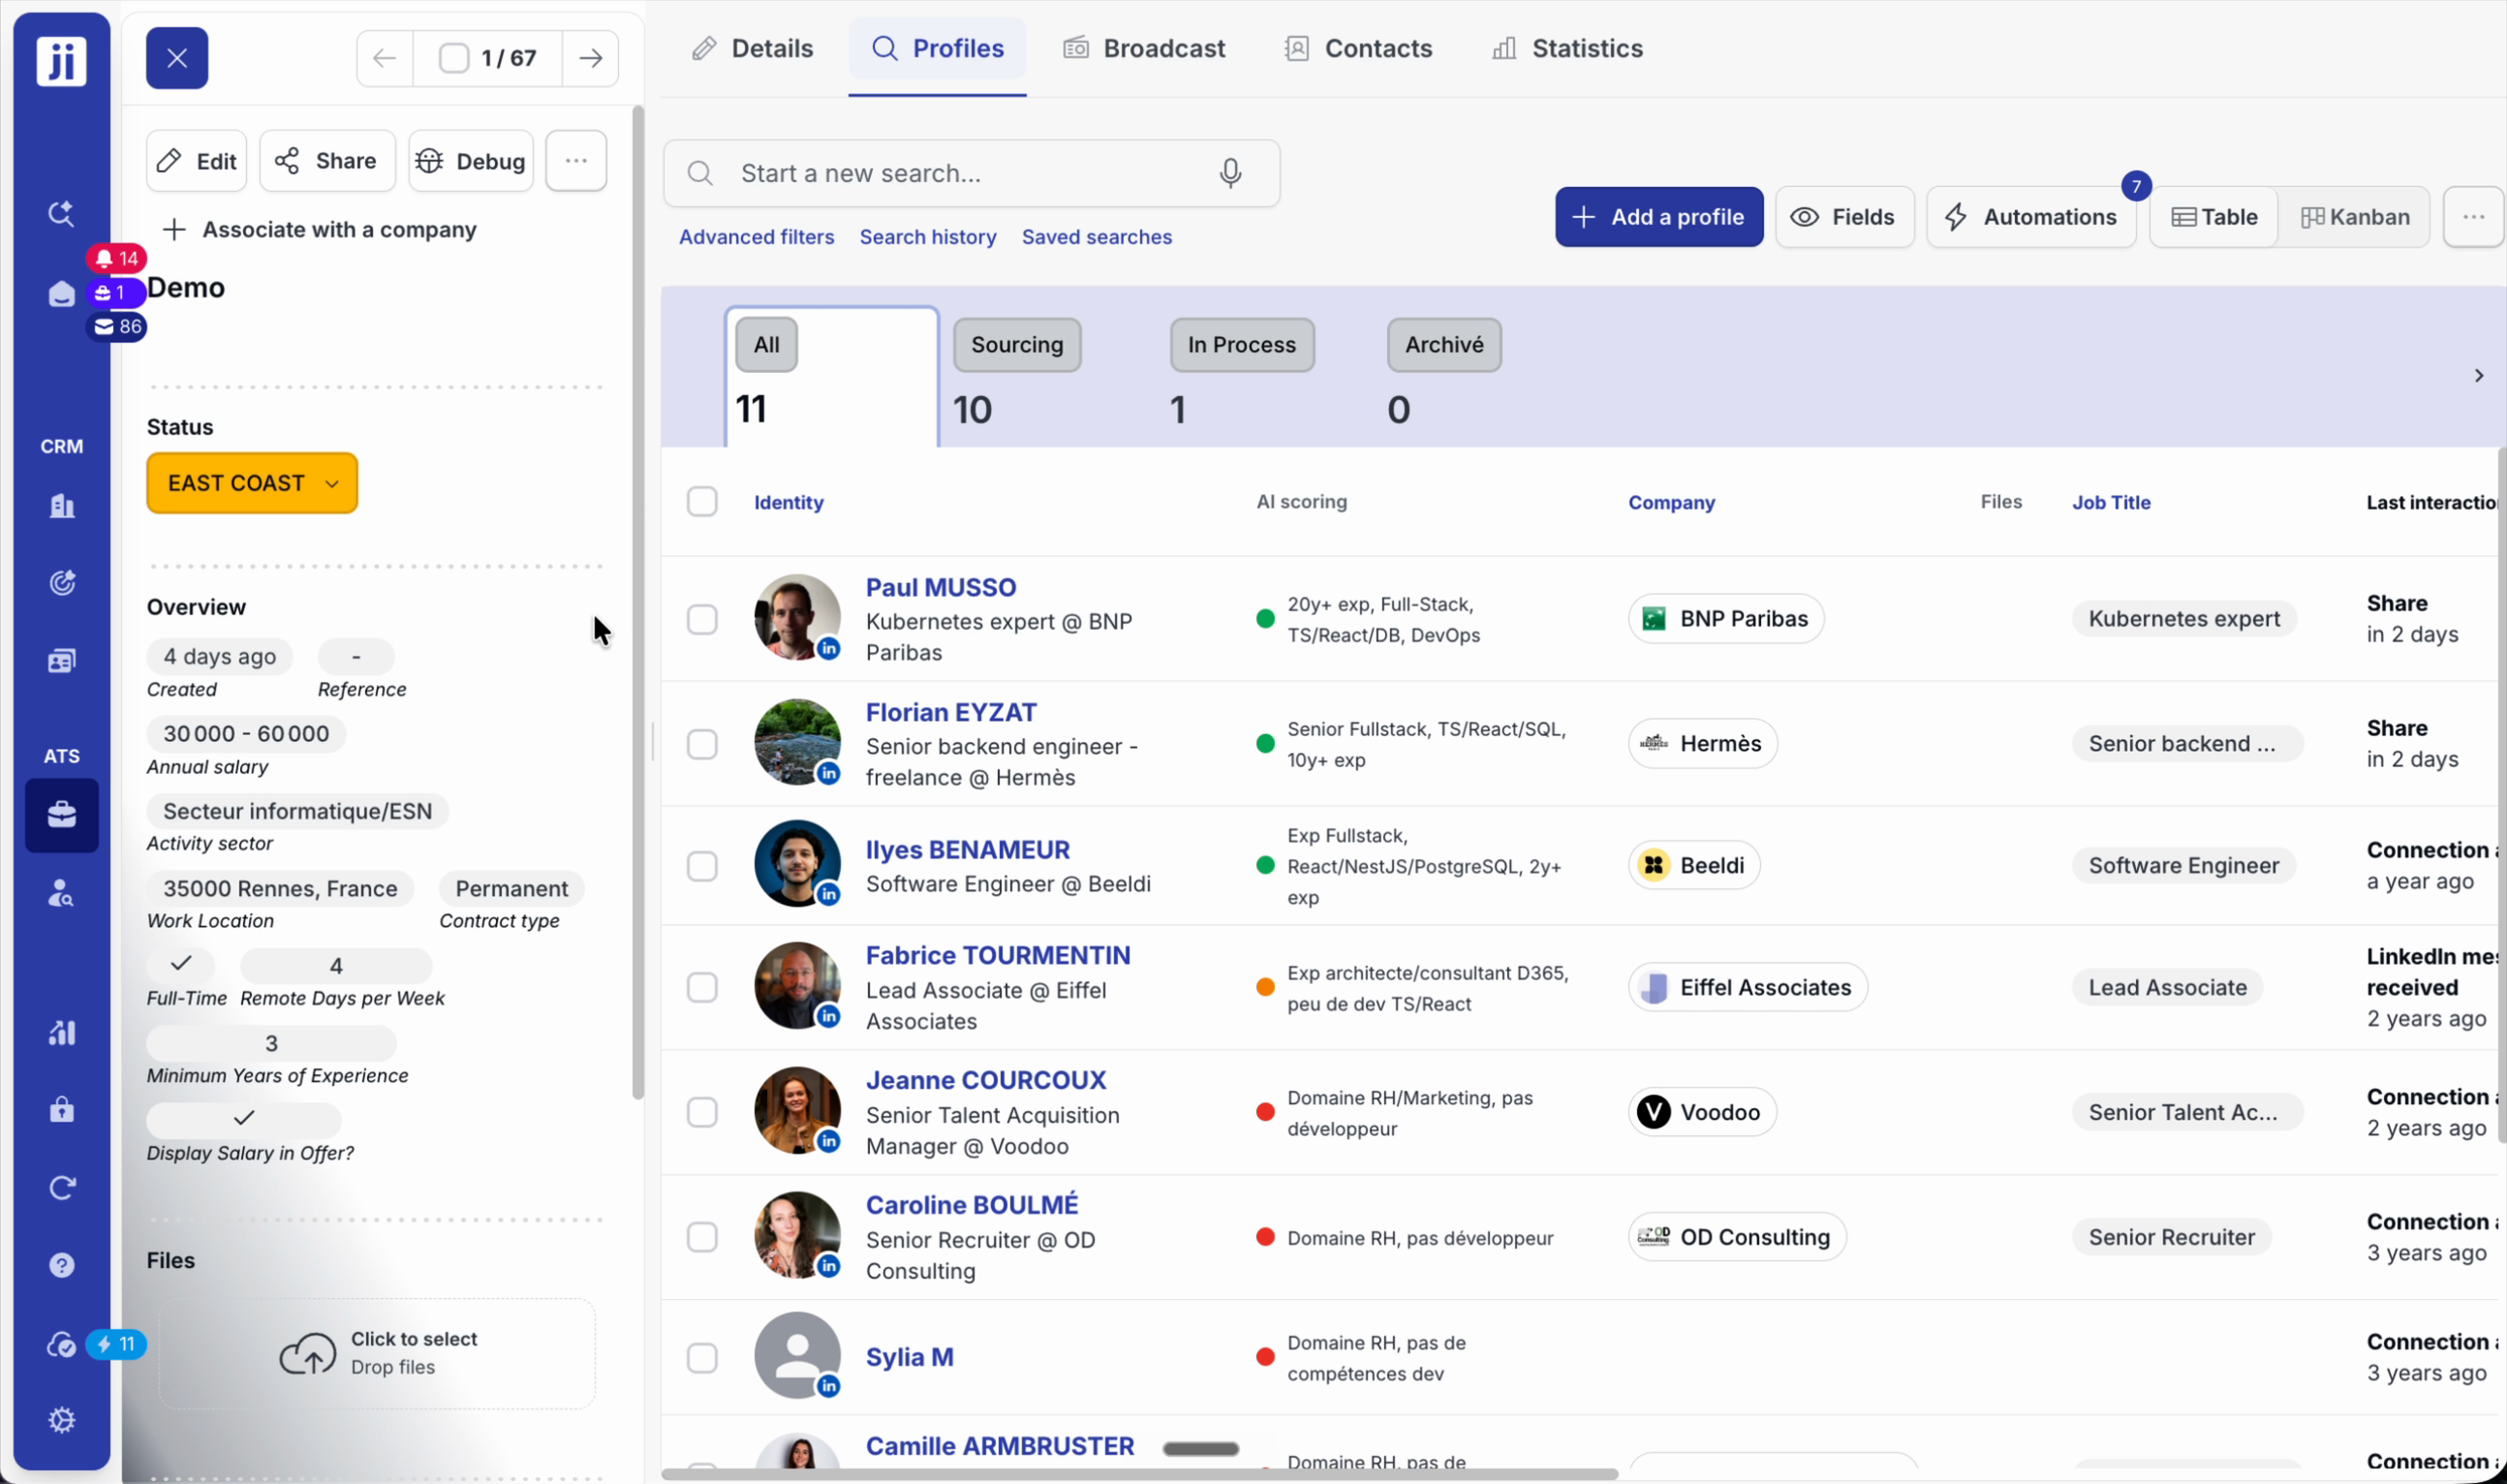
Step 2: In your recruitment project, select the profiles and click Automation.
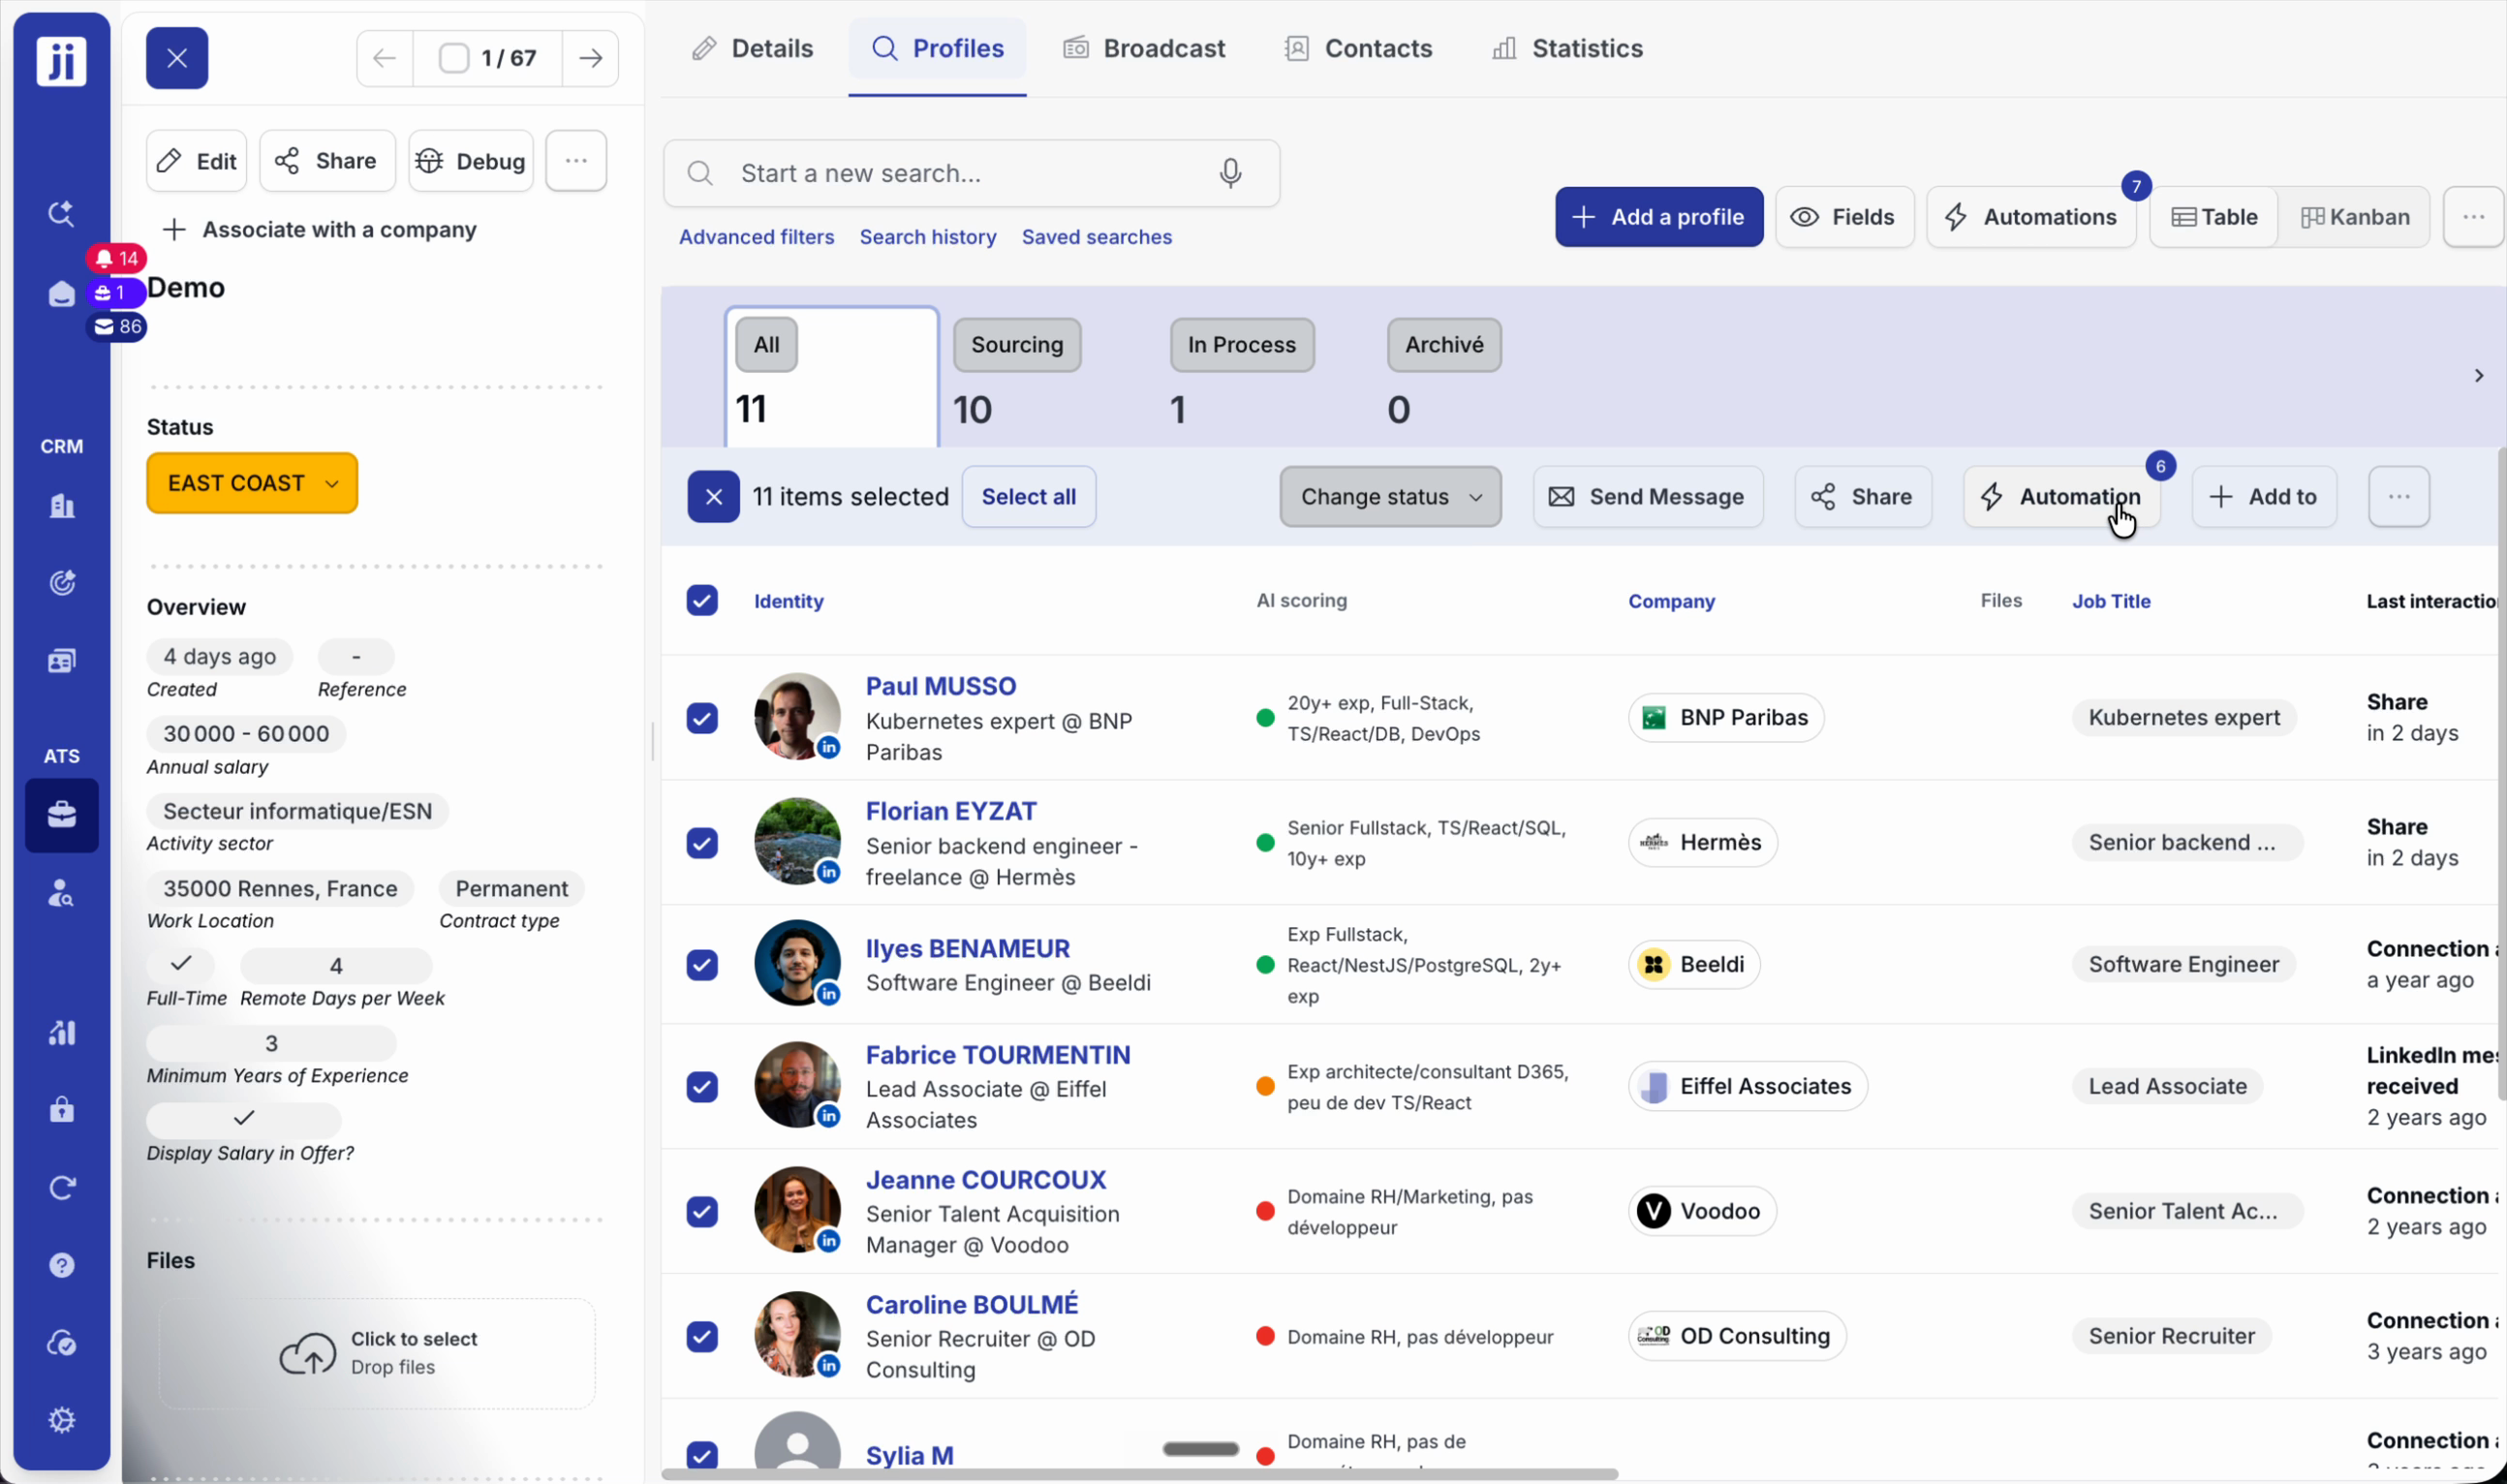
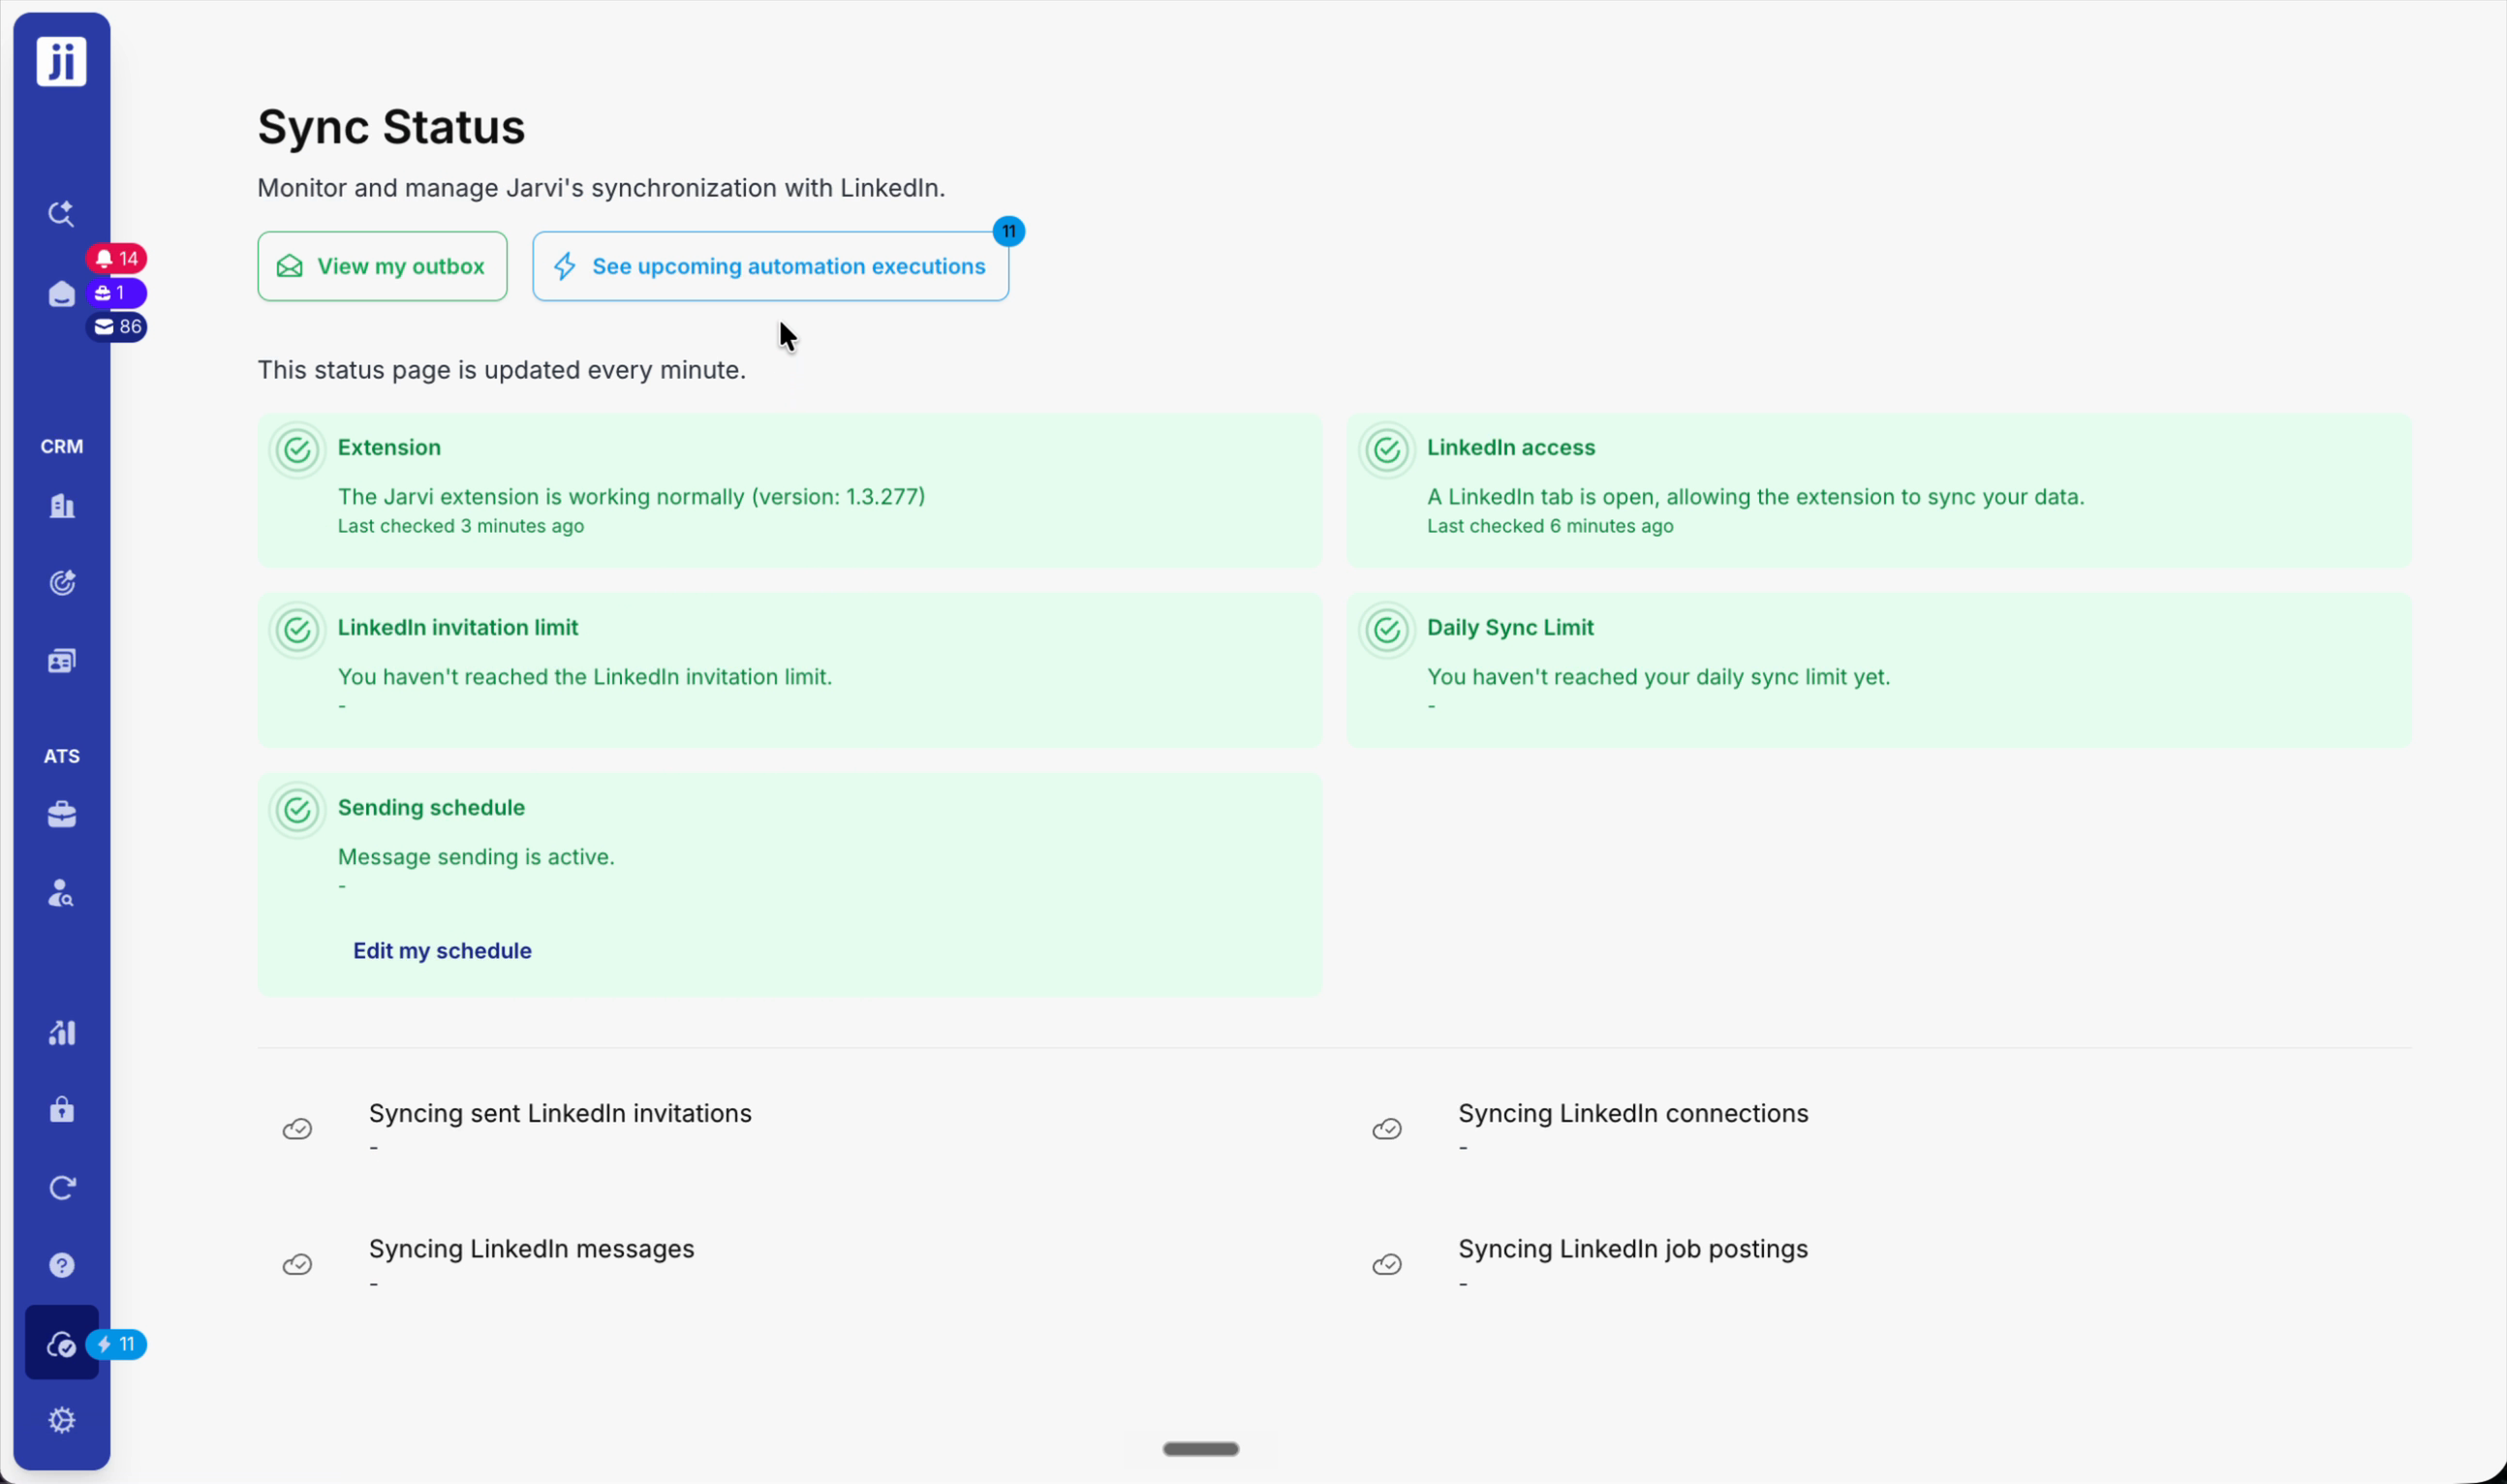
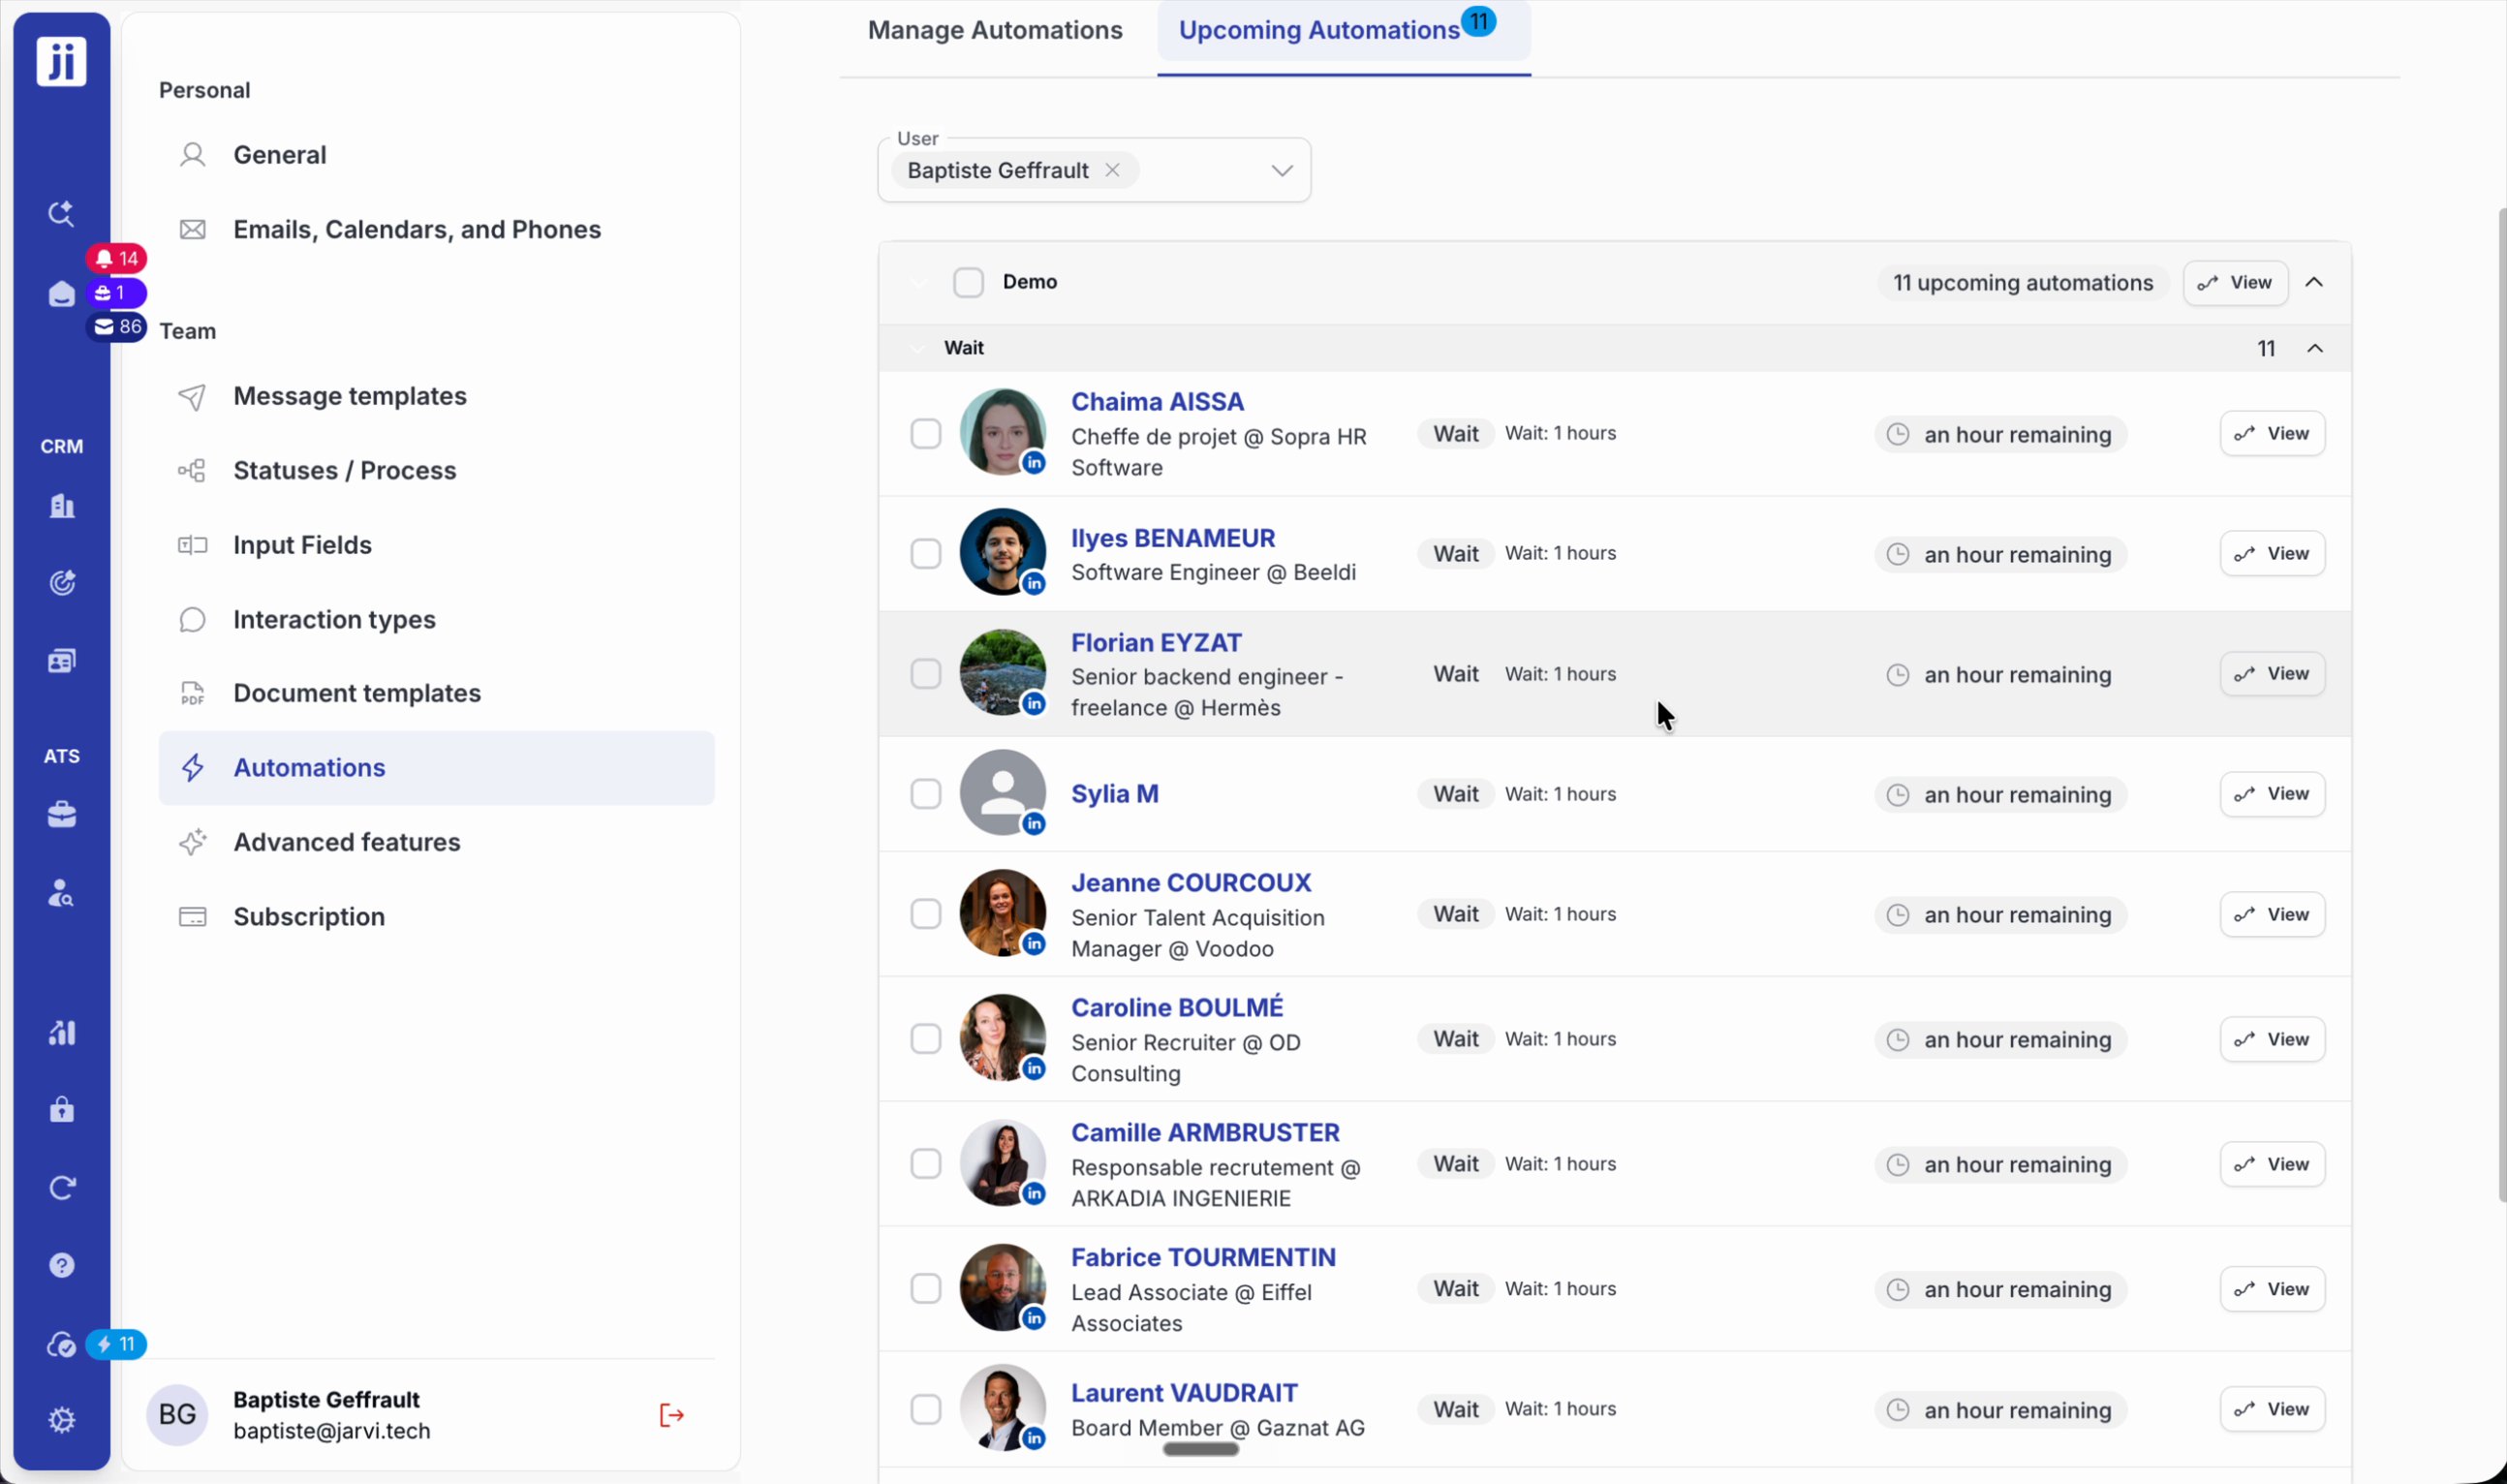
Step 3: Launch the sequence and confirm. Check the sending status in the bottom-left corner of the interface.
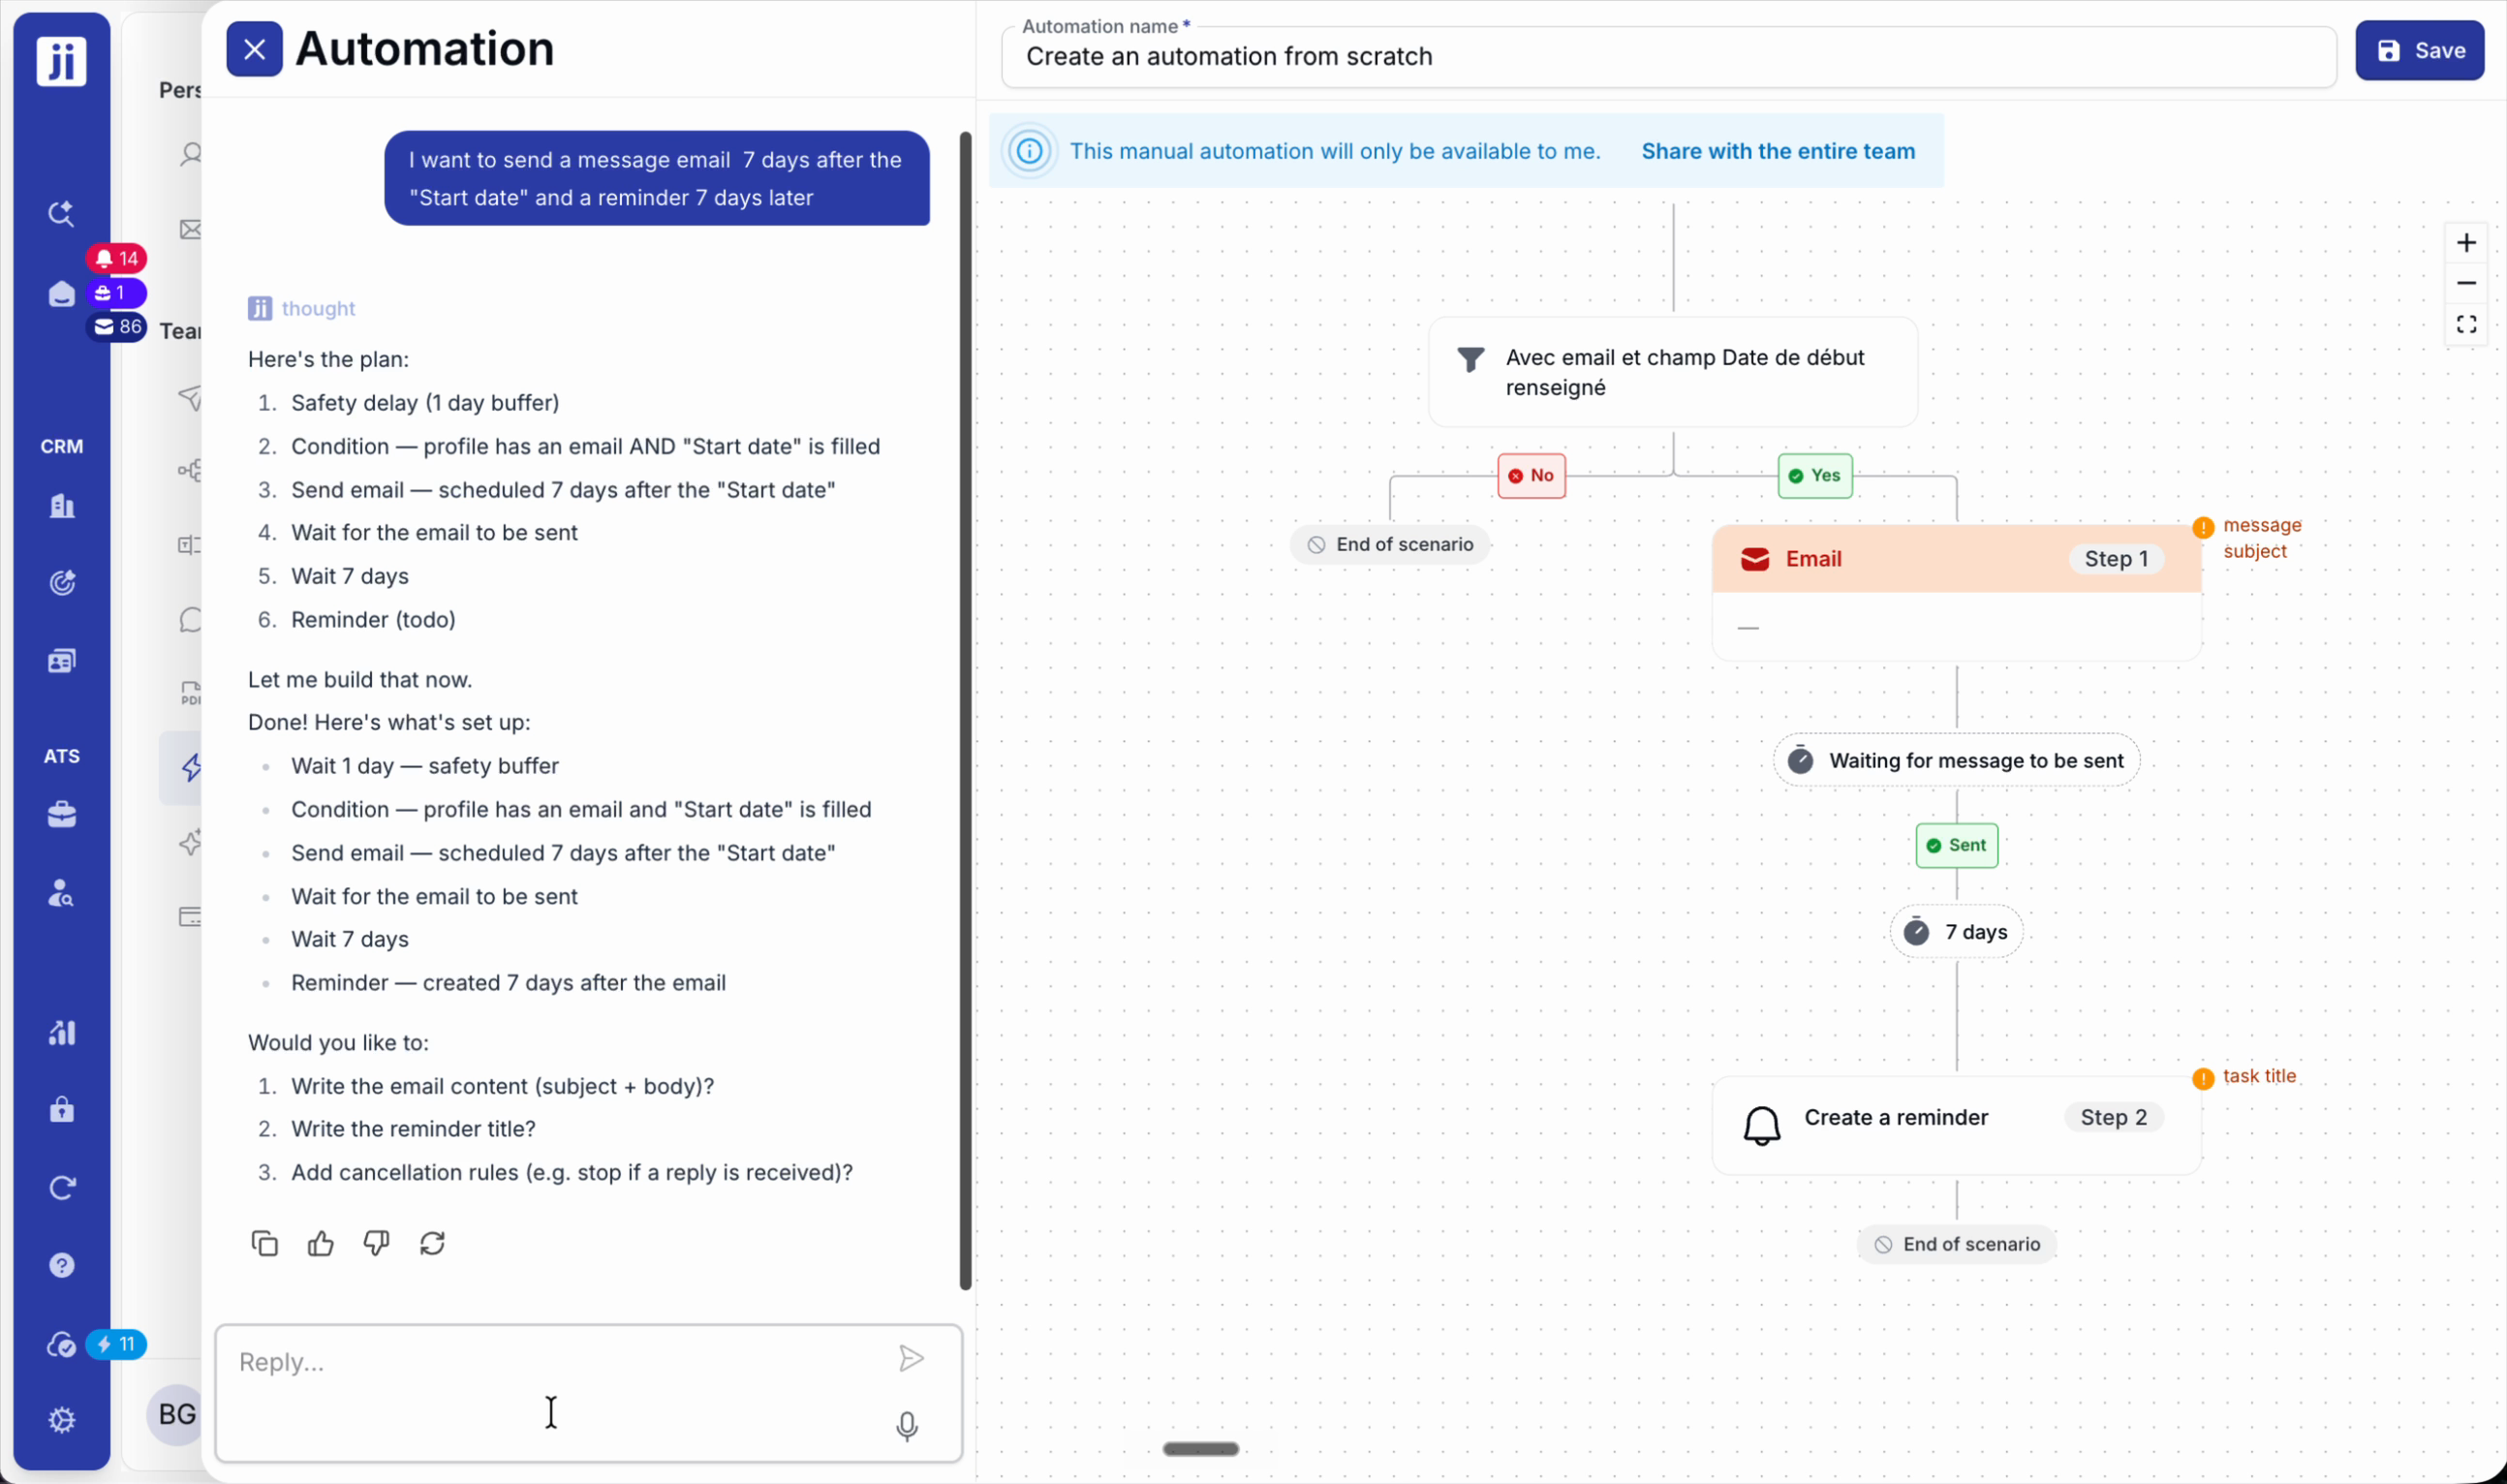
Manage complex and alternative scenarios
Step 1: Add conditions to handle cases where the initial action is not possible (e.g. no LinkedIn invitation possible? Send an email instead).
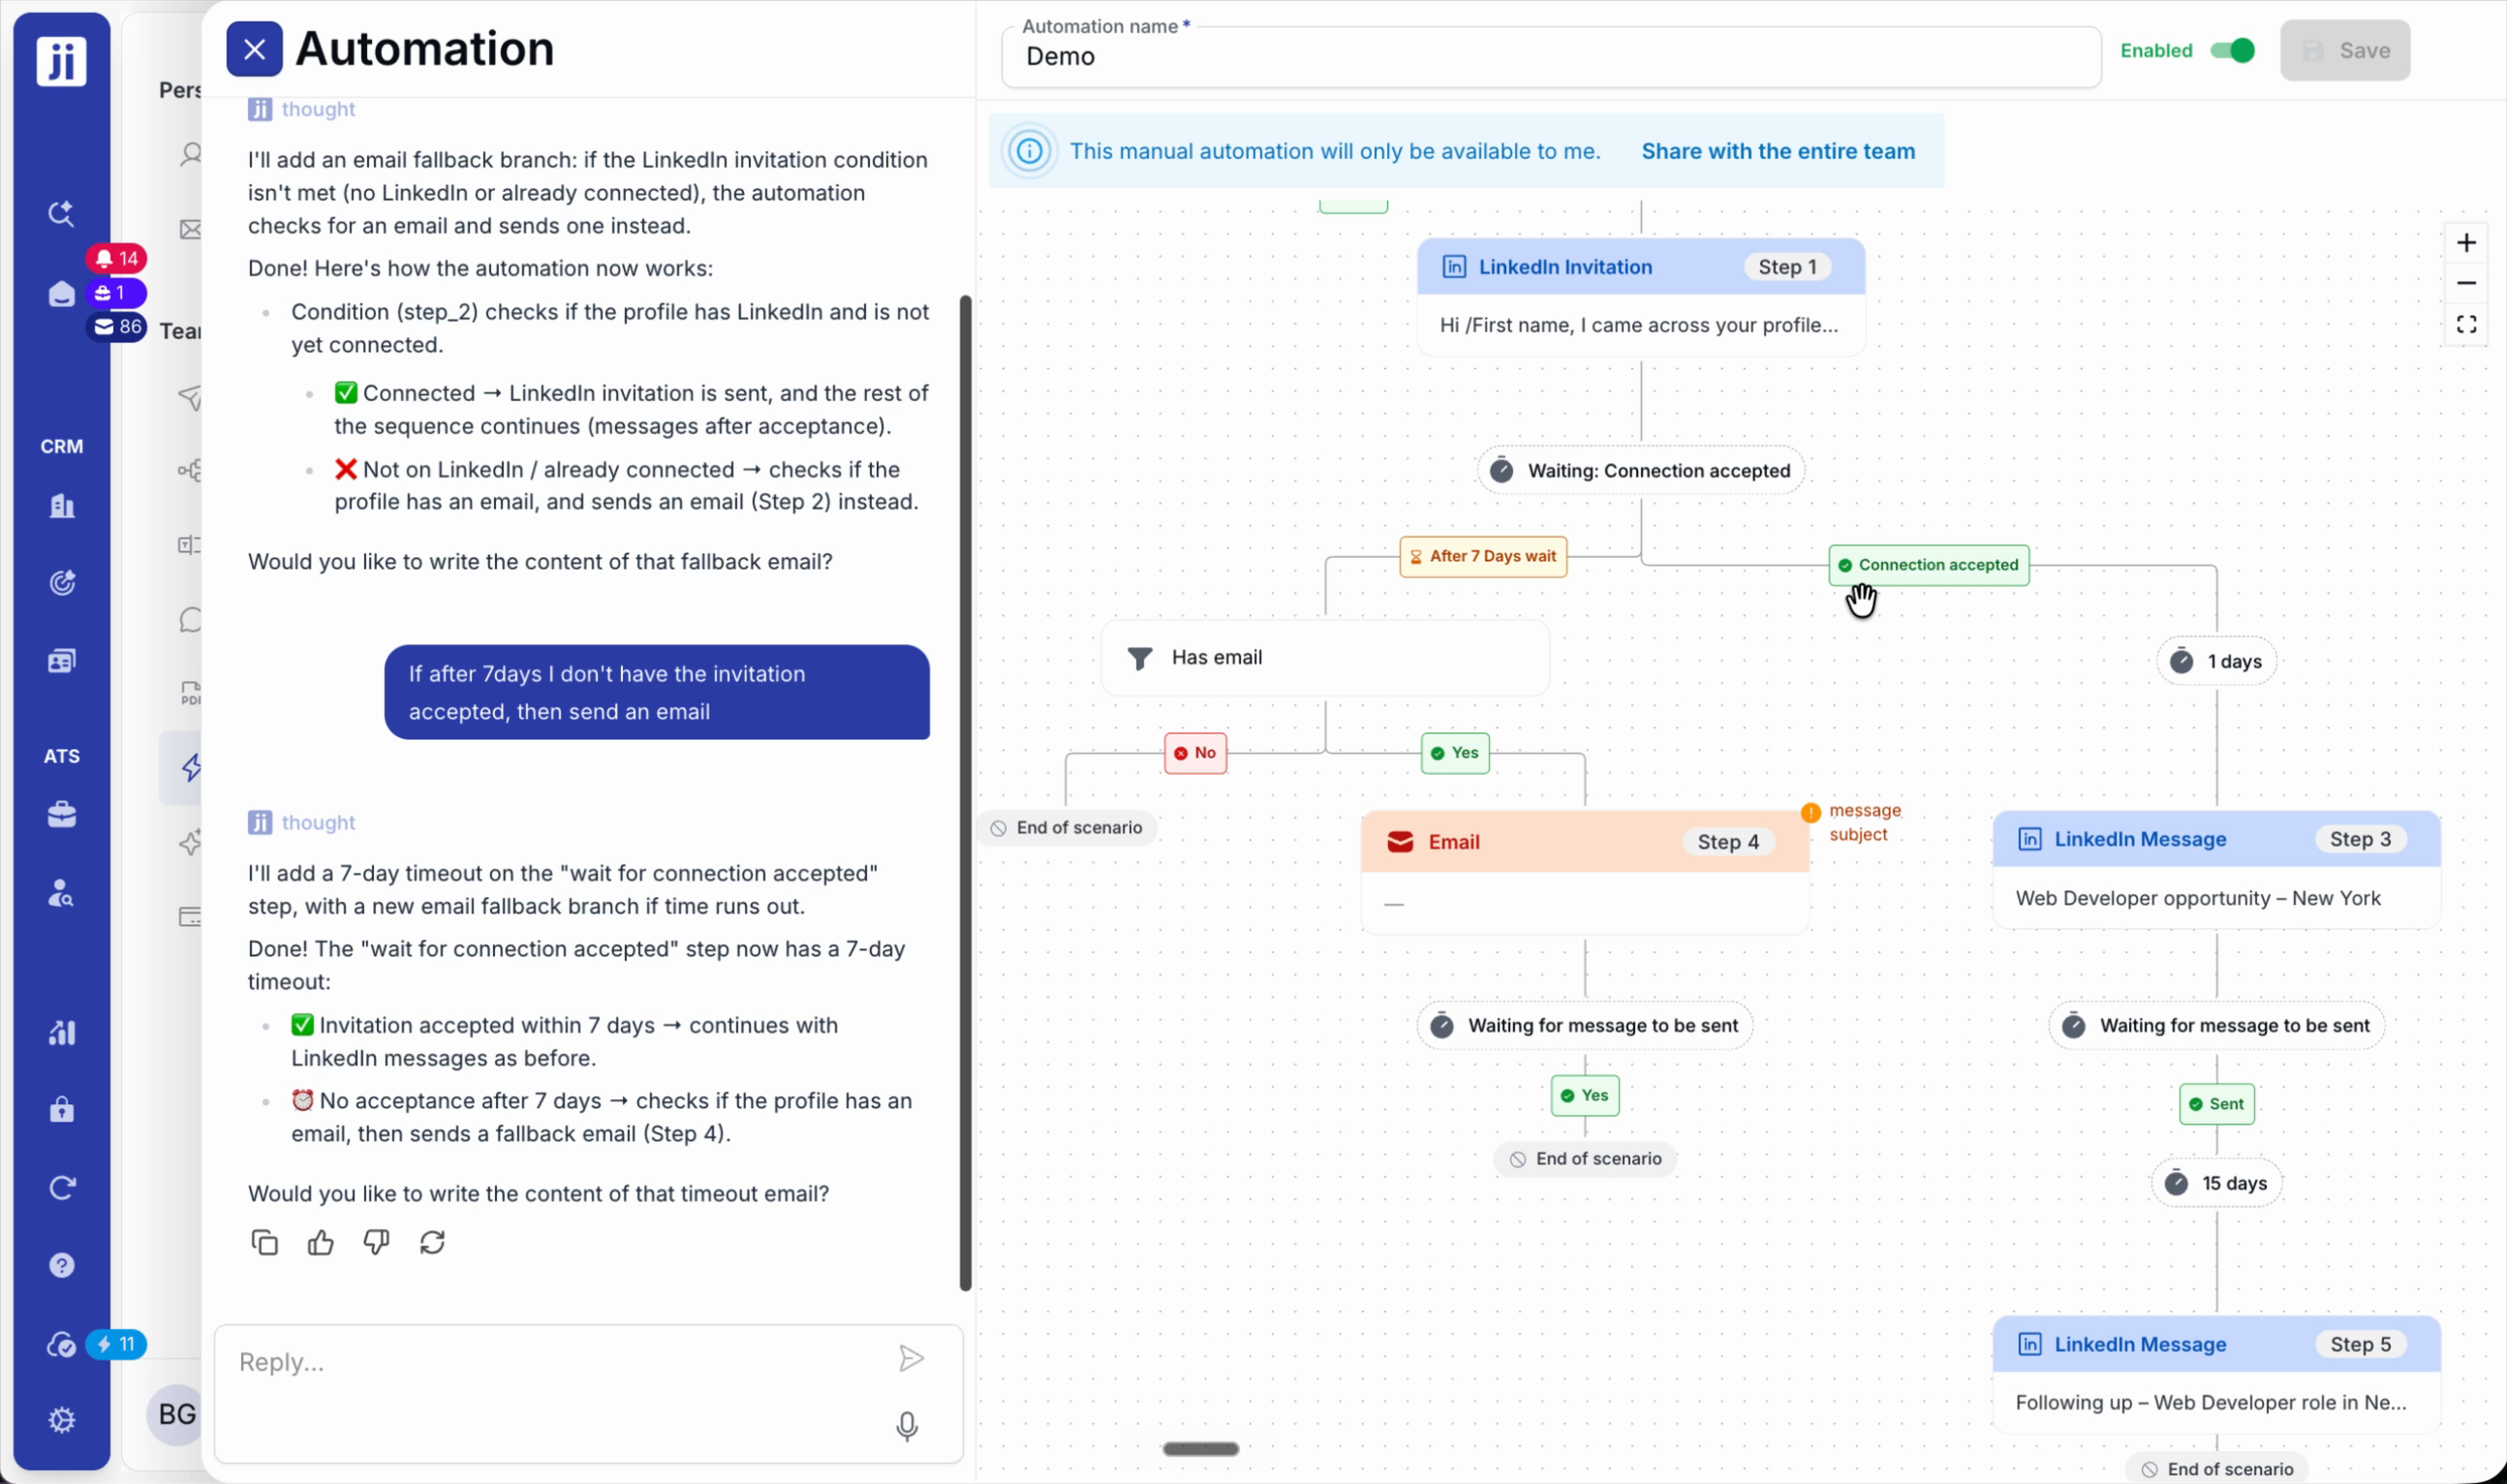
Step 2: Set up alternatives based on profile status or elapsed time (e.g. follow up via another channel after 7 days without a reply).

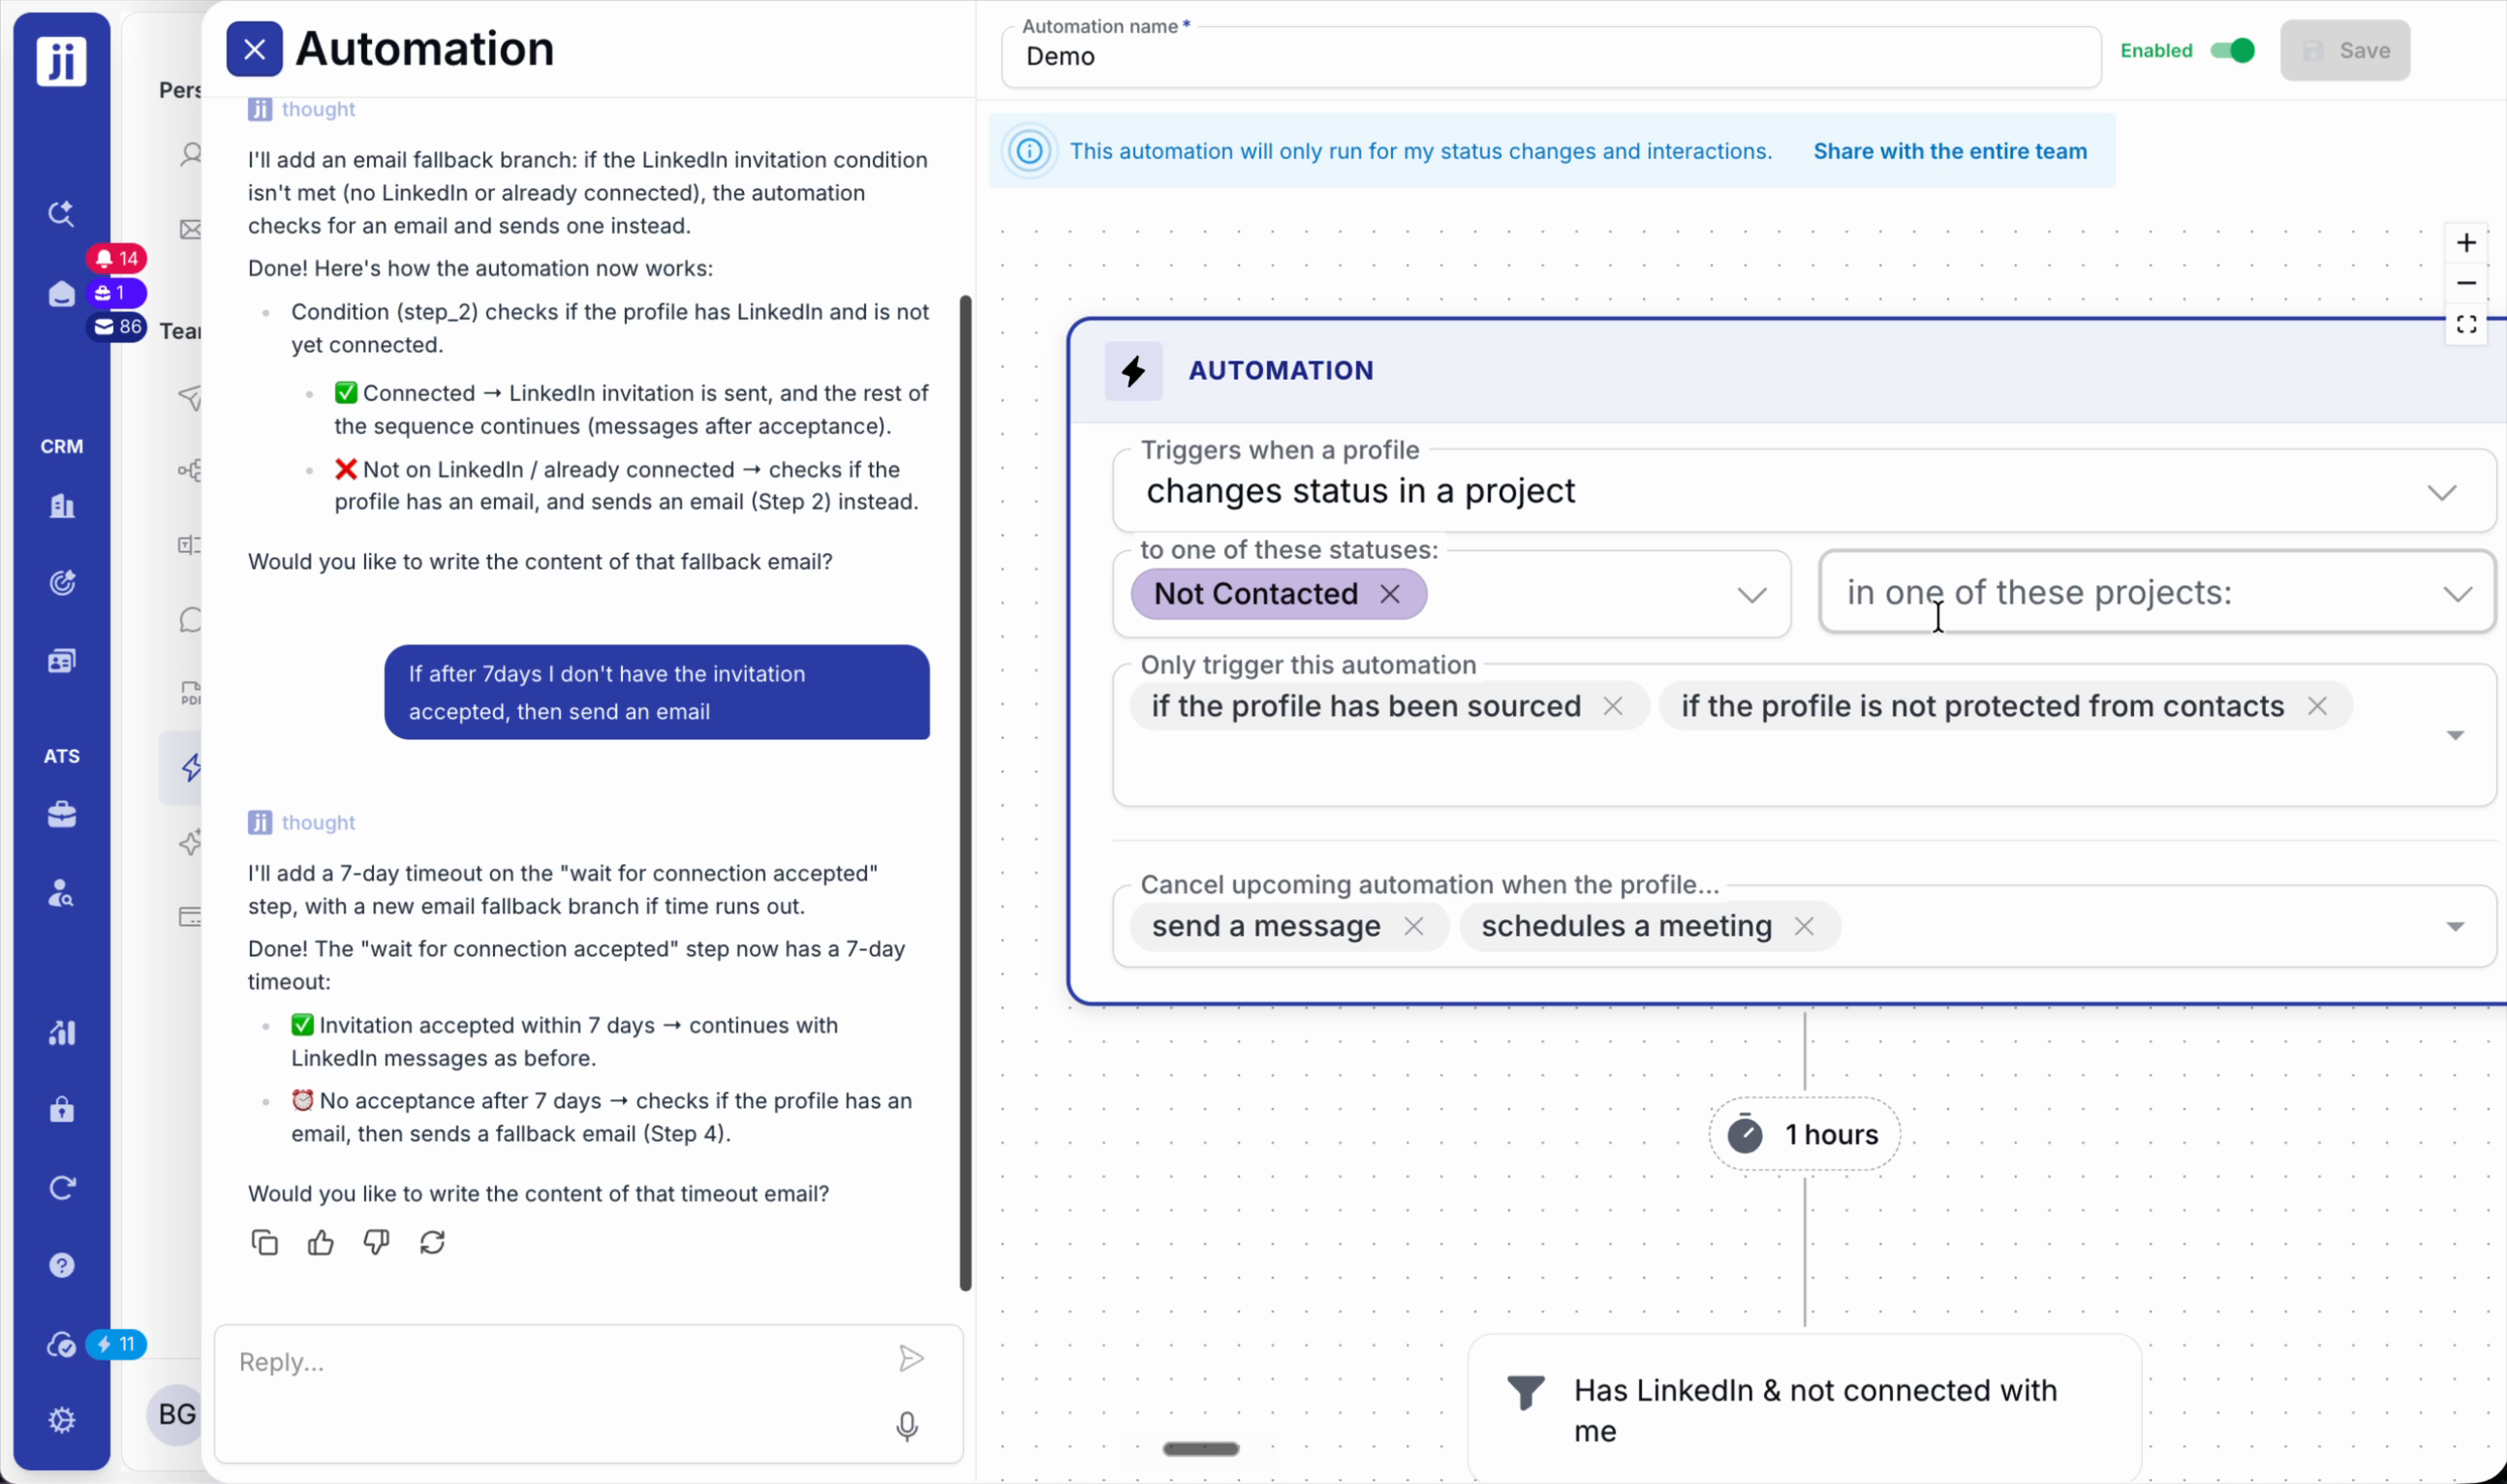
Advanced triggers: status and interactions
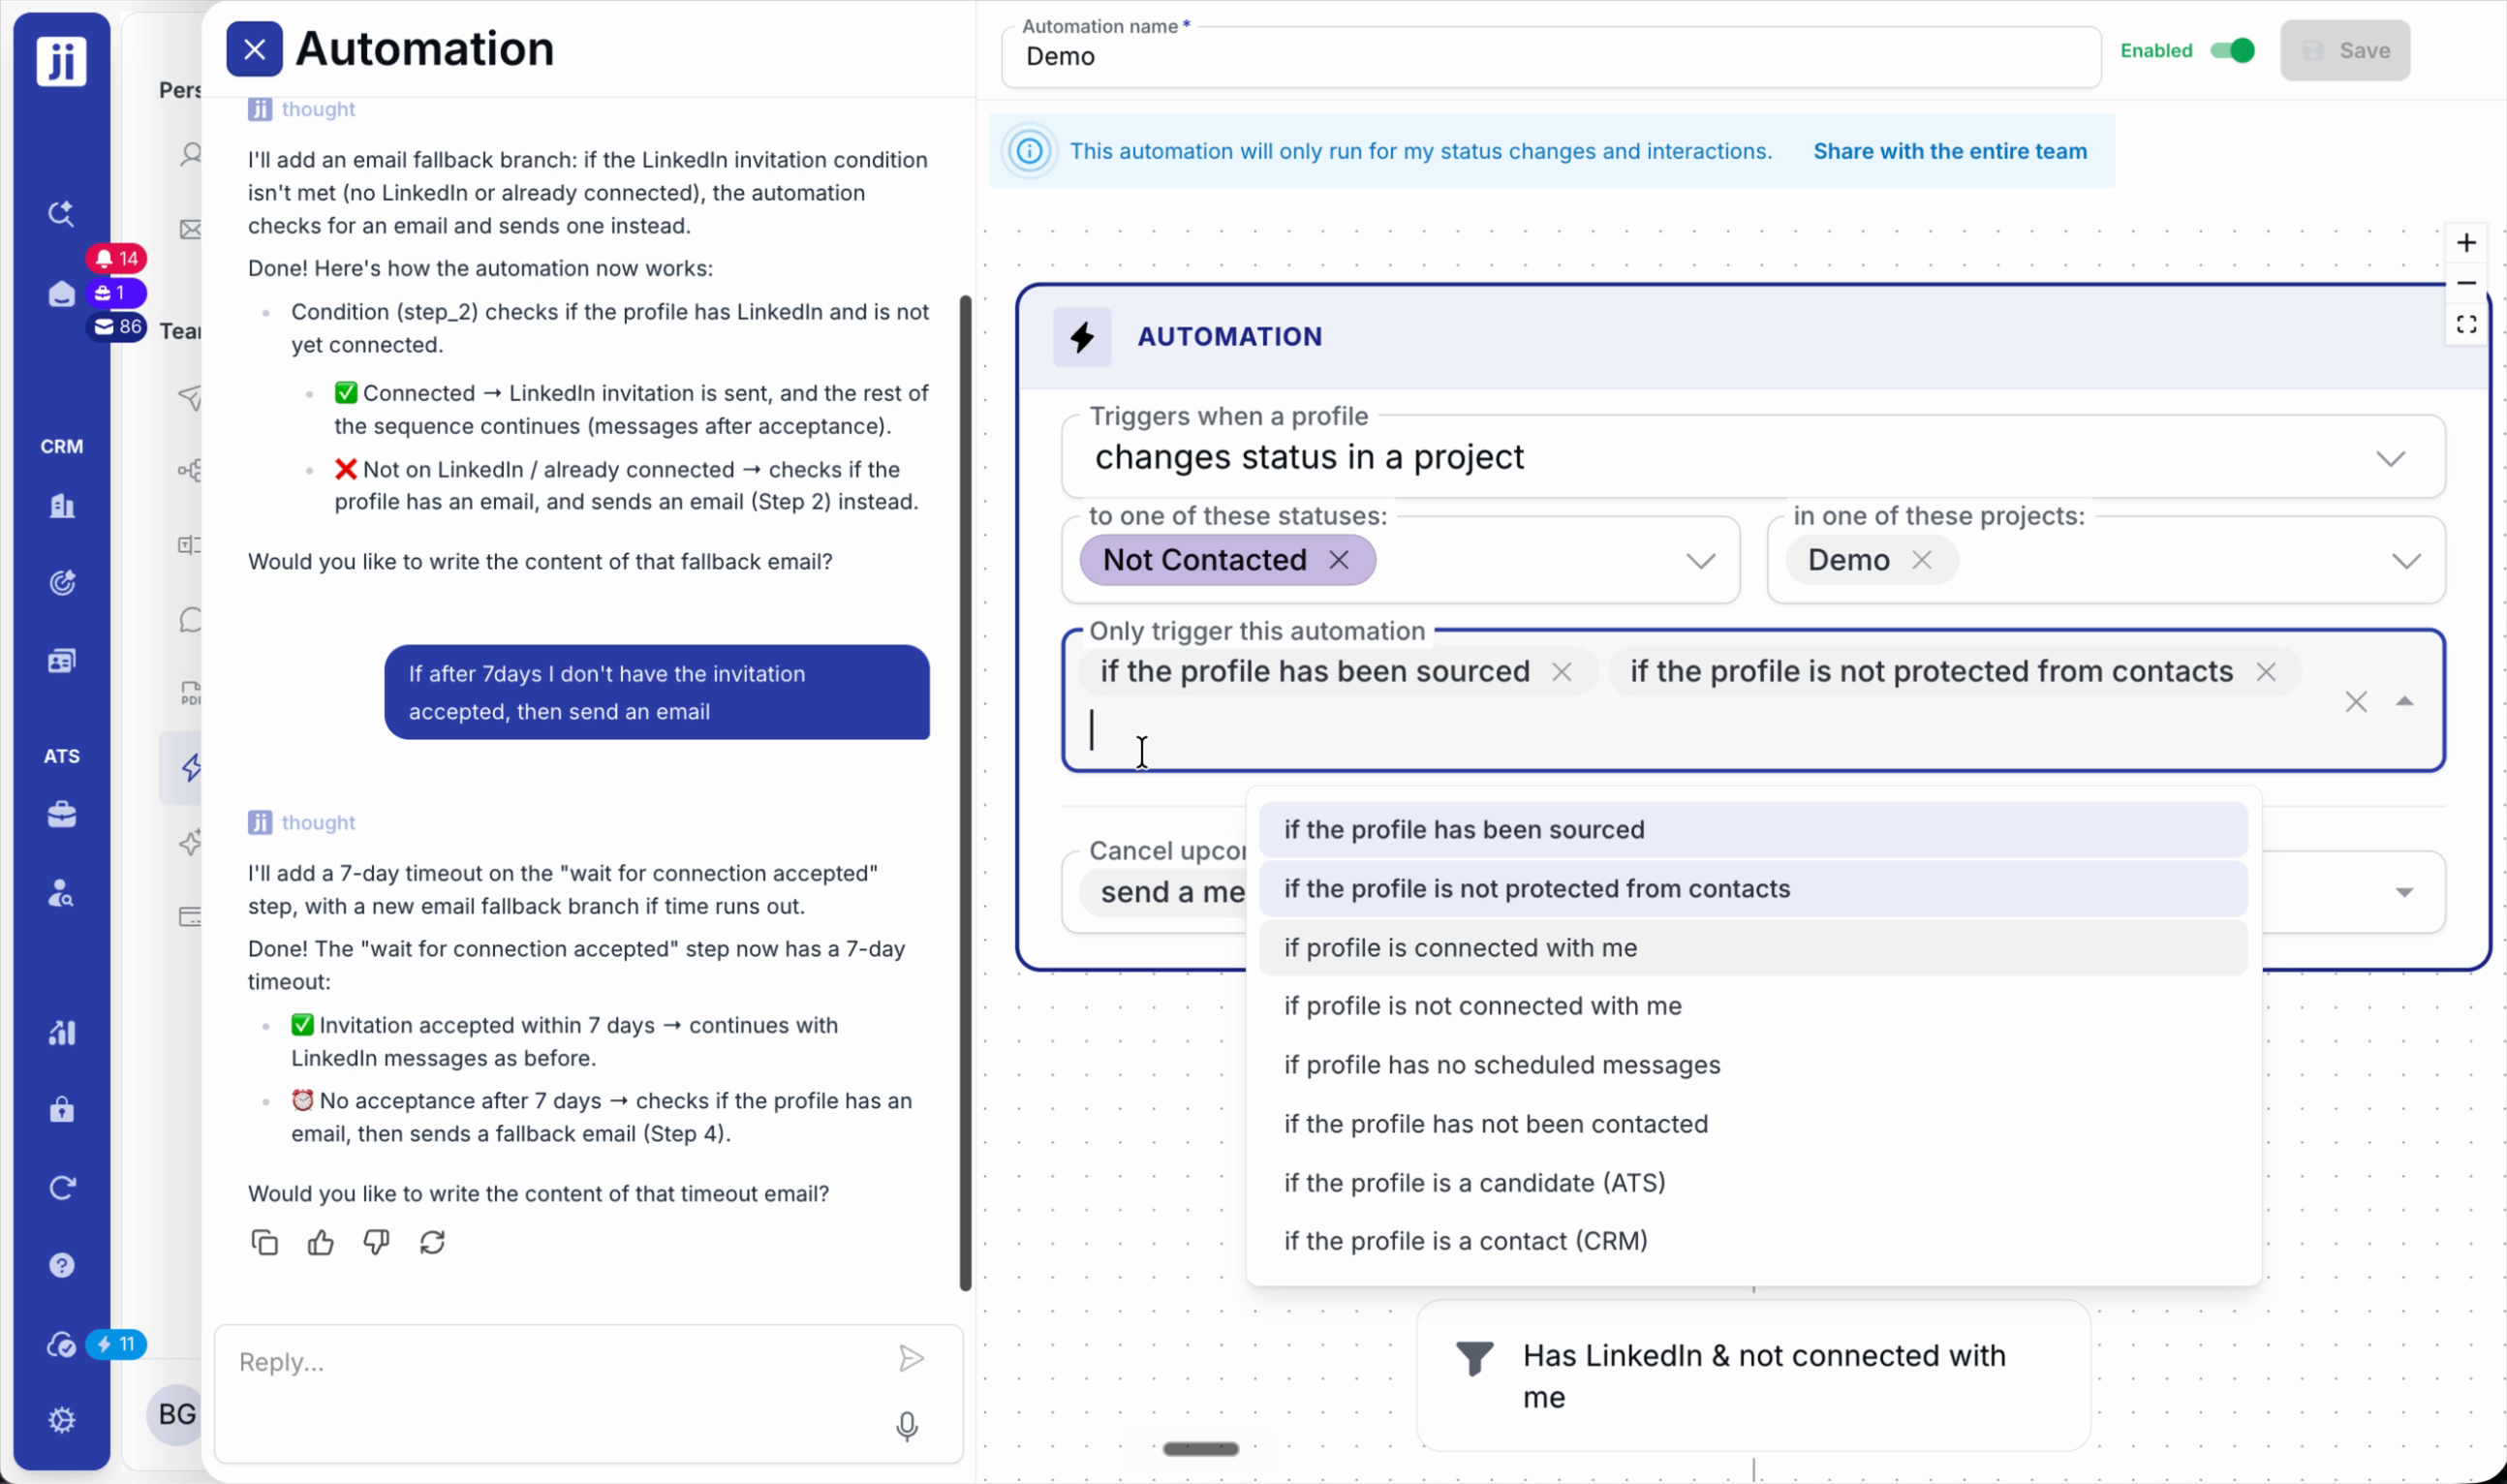
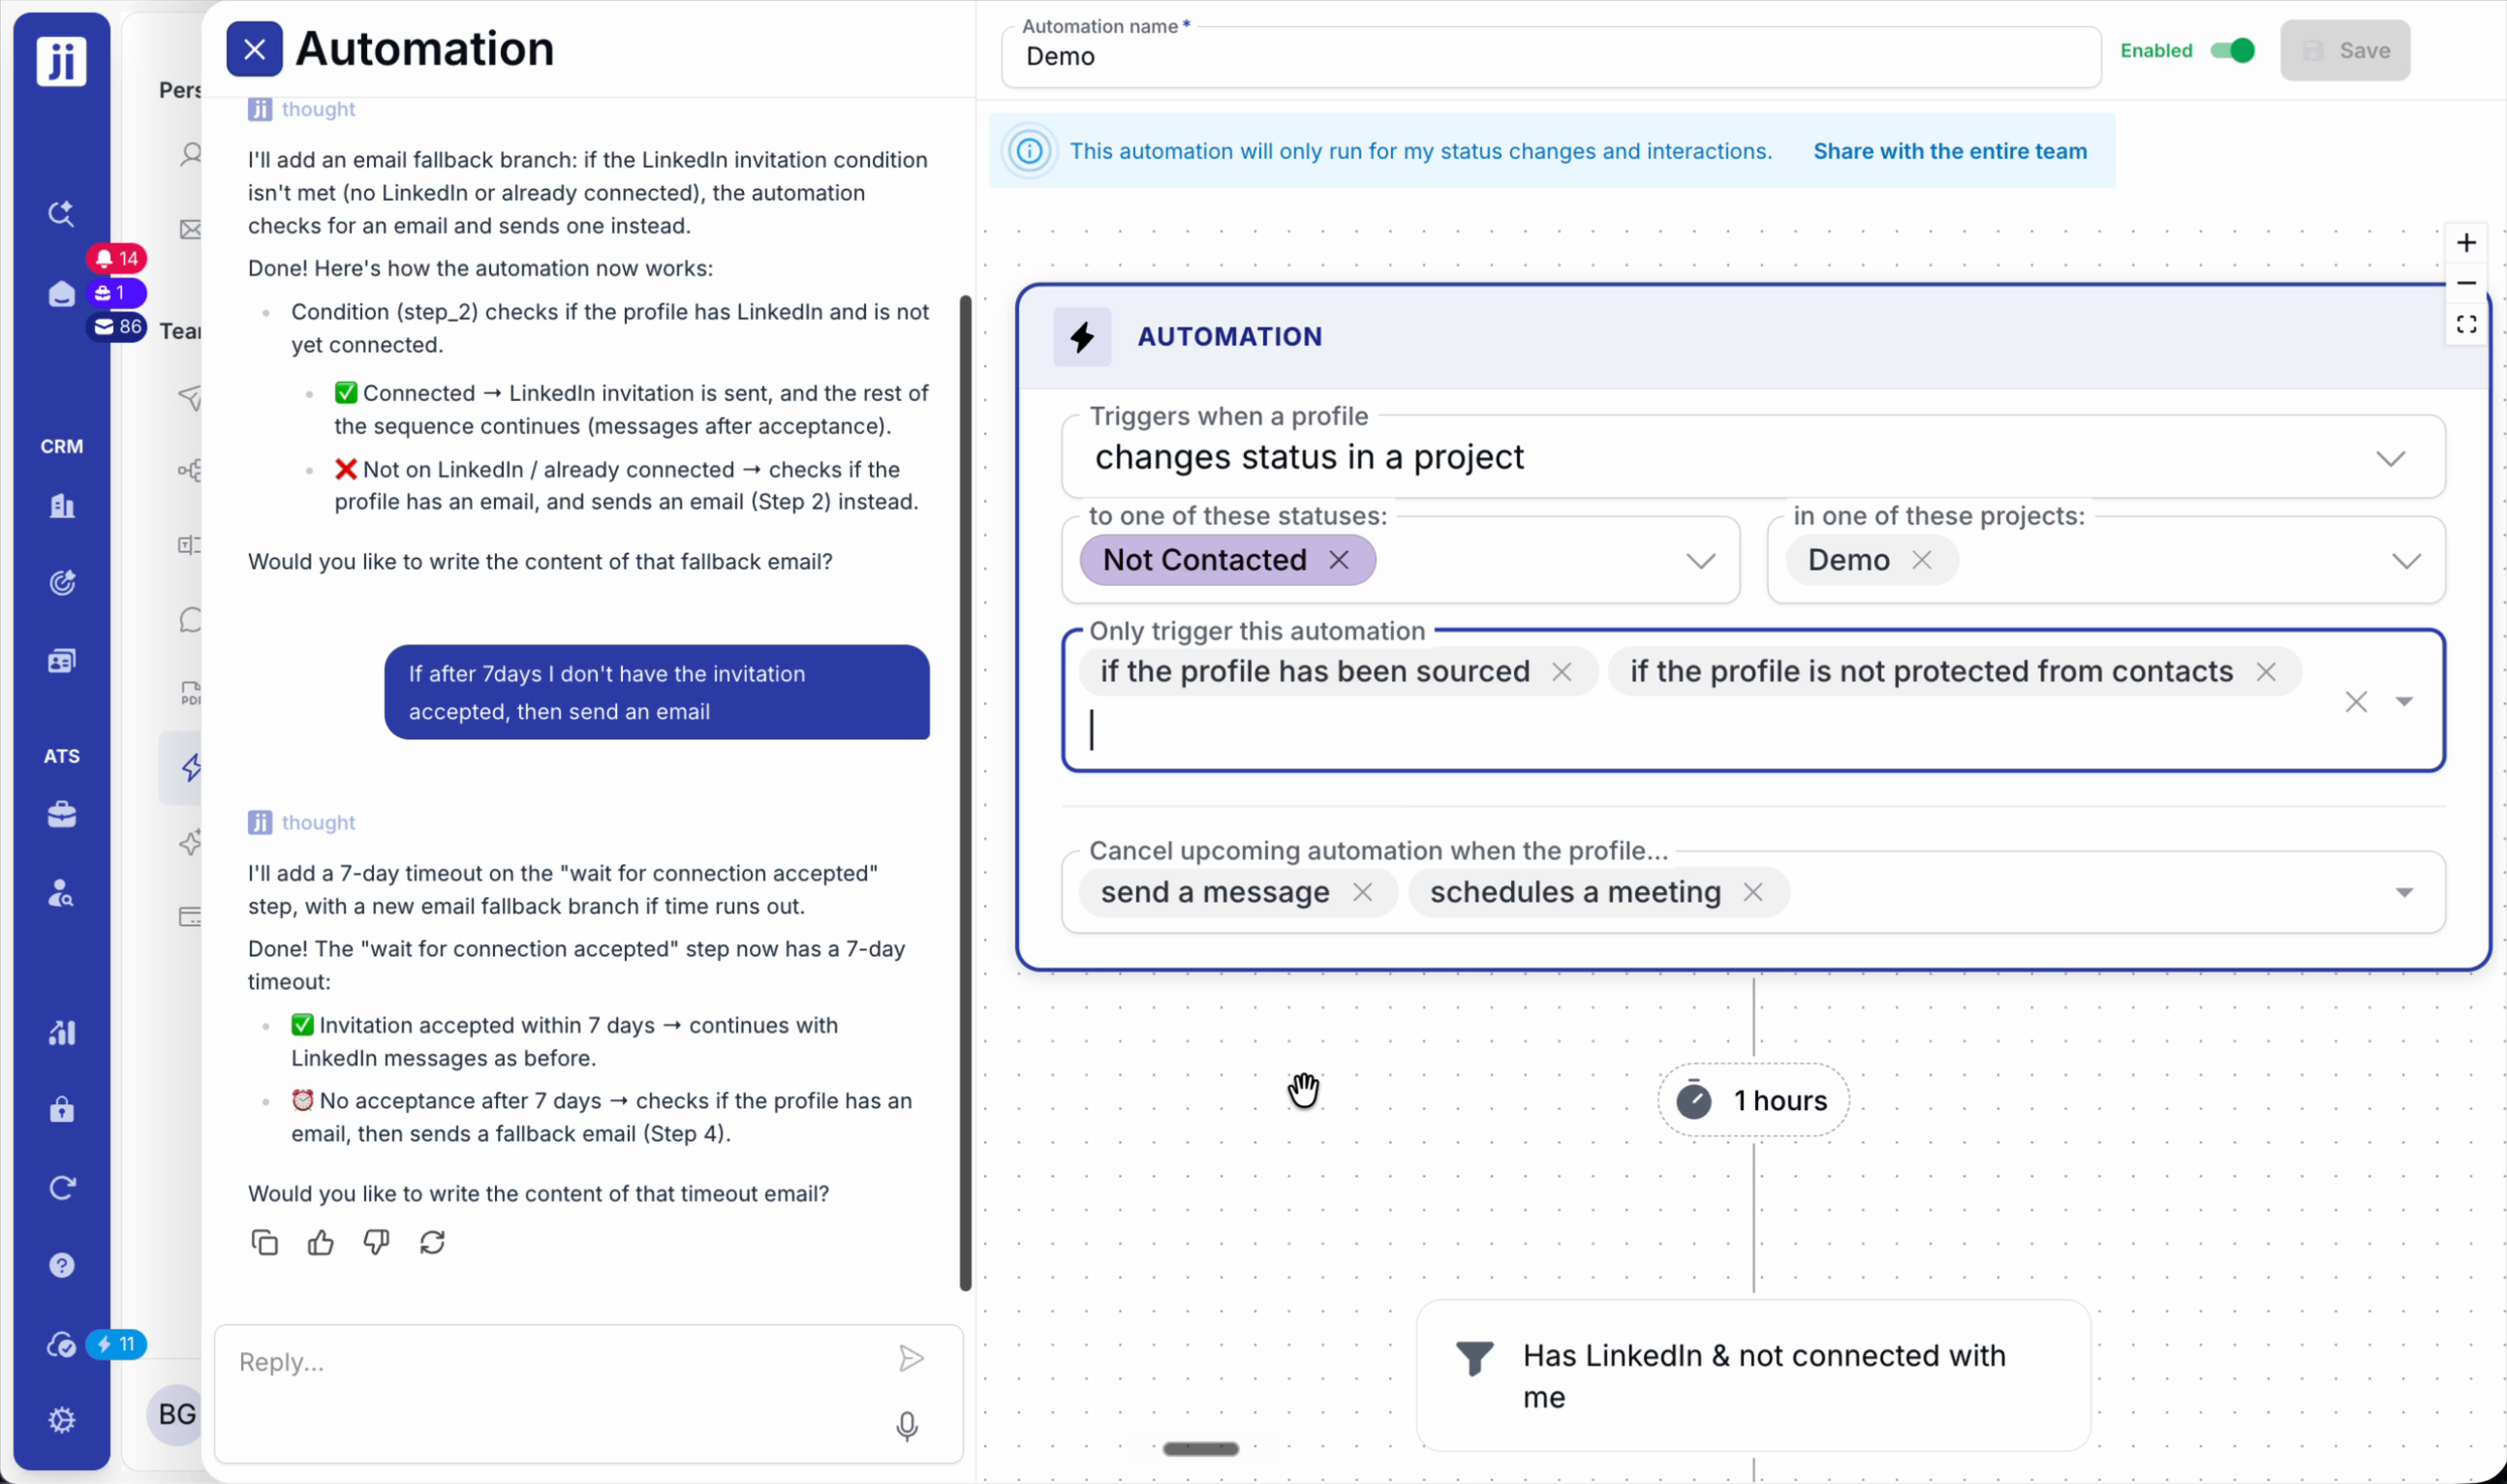
Step 1: Choose automatic triggering when a profile’s status changes in a project.

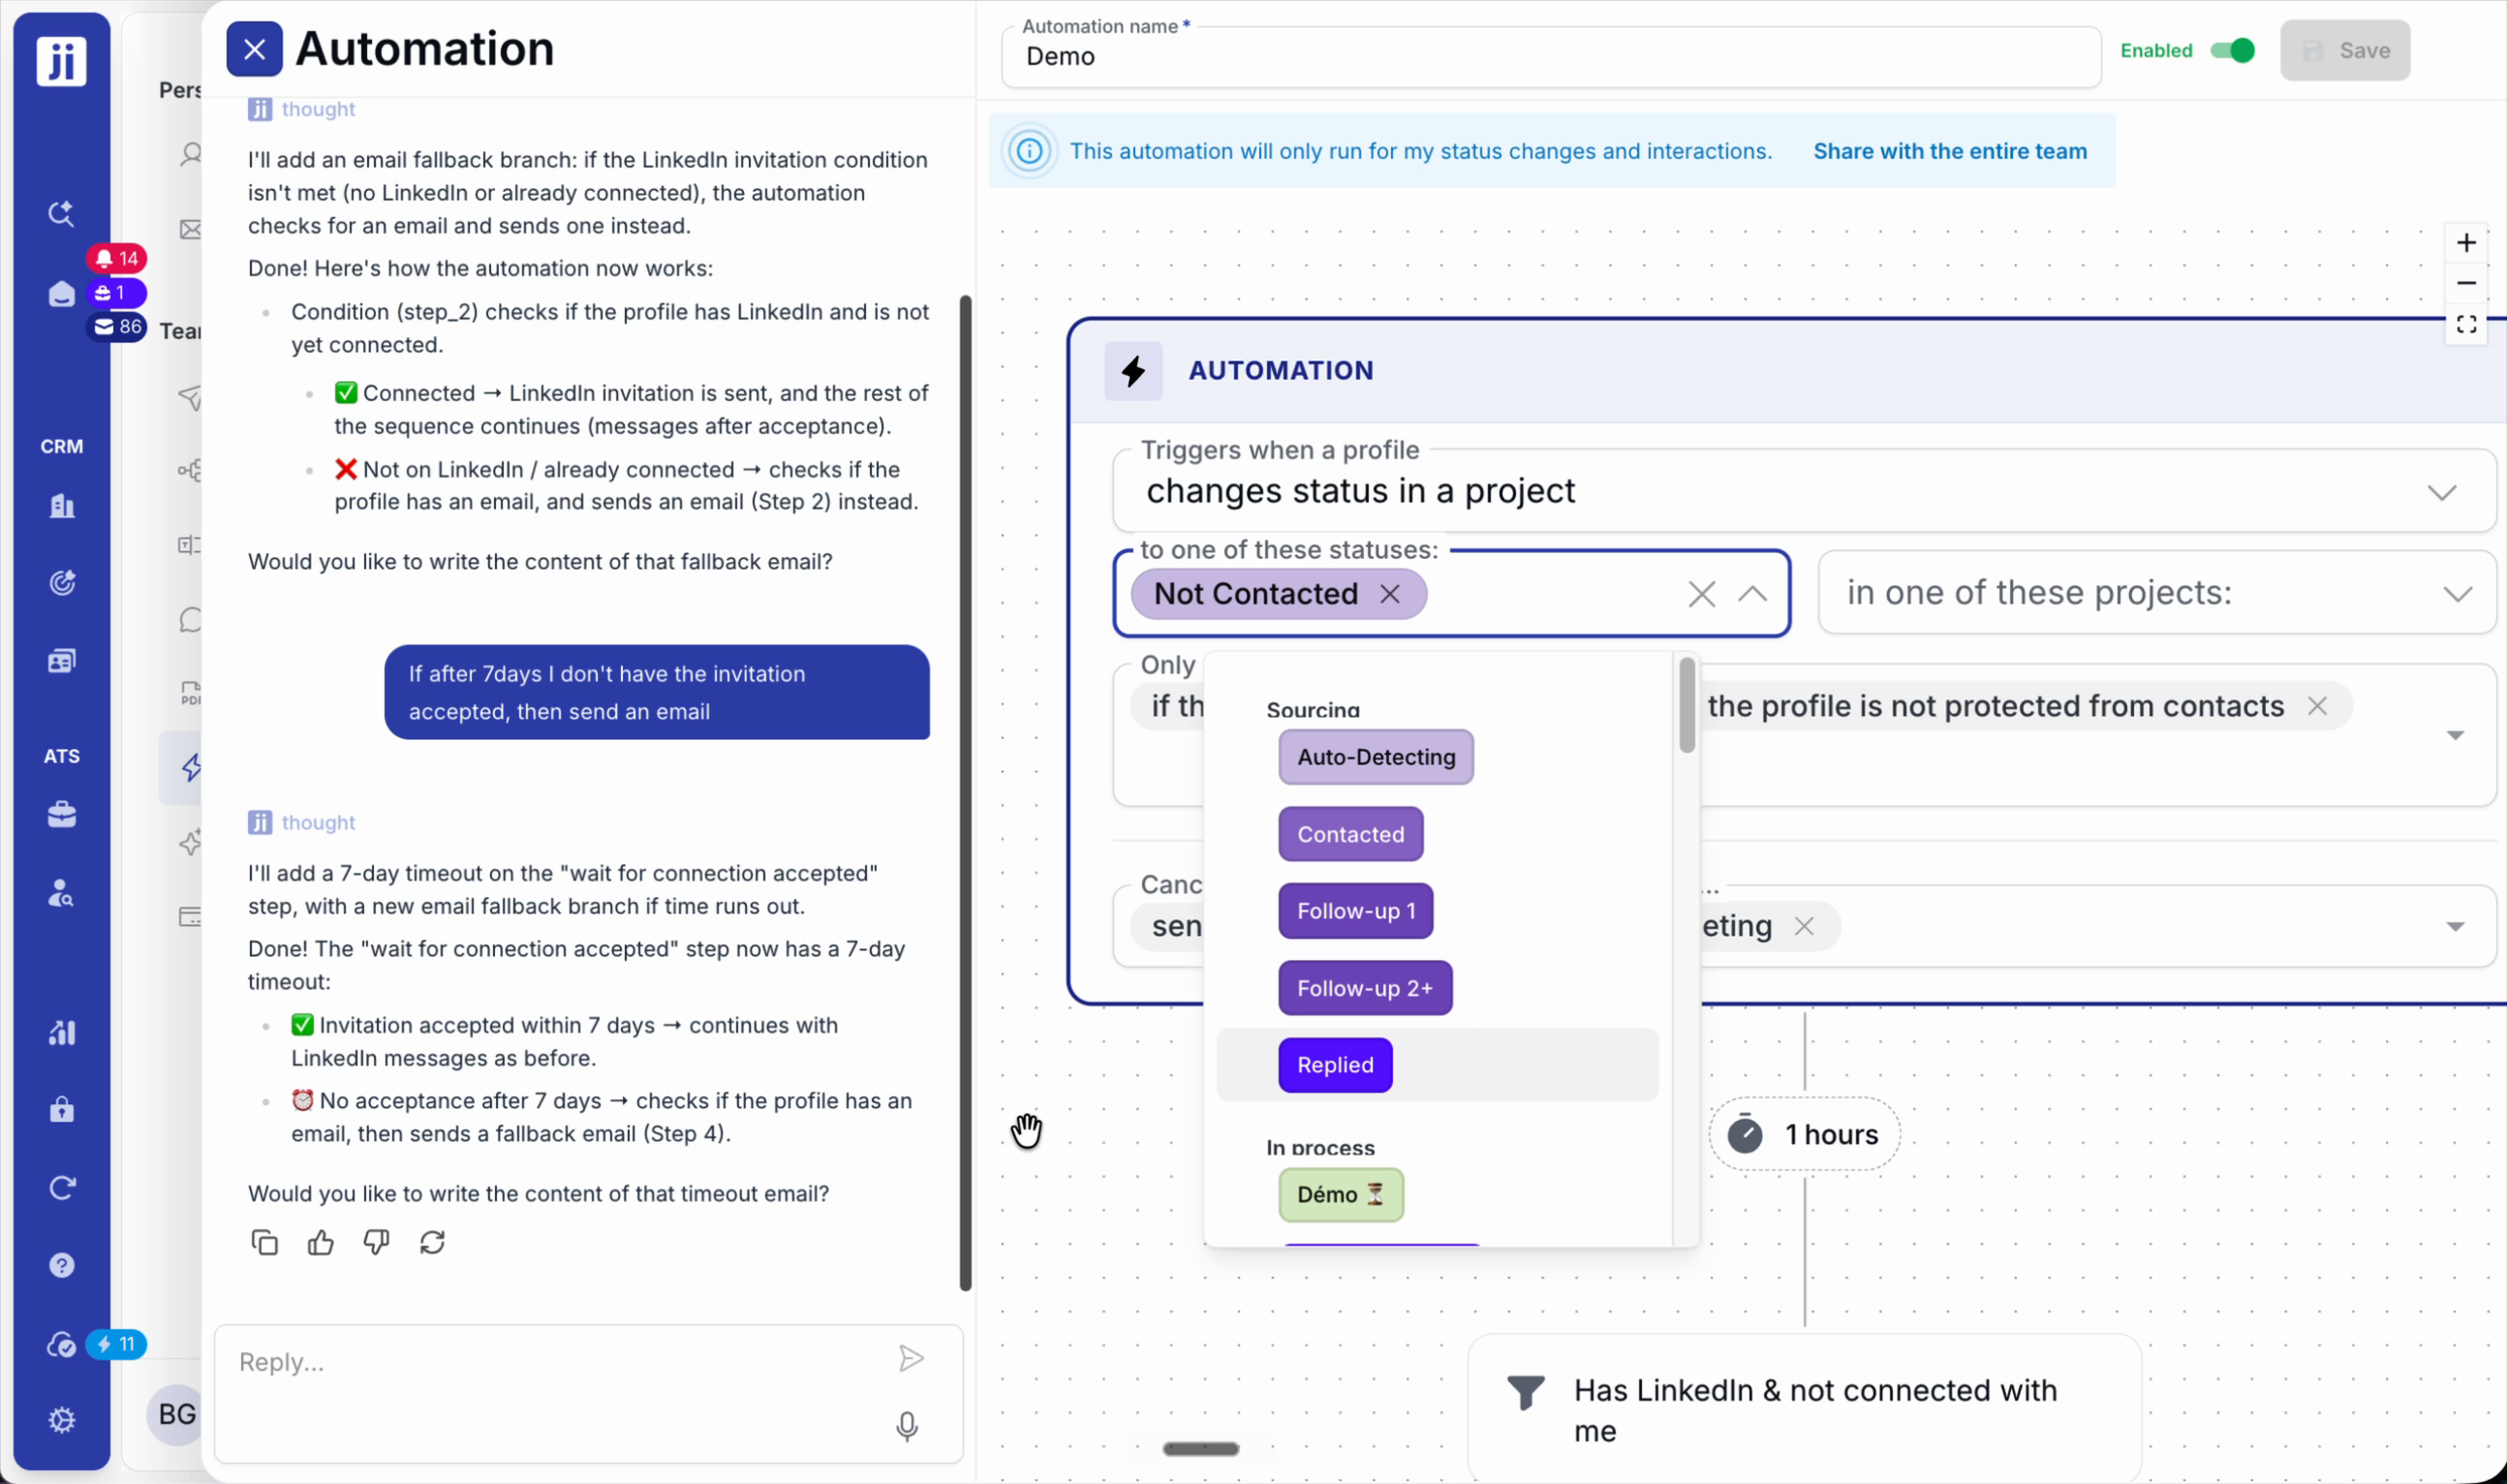
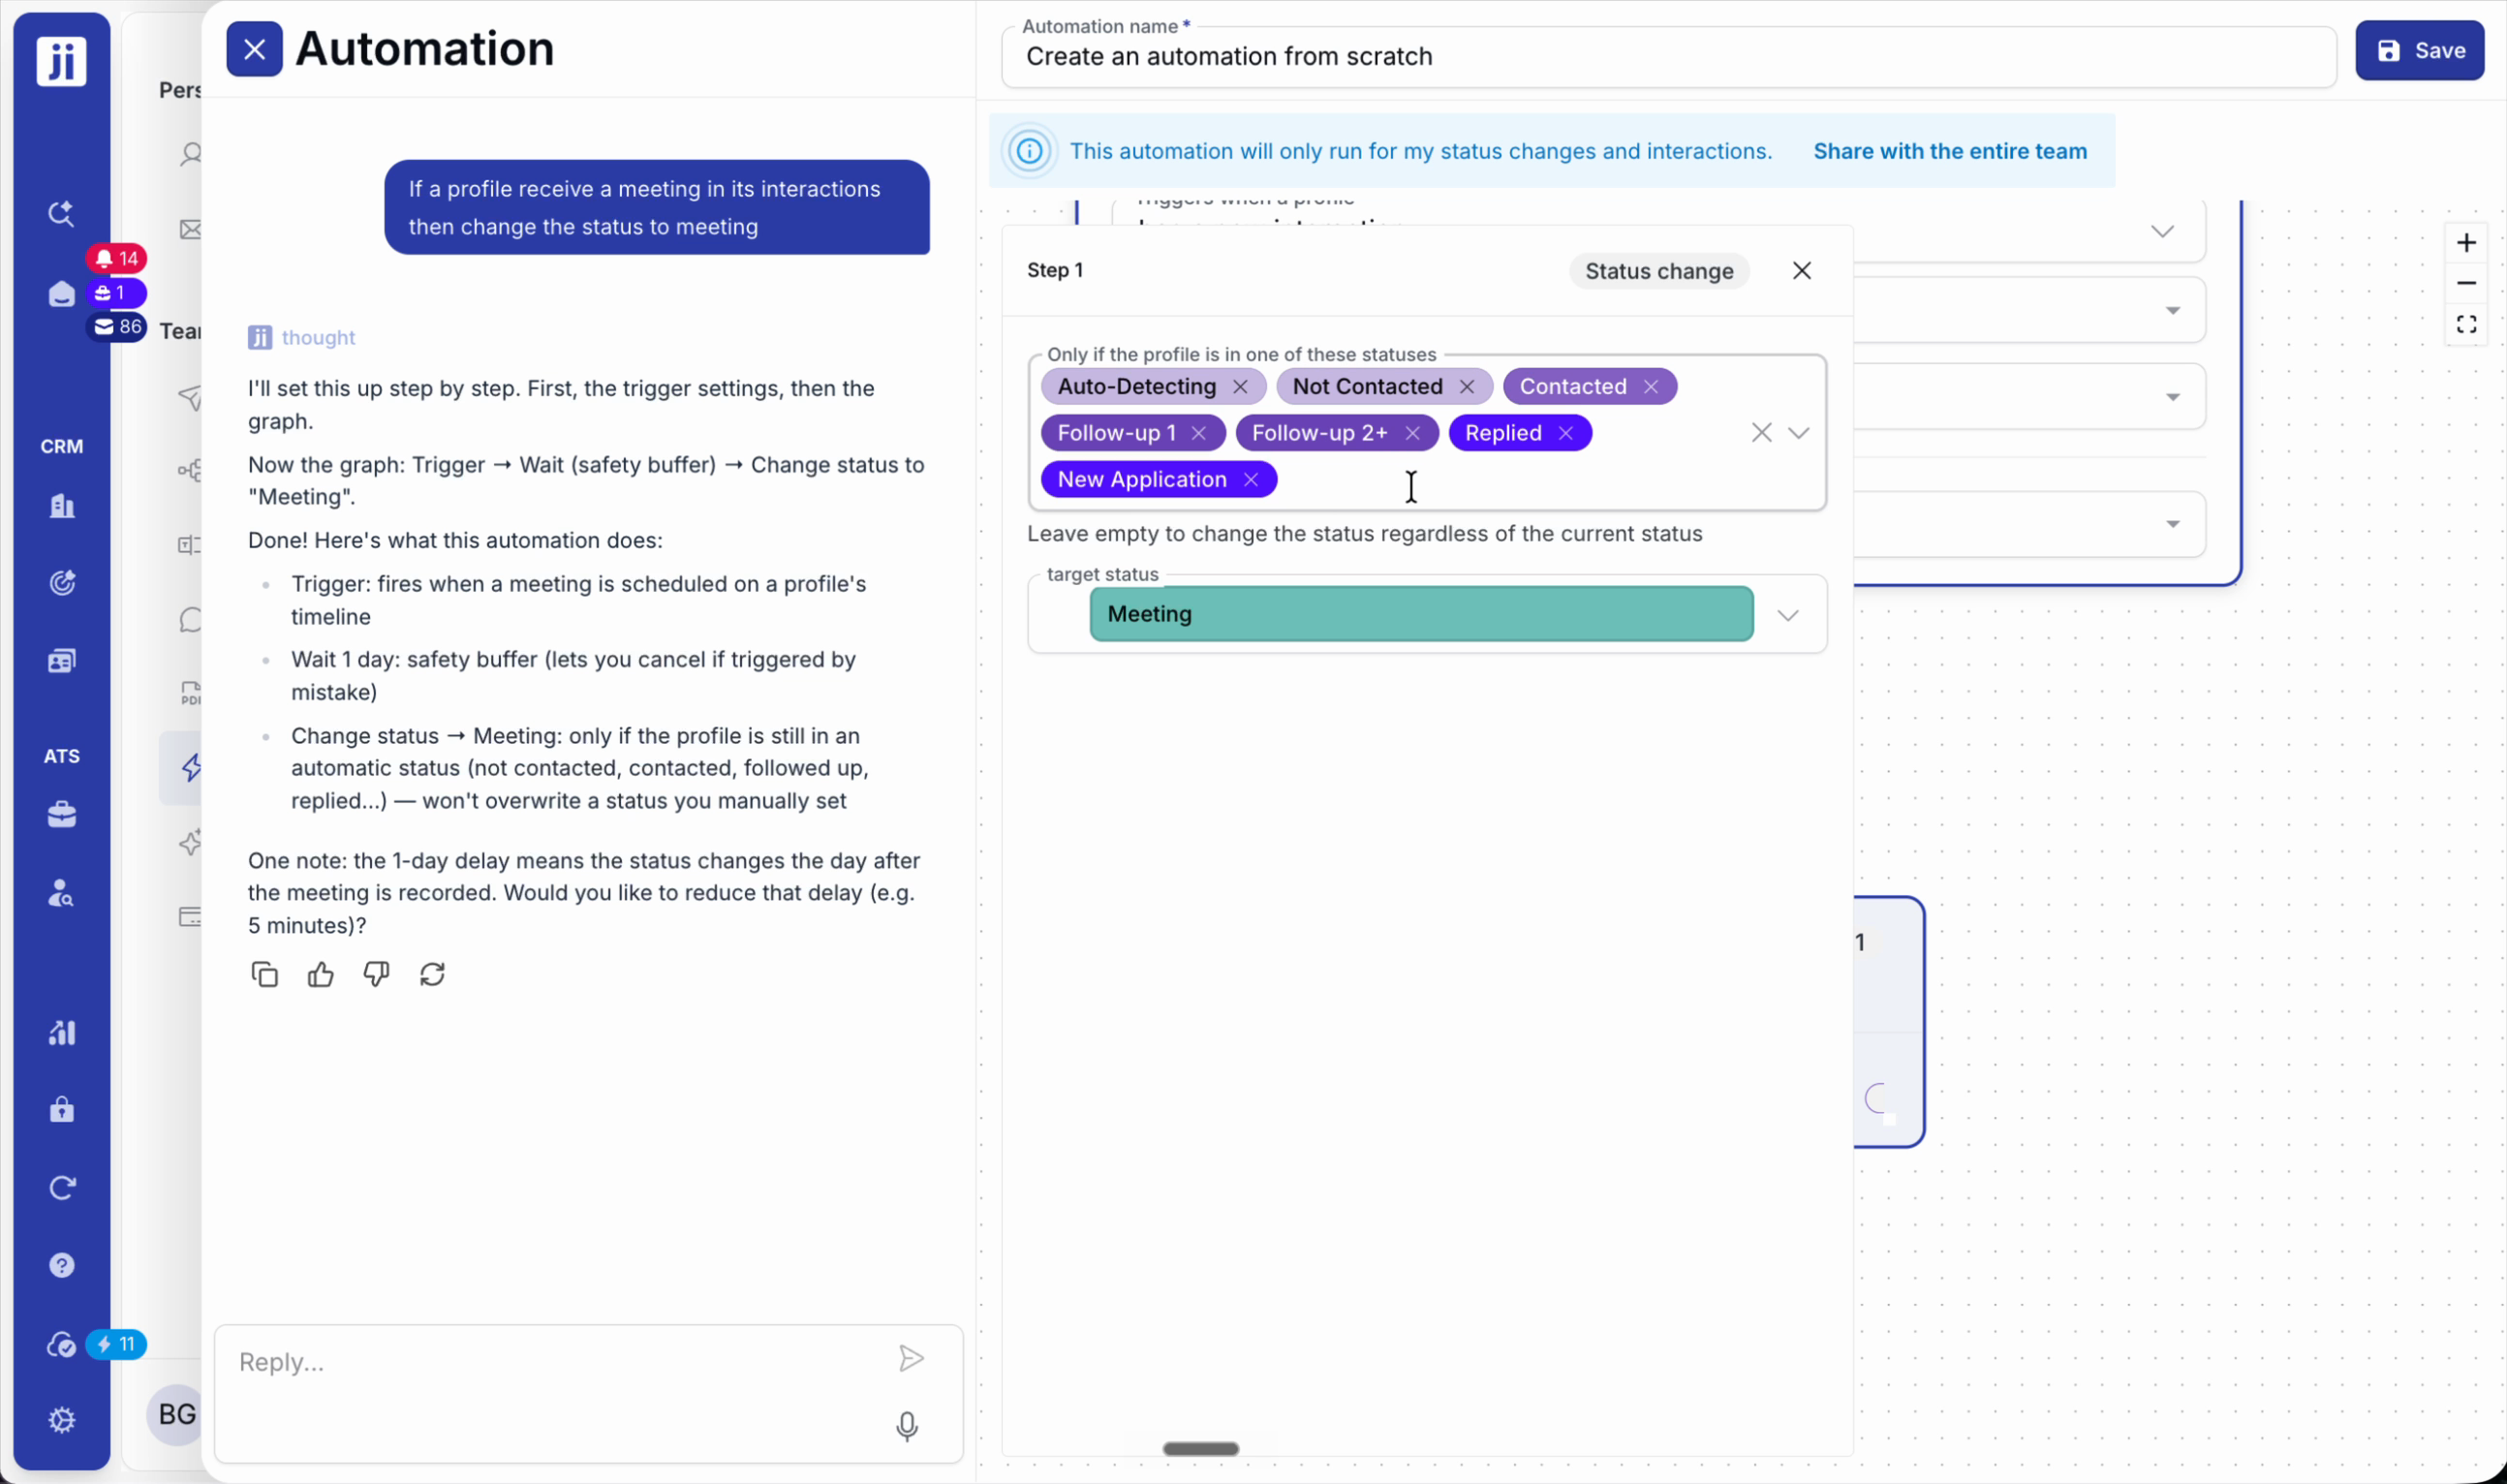
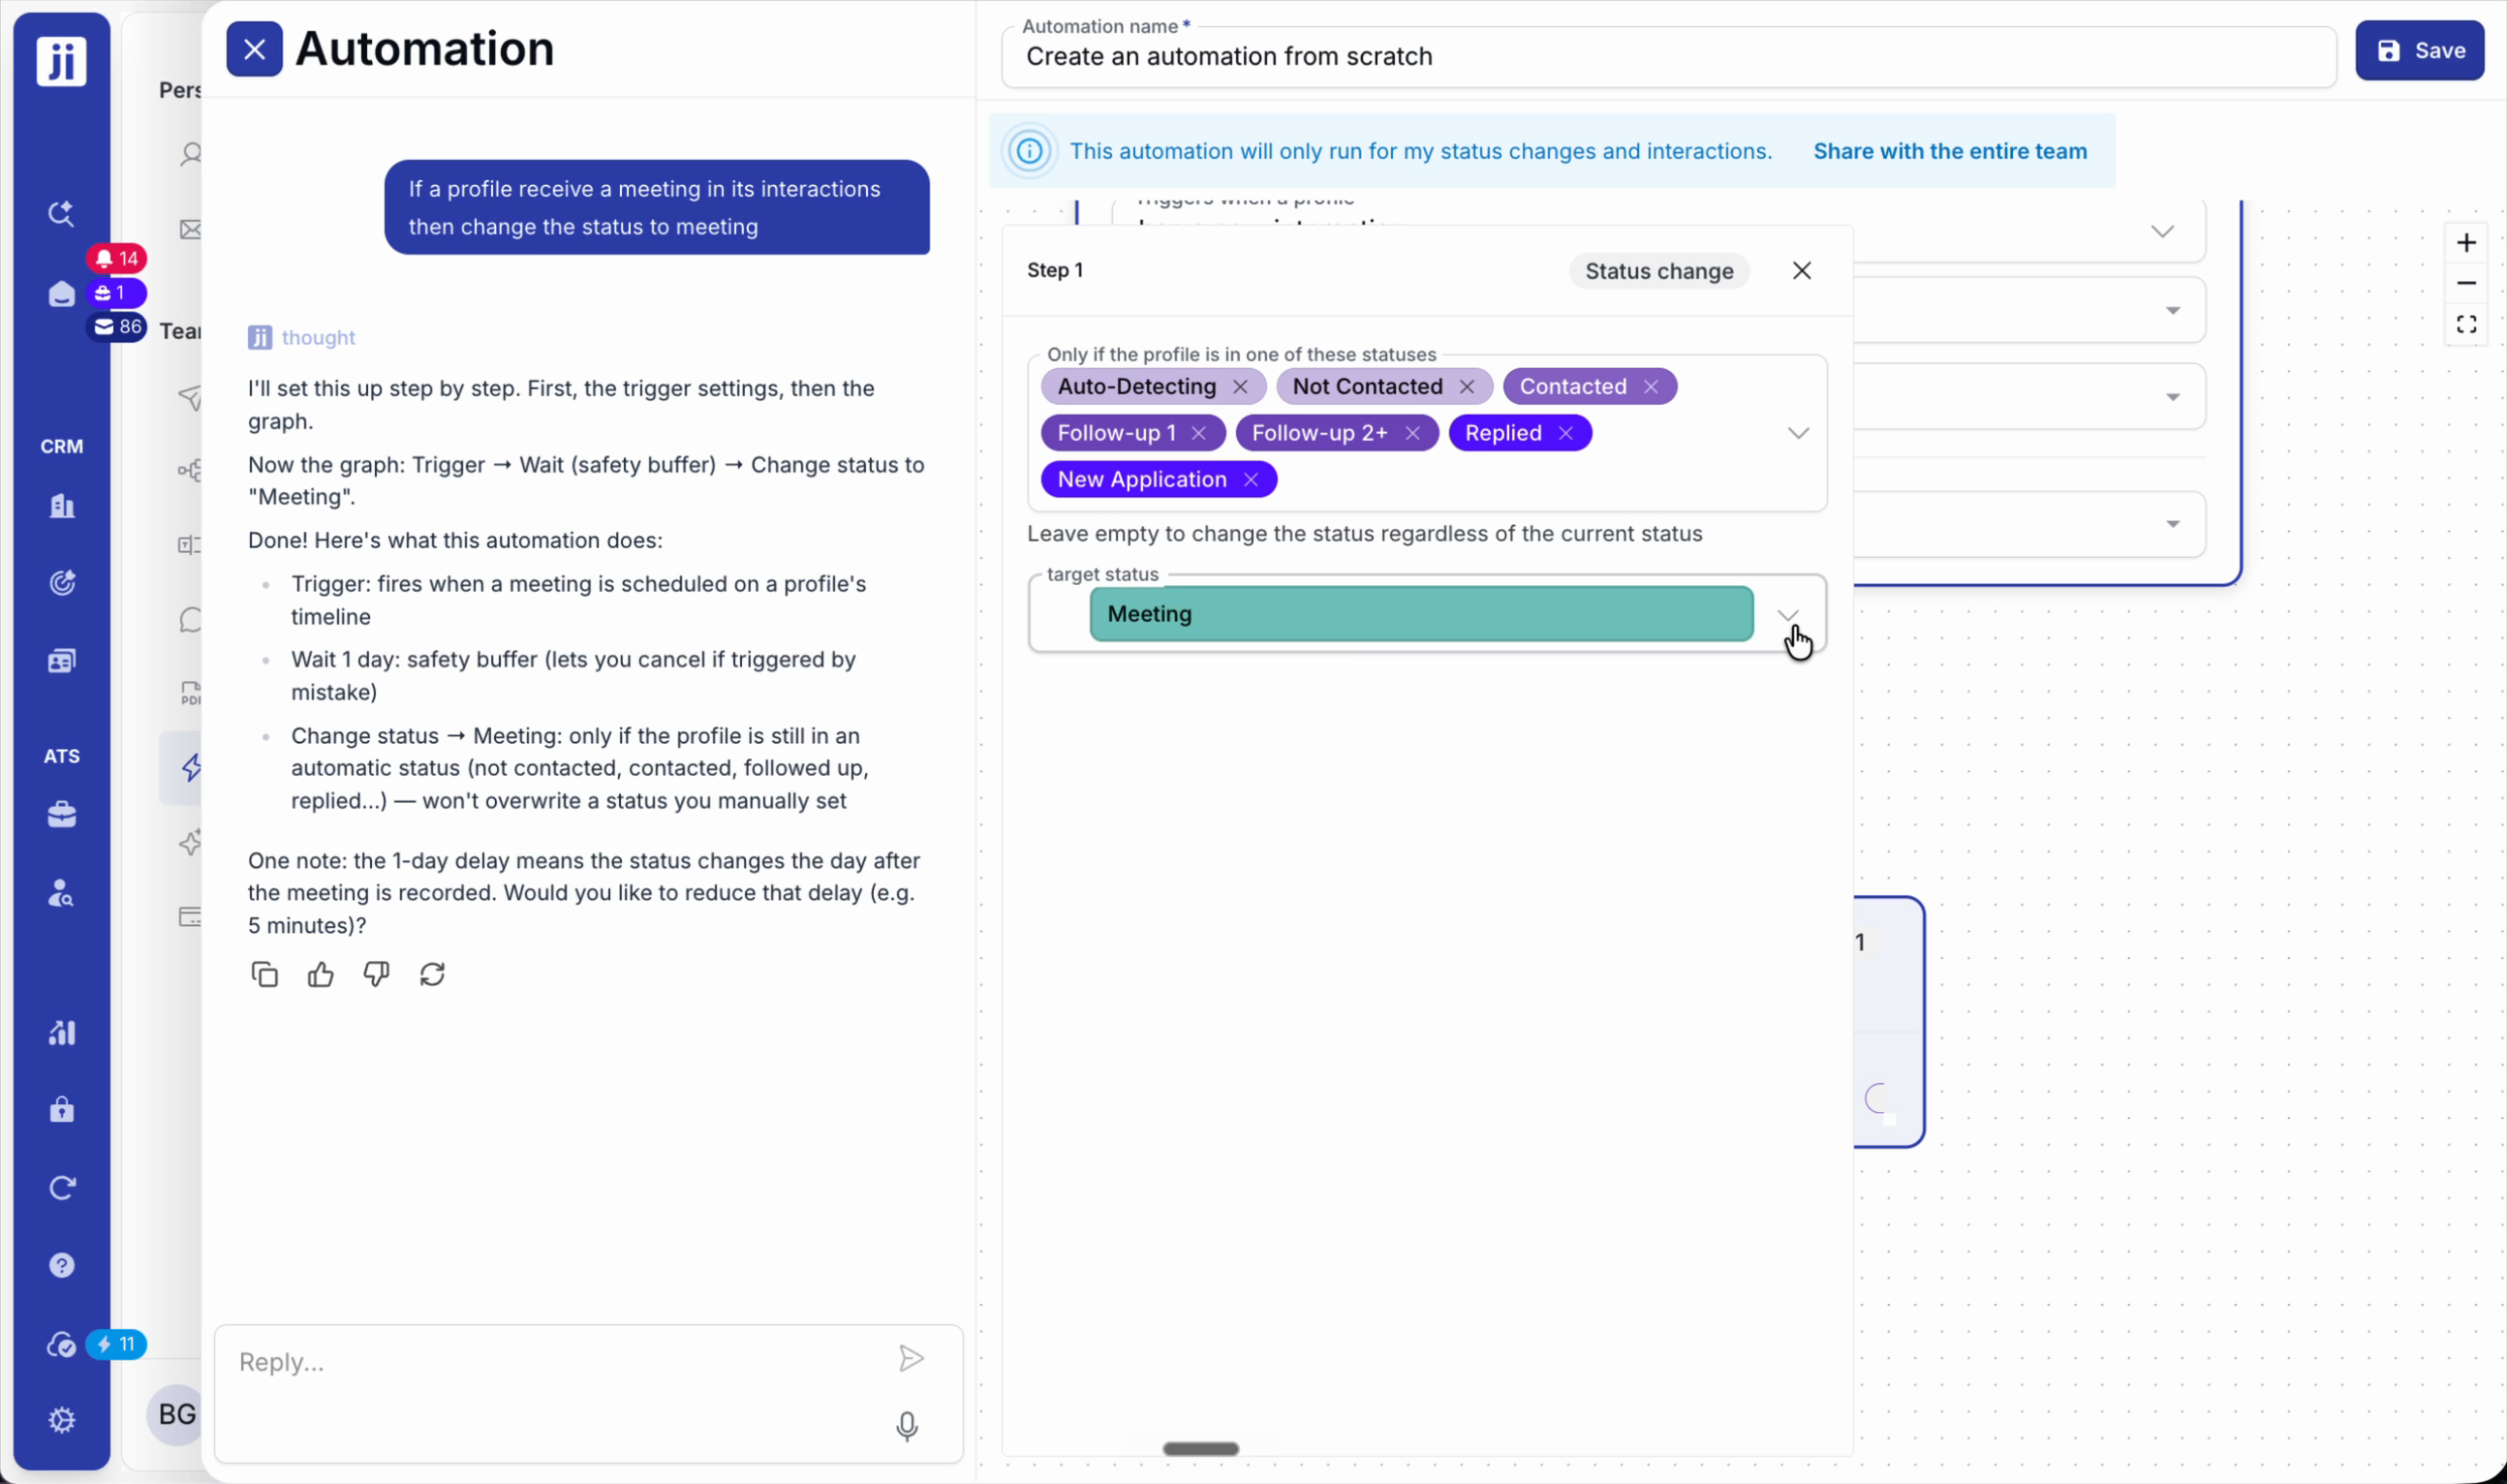
Step 2: Restrict the sequence to certain statuses or projects to avoid errors and keep actions relevant.
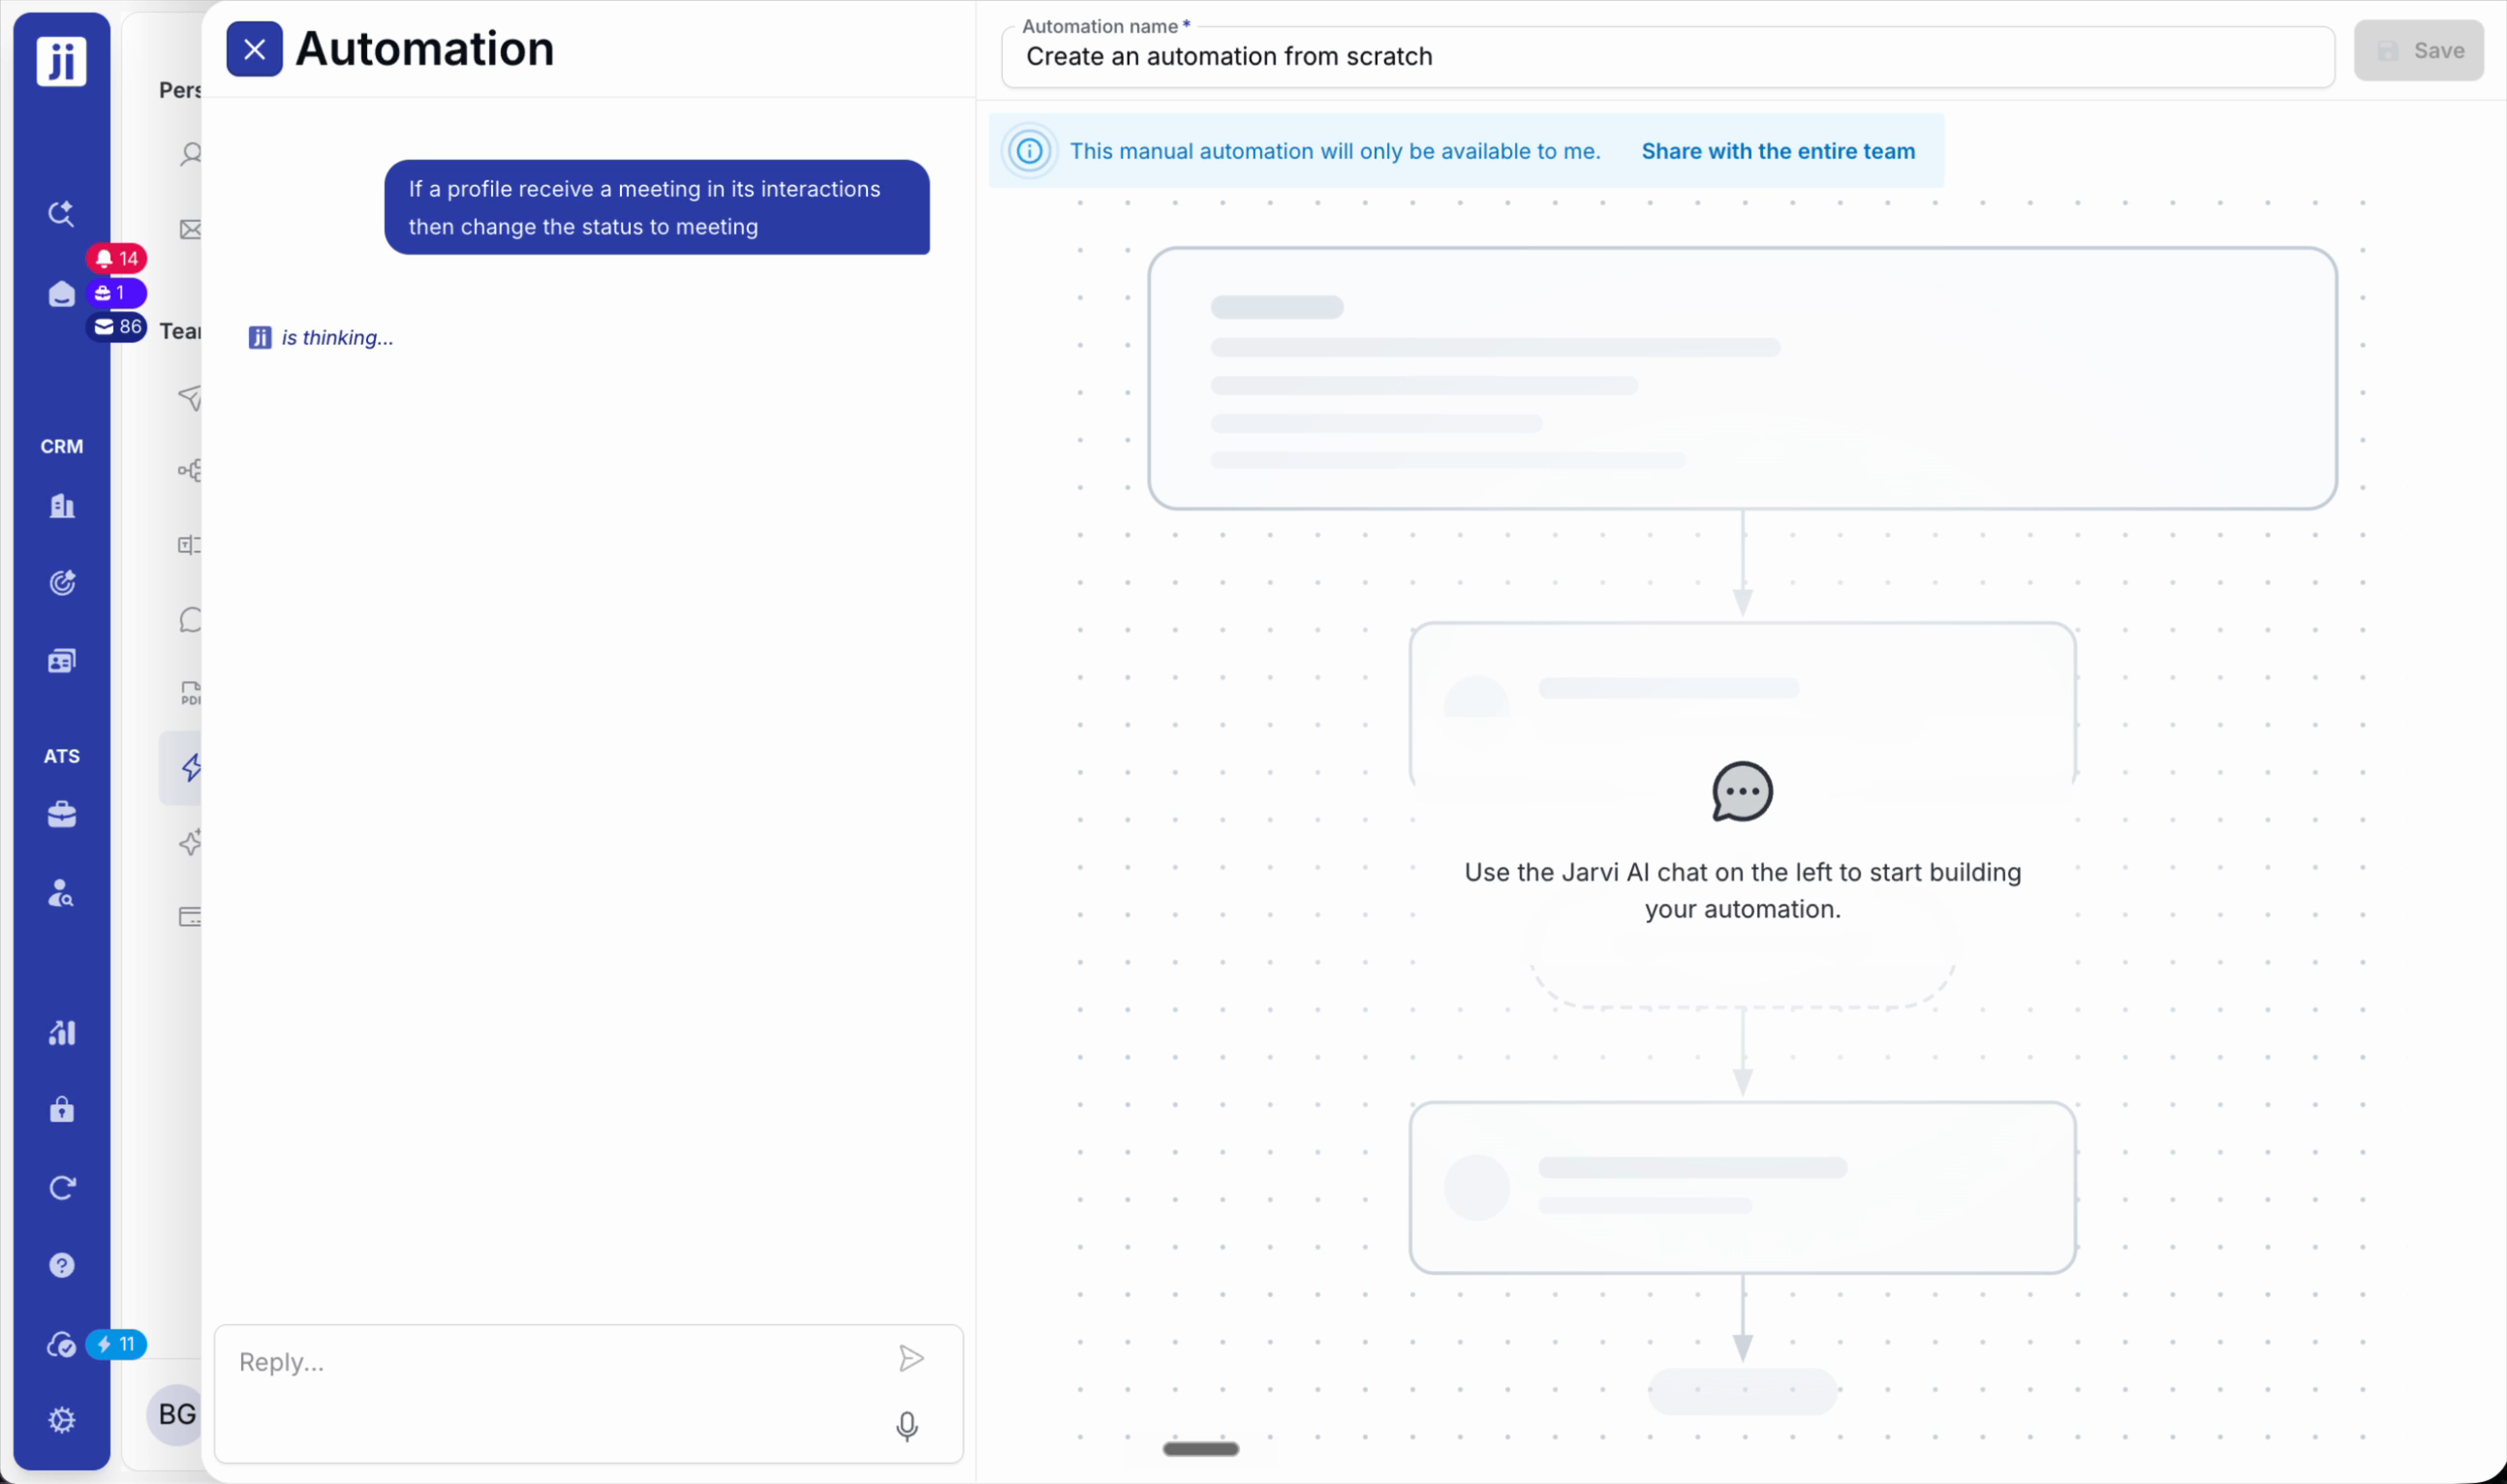
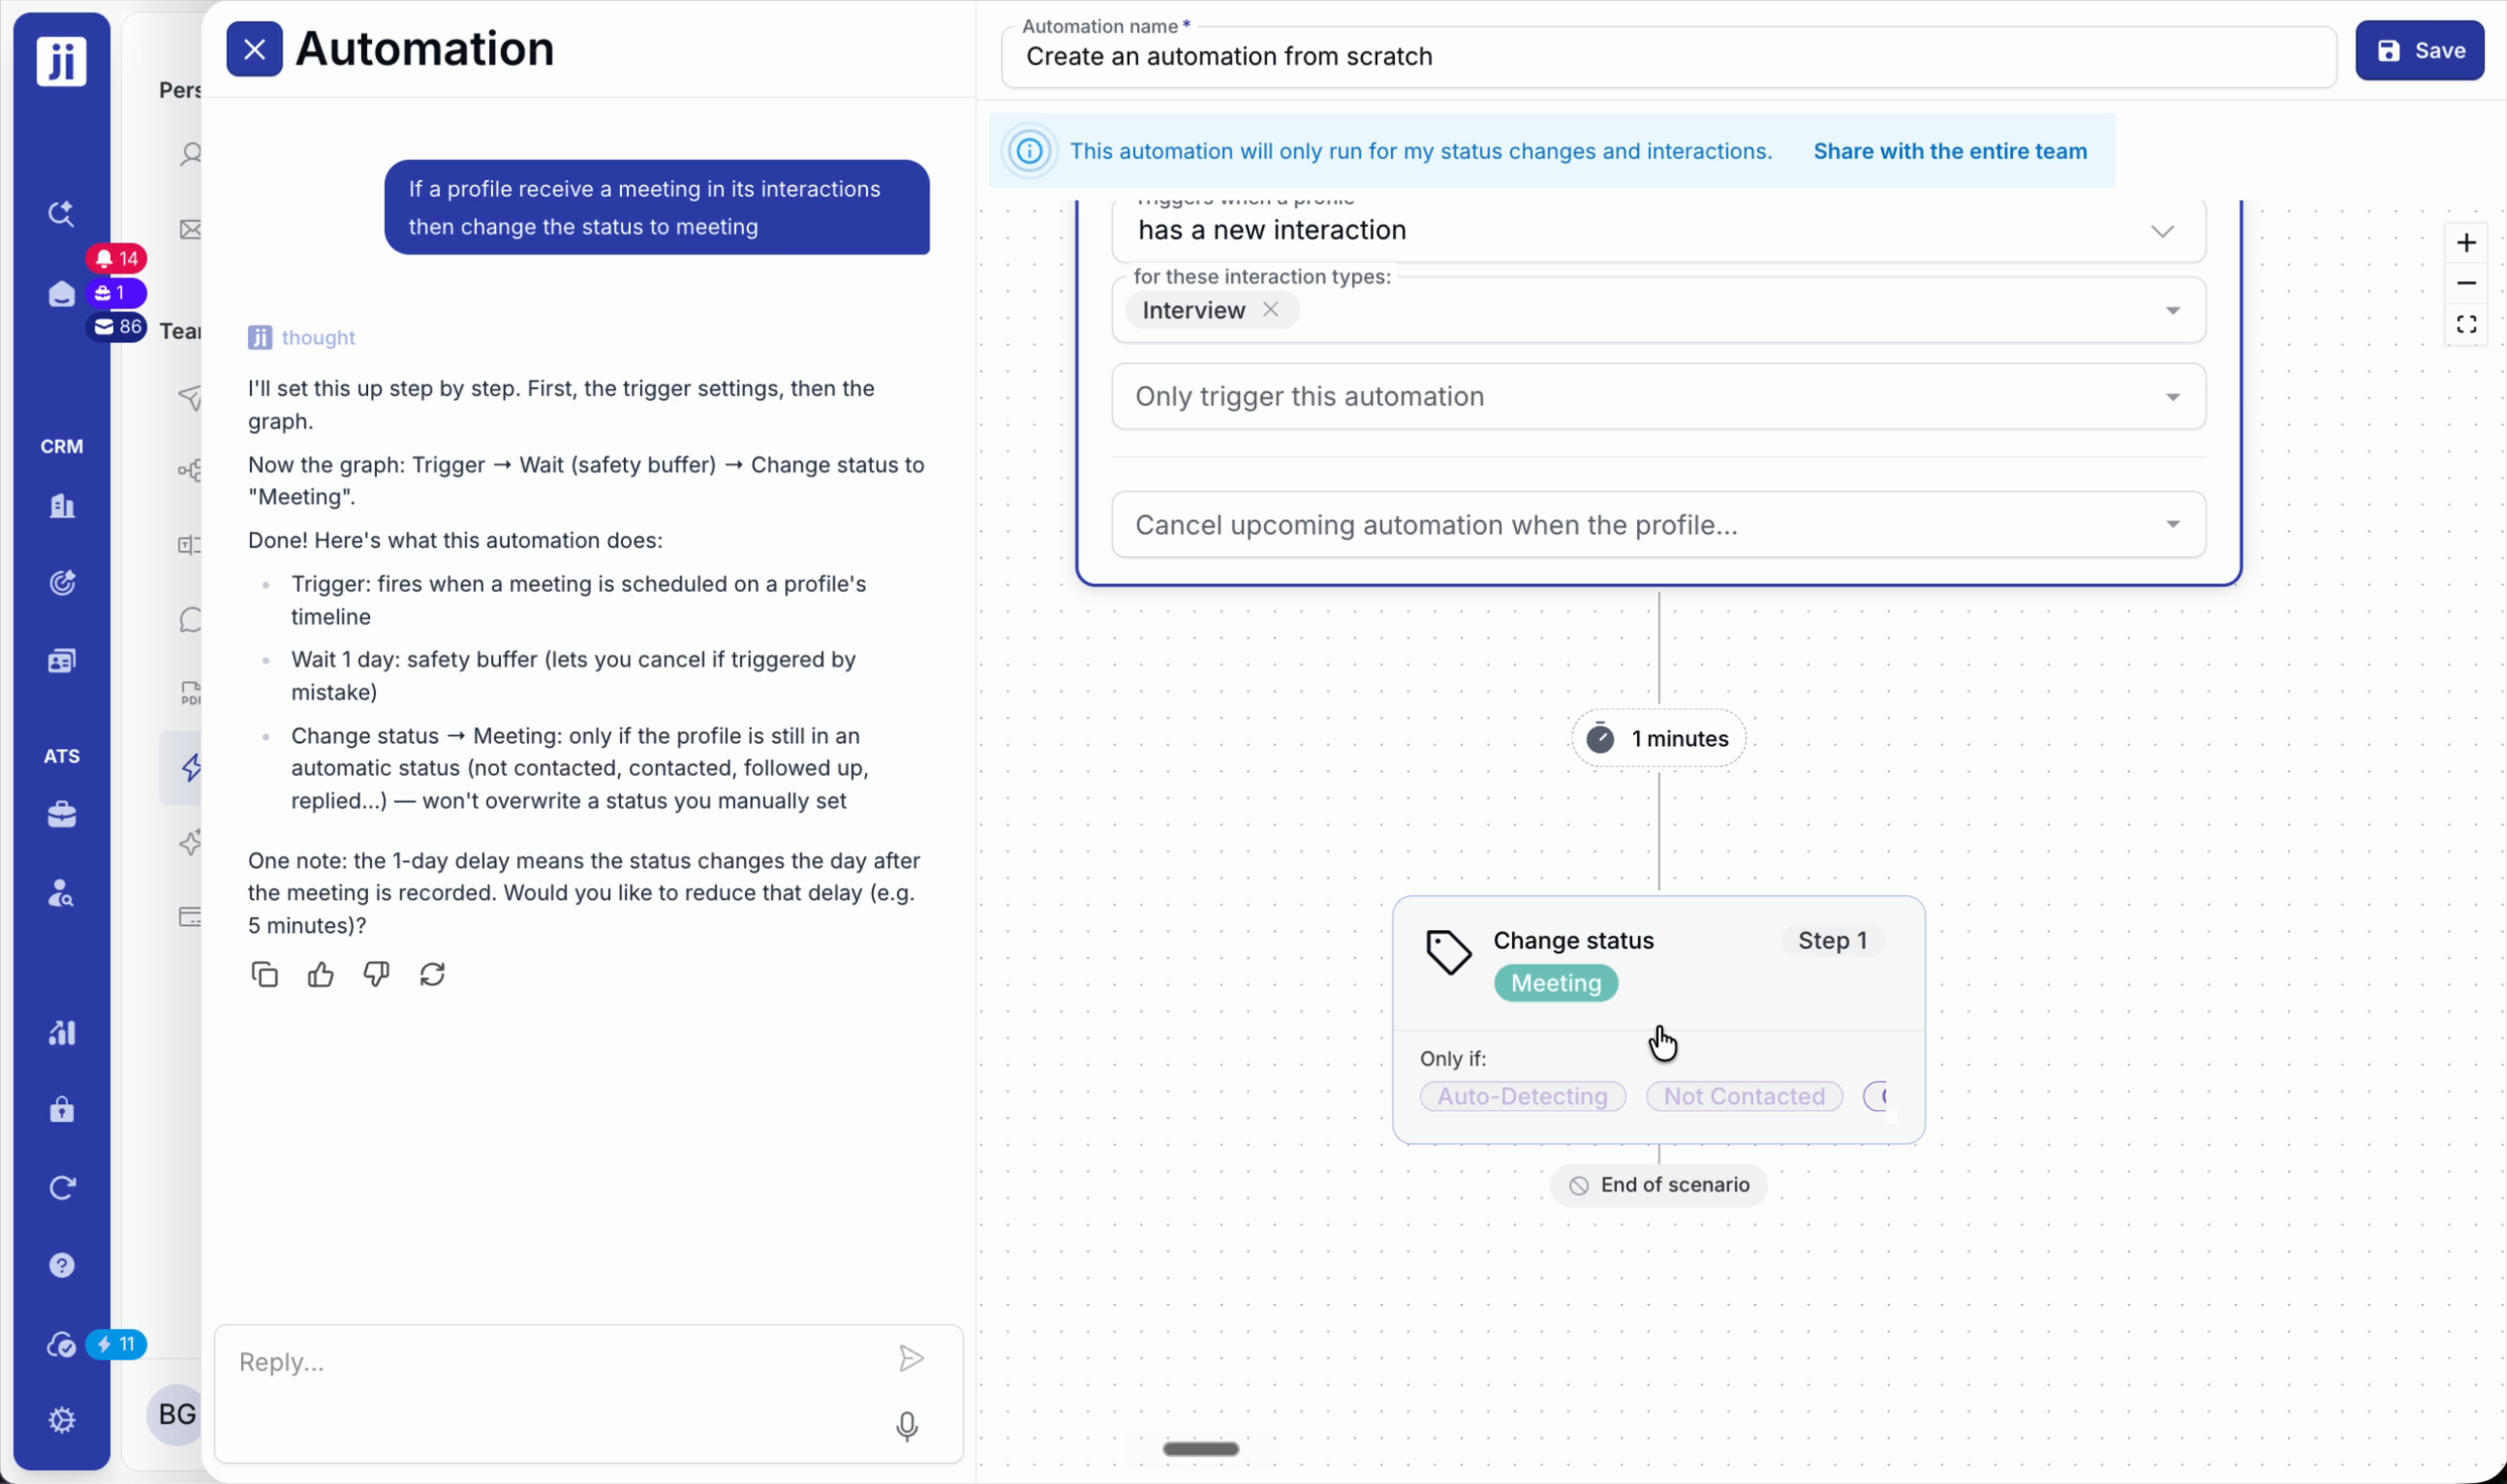
Step 3: For an interaction-based workflow (e.g. meeting scheduled = automatic status change to “Interview”), set up the rule in the automation.
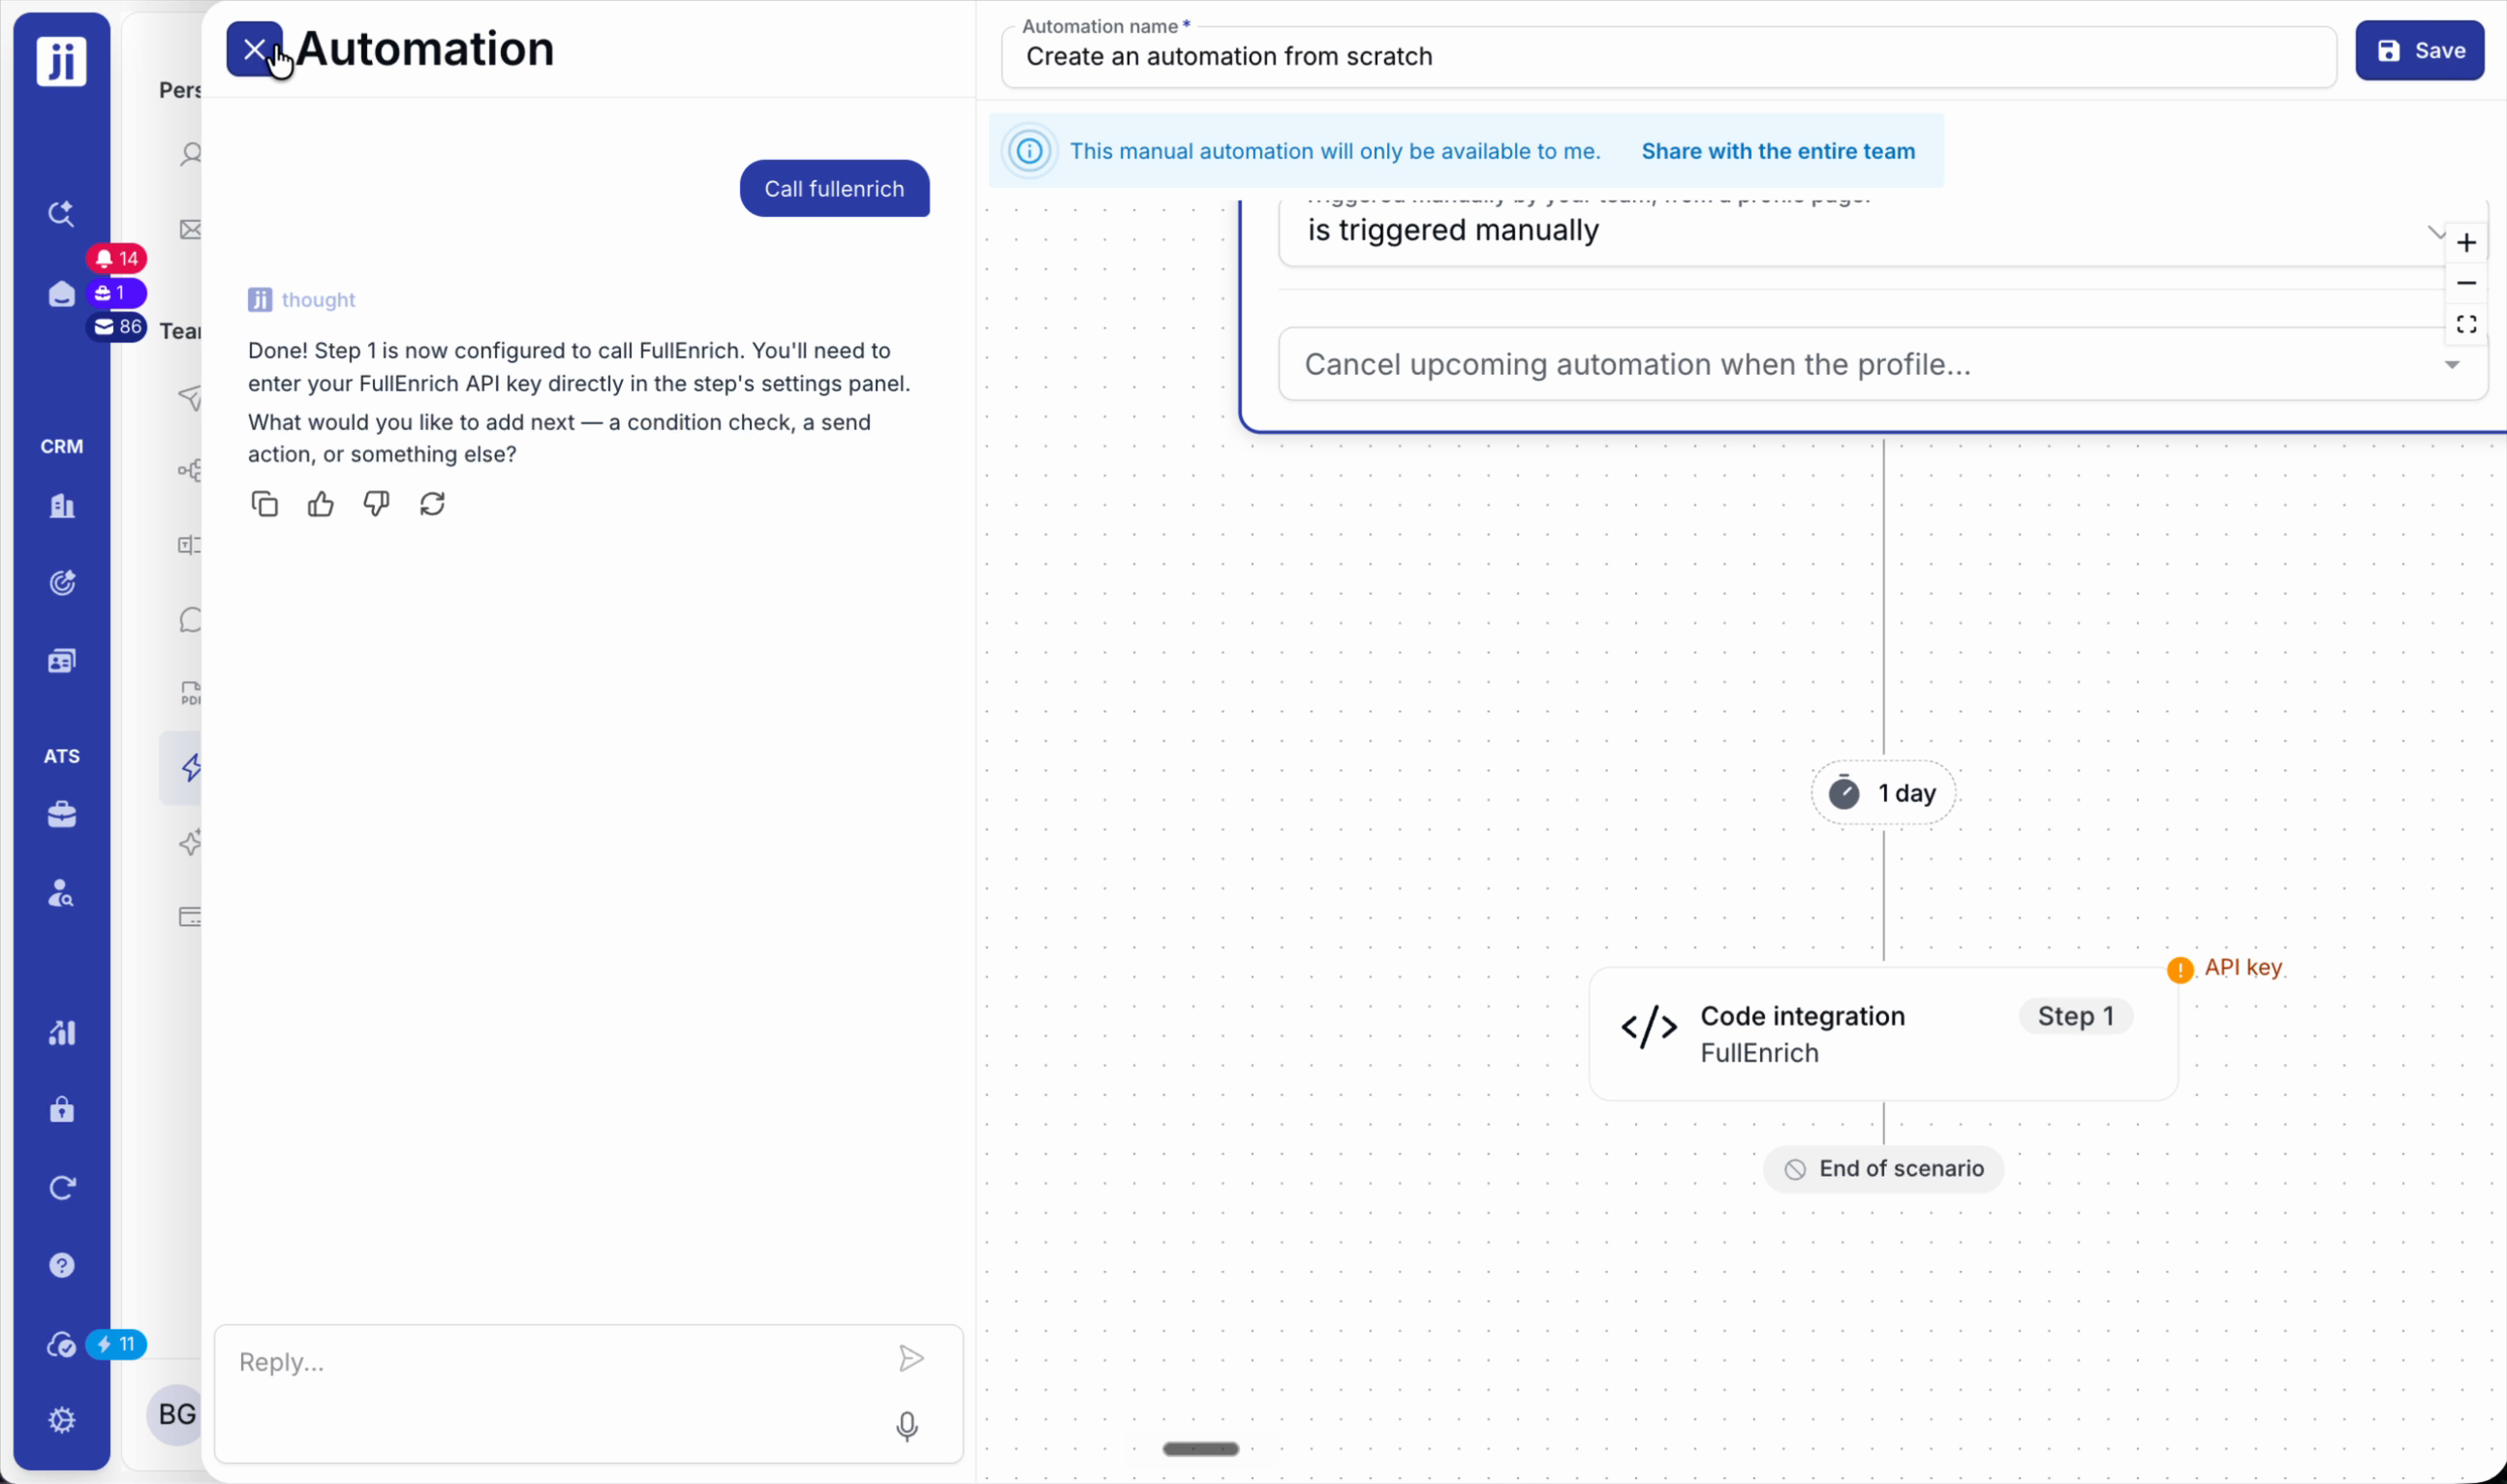
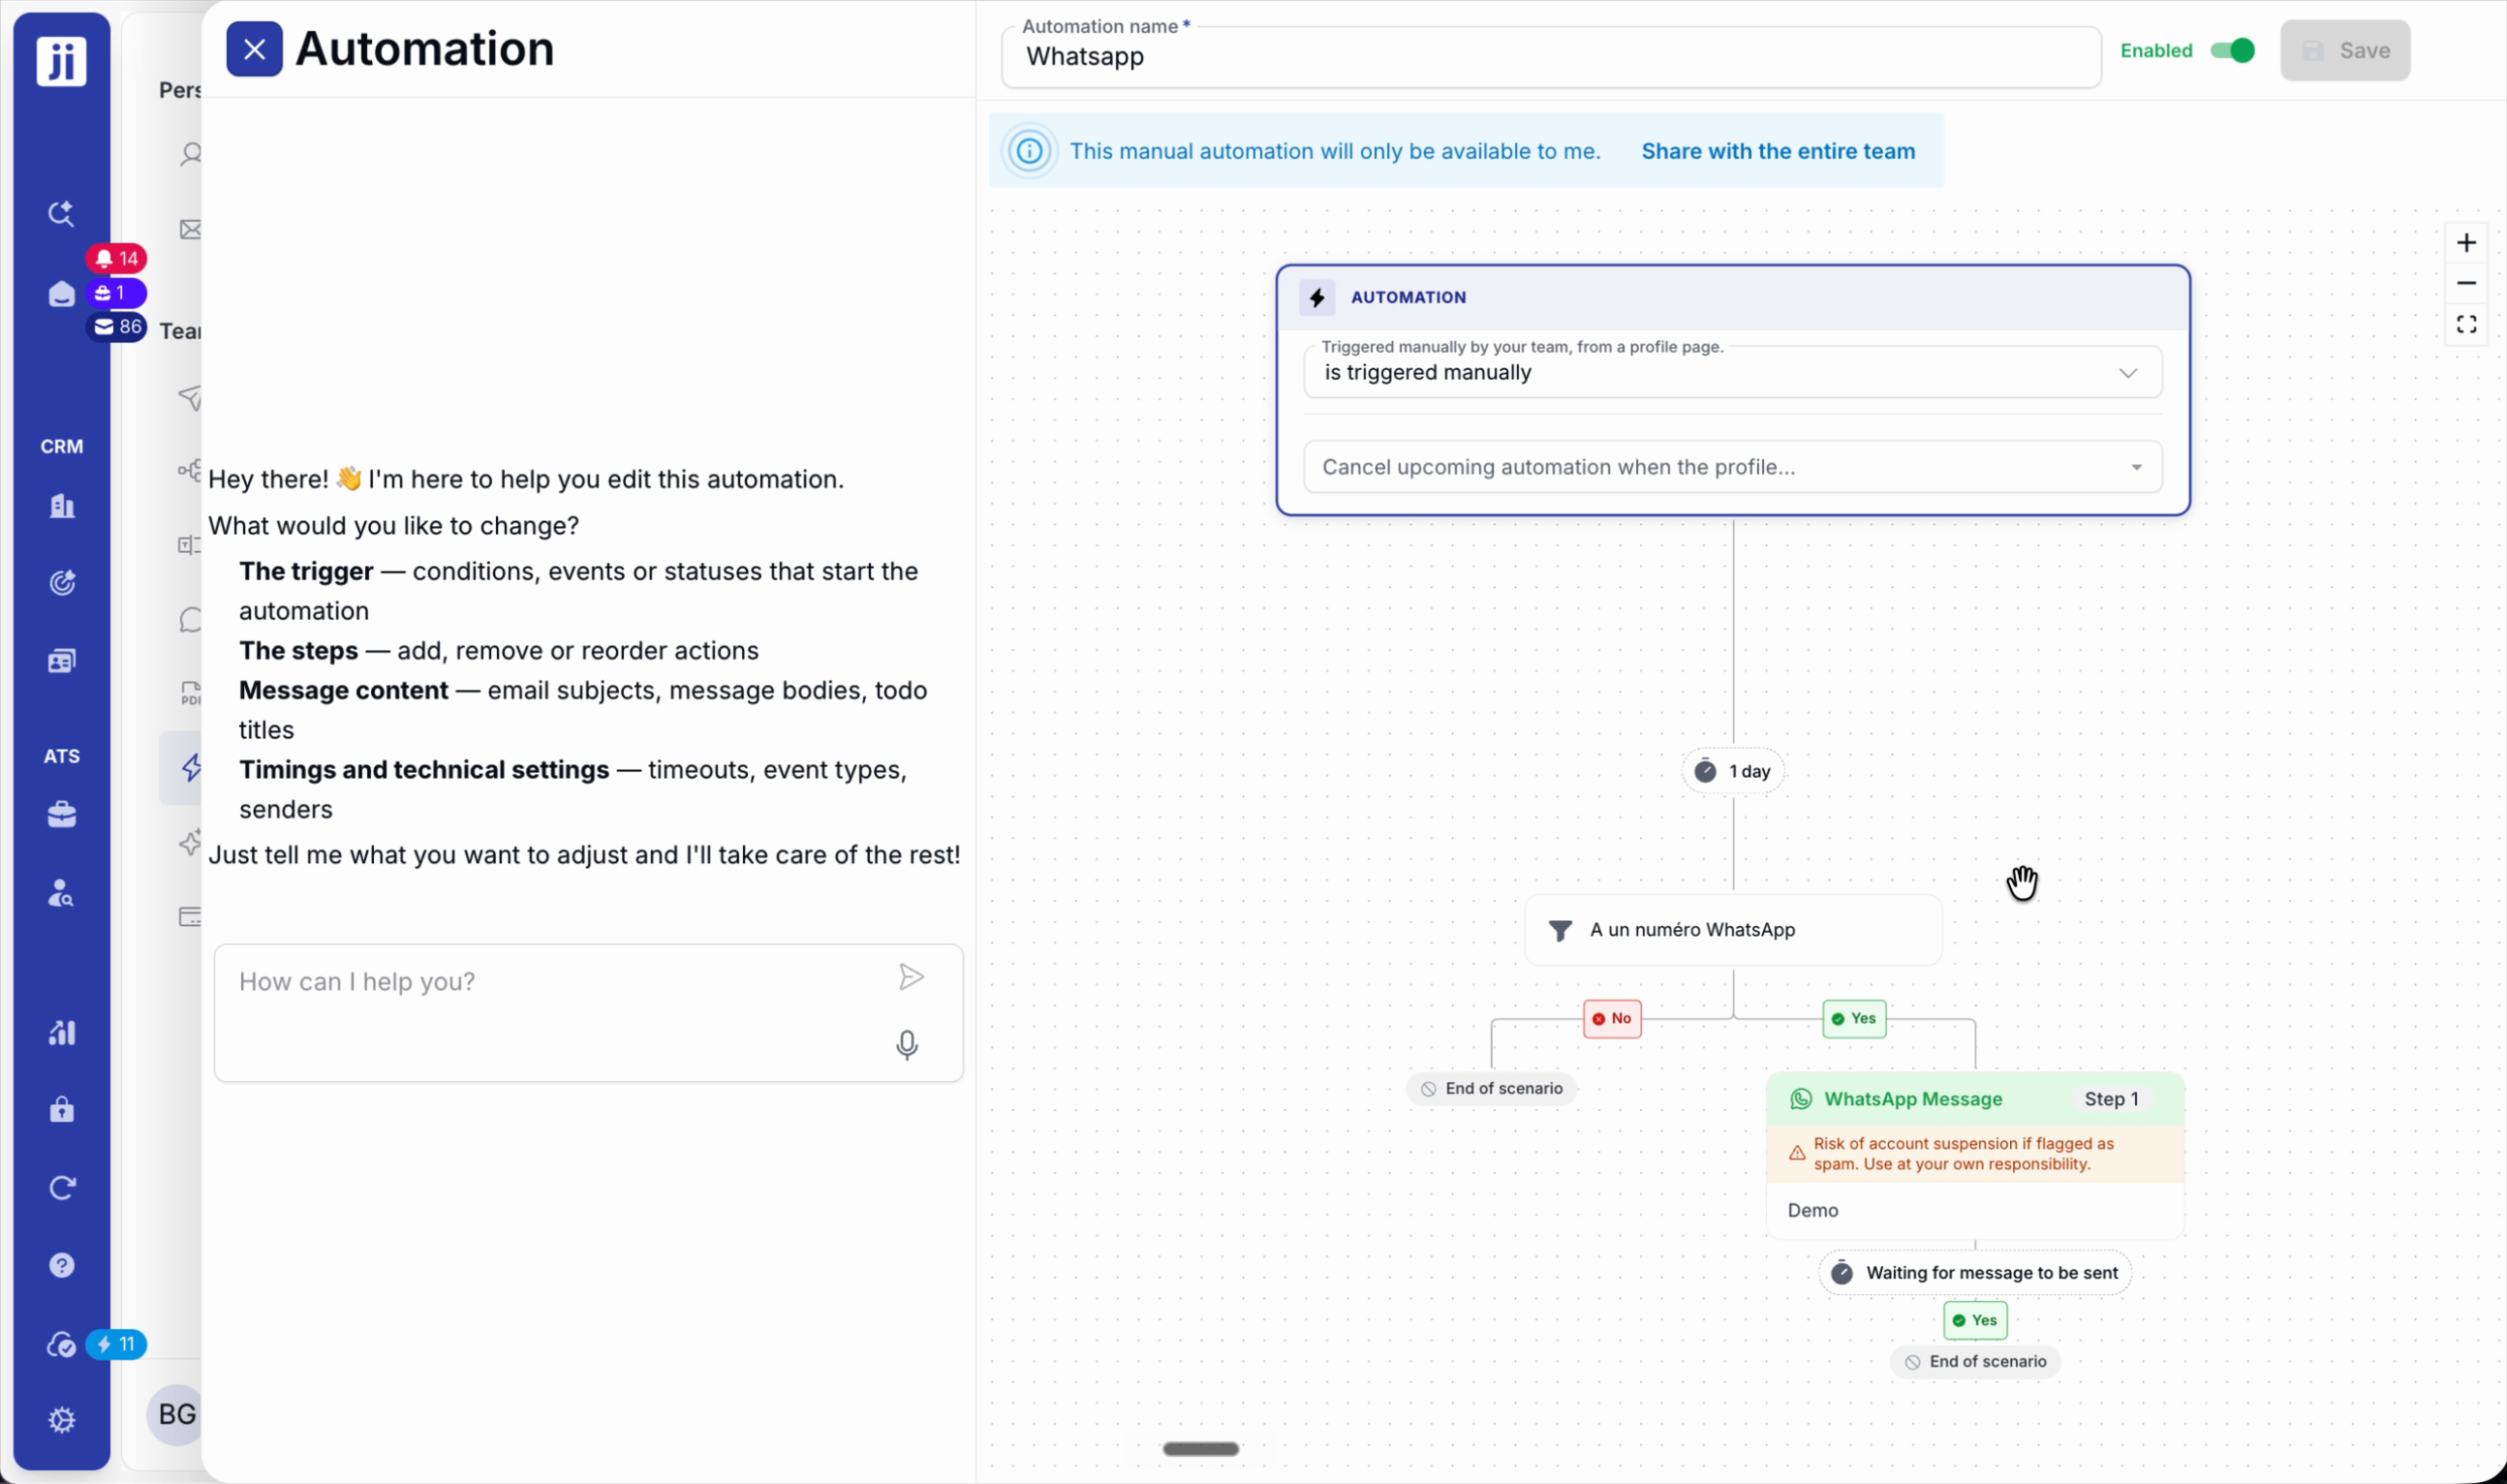
Integrations and additional channels
Step 1: Add partners such as SignNow (electronic signature) or Full Enrich (profile enrichment) by entering your API keys.

Step 2: Automate messages on WhatsApp, following best practices to avoid spam detection.
Custom date-based scenarios
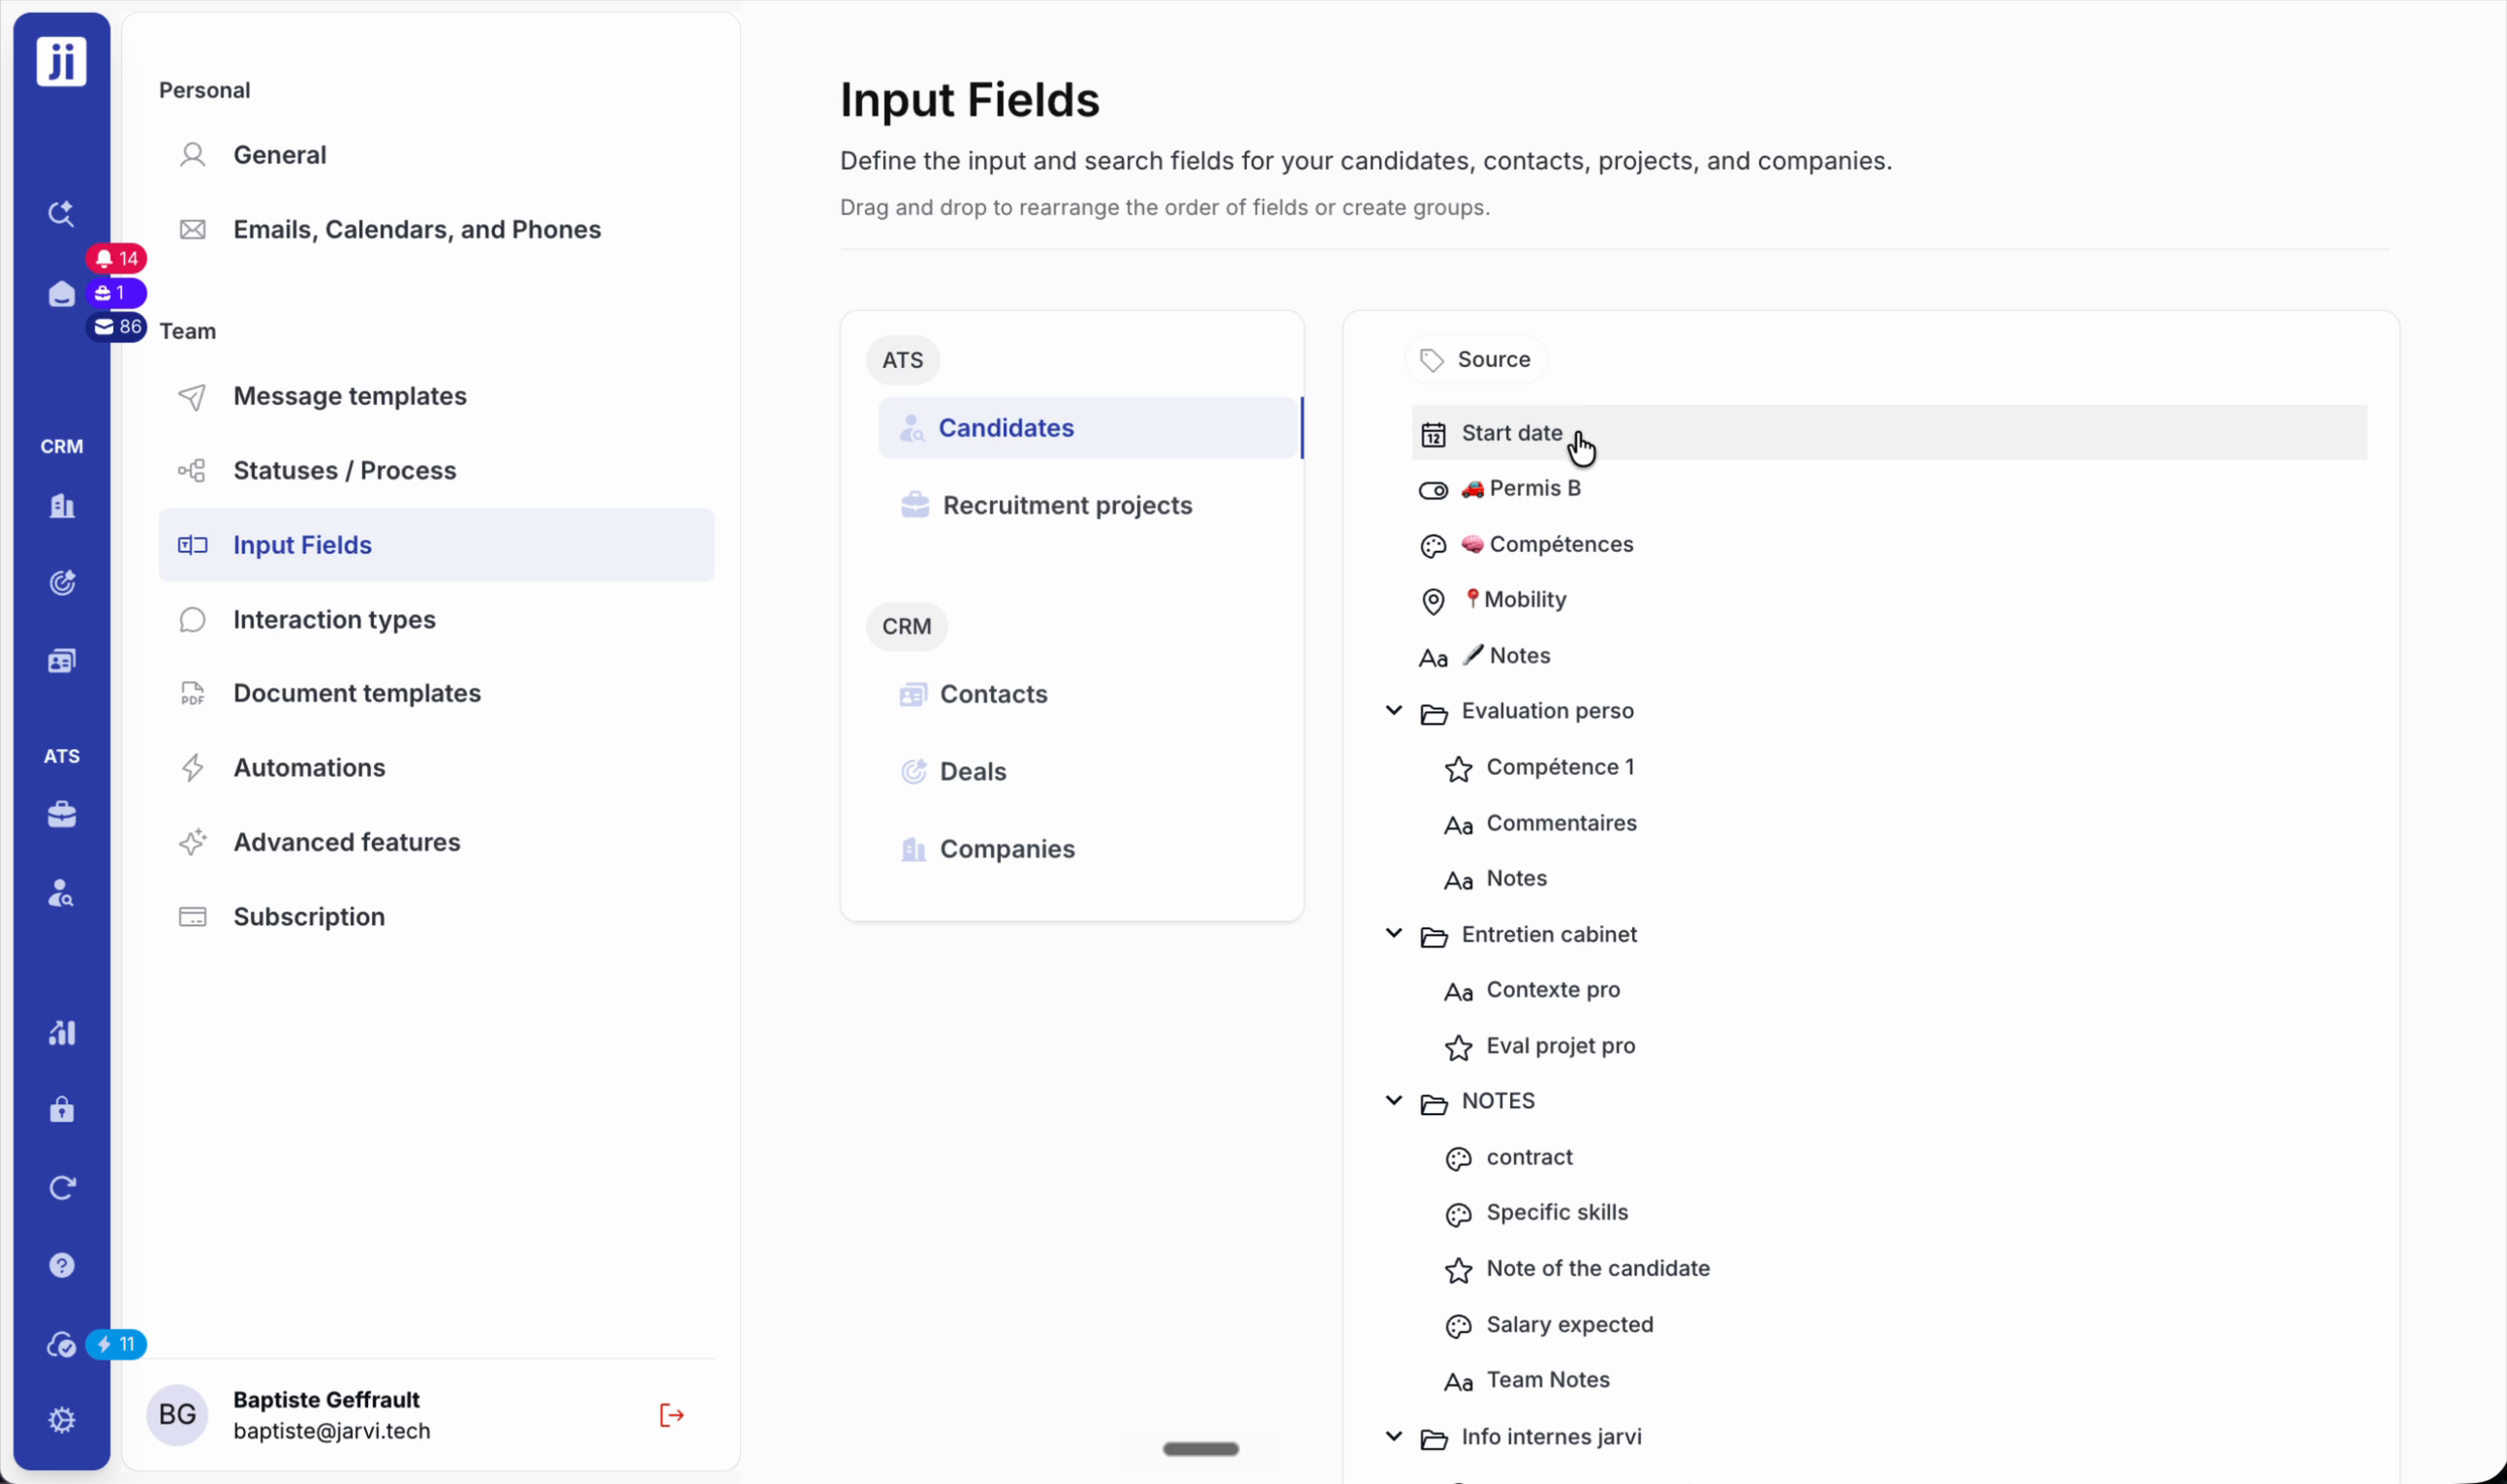
Step 1: Add a custom date field via My Preferences > Input Fields (e.g. start date).
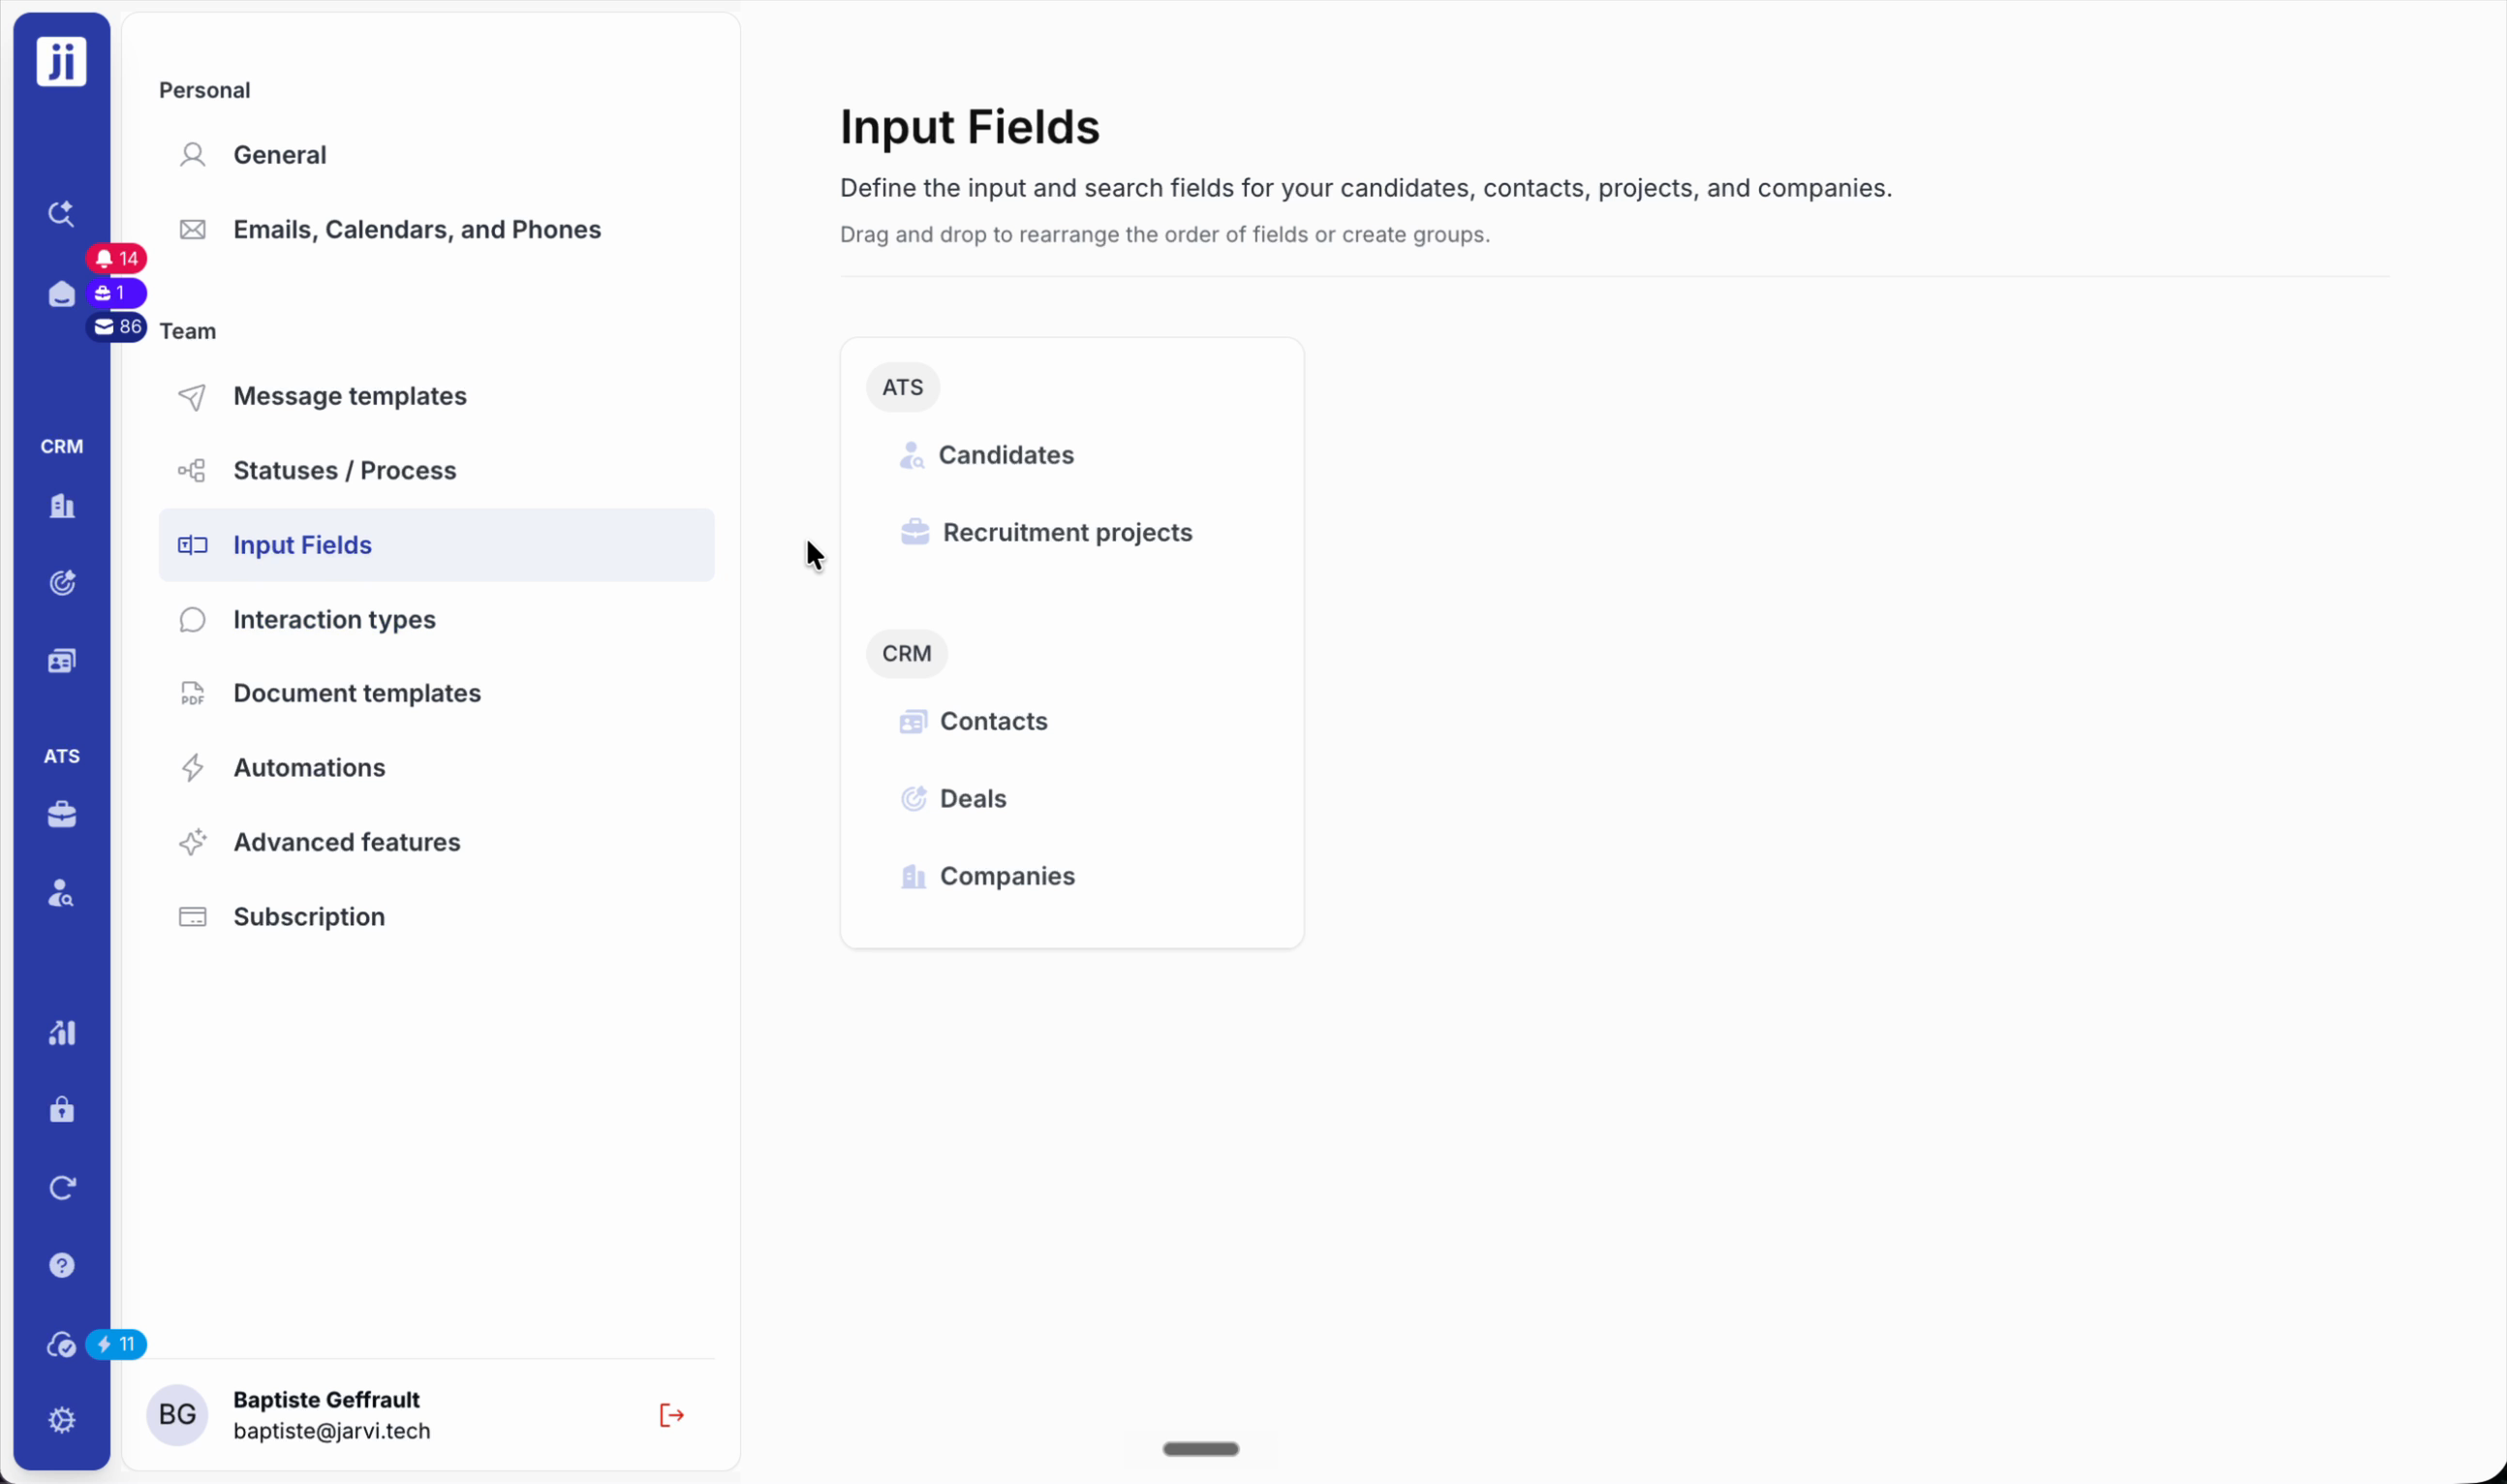
Step 2: Create an automation that runs at a specific time relative to that date (e.g. send an email or reminder 7 days before/after).
Connect external systems
Step 1: Set up webhooks to notify another system when a profile changes.

Step 2: For advanced integrations, use the MCP server and the Jarvi API.

Automation in Jarvi simplifies your life: you structure your candidate follow-up while keeping control over exceptions and personalisation. For any questions, ask your AI assistant or contact support to optimise your workflows.