Accessing the feature
Jarvi allows you to protect a profile in two main ways:
- By assigning a protected status to the profile.
- By protecting the company to which it belongs.
Step-by-step guide
1. Protecting a profile via status
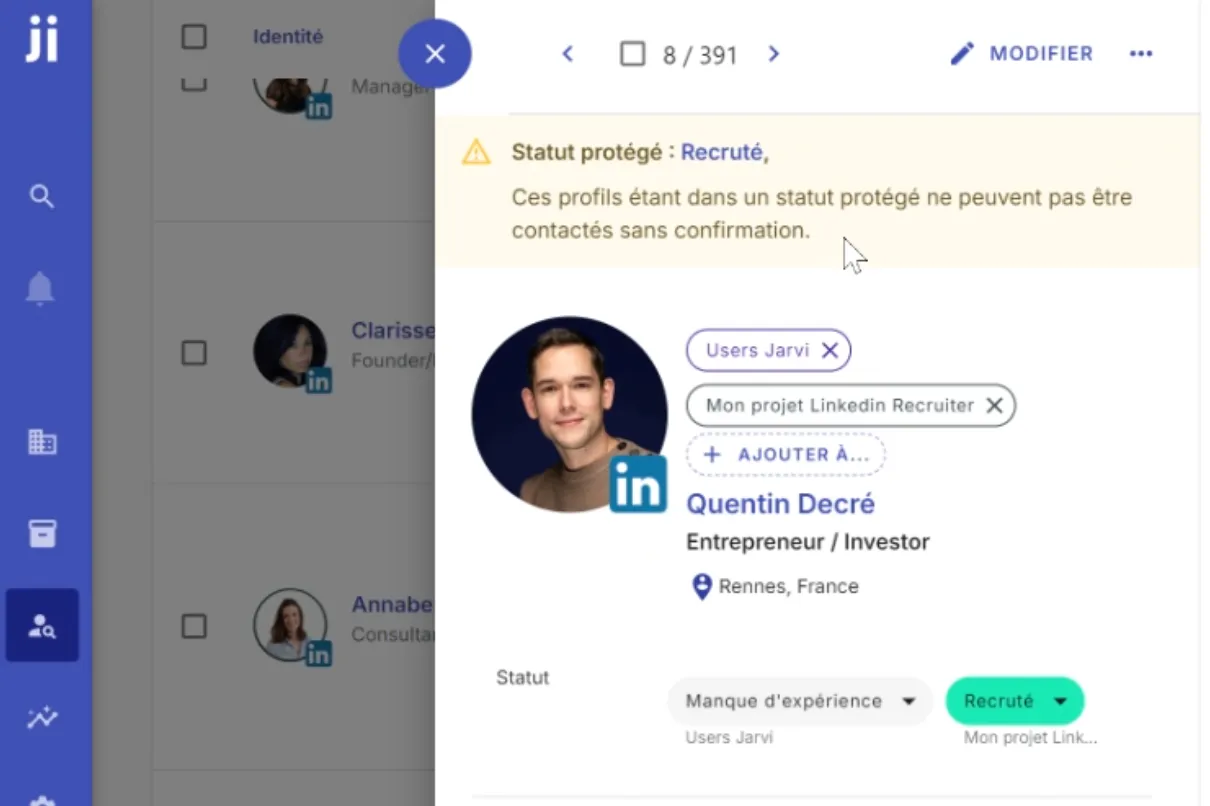
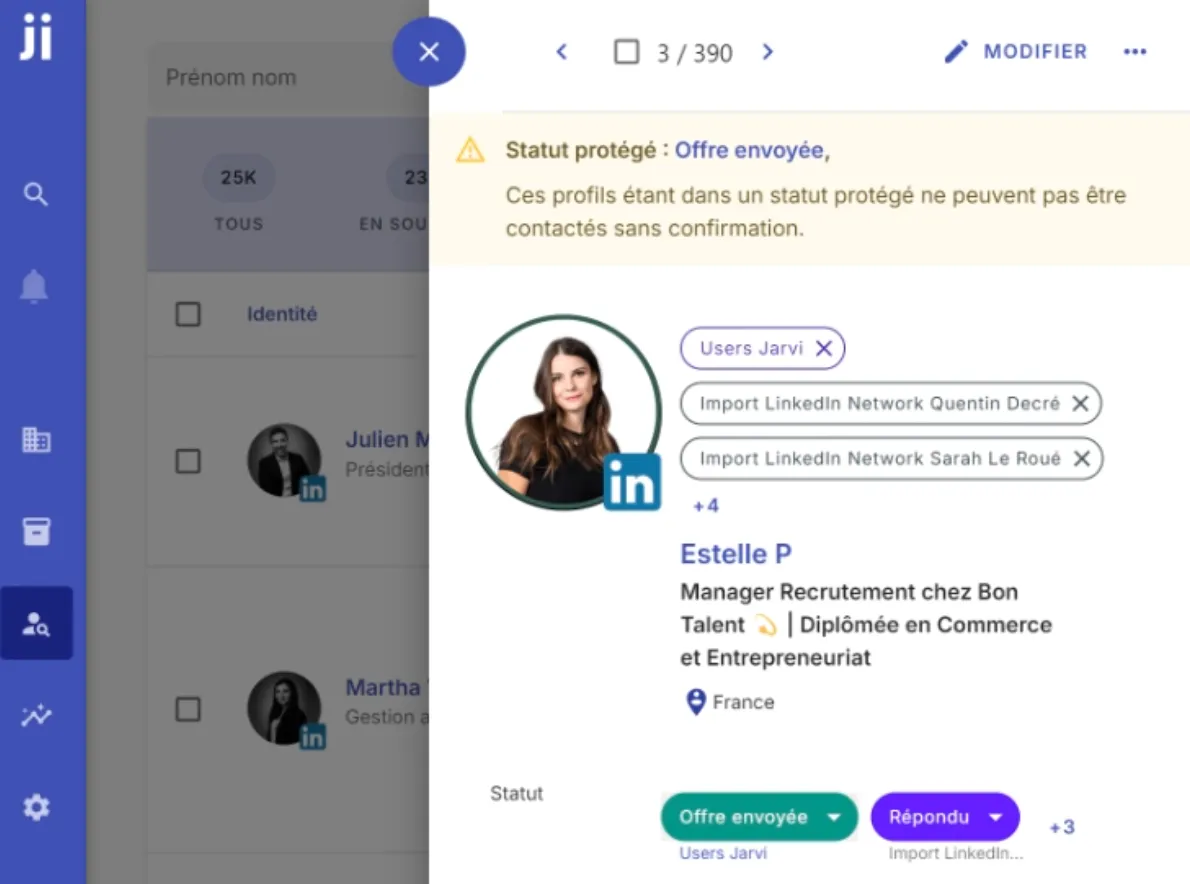
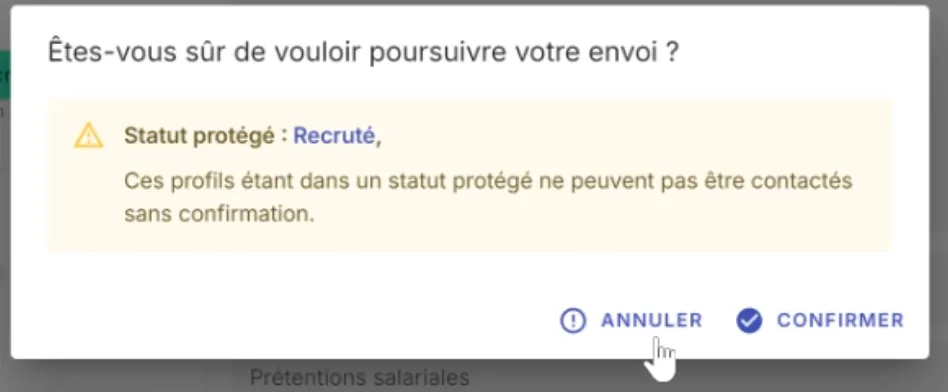
If a profile has a status that you’ve defined as “protected,” it cannot be contacted without confirmation.
Steps:
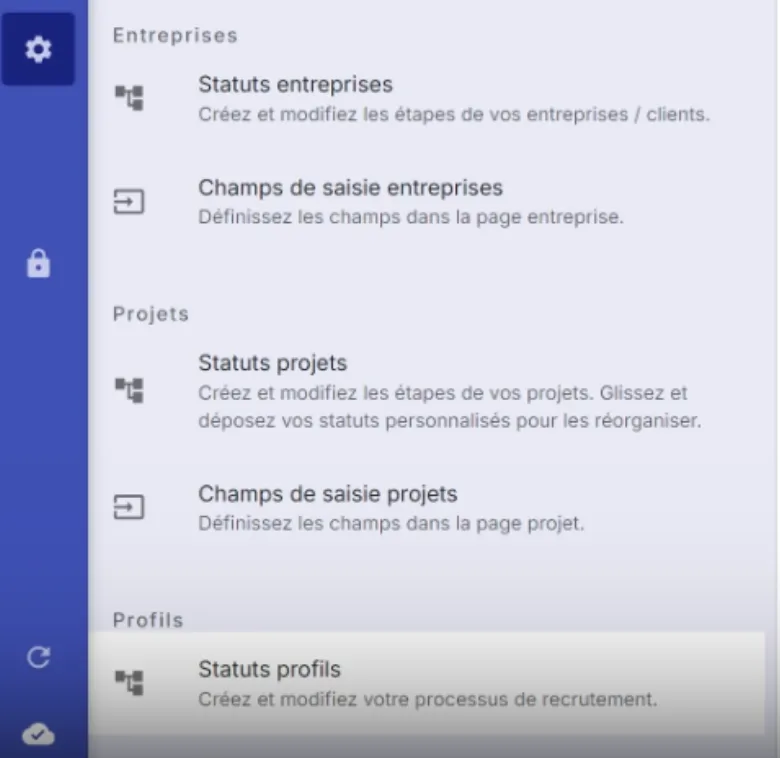
- Access preferences:
- Go to Settings > Profile statuses.
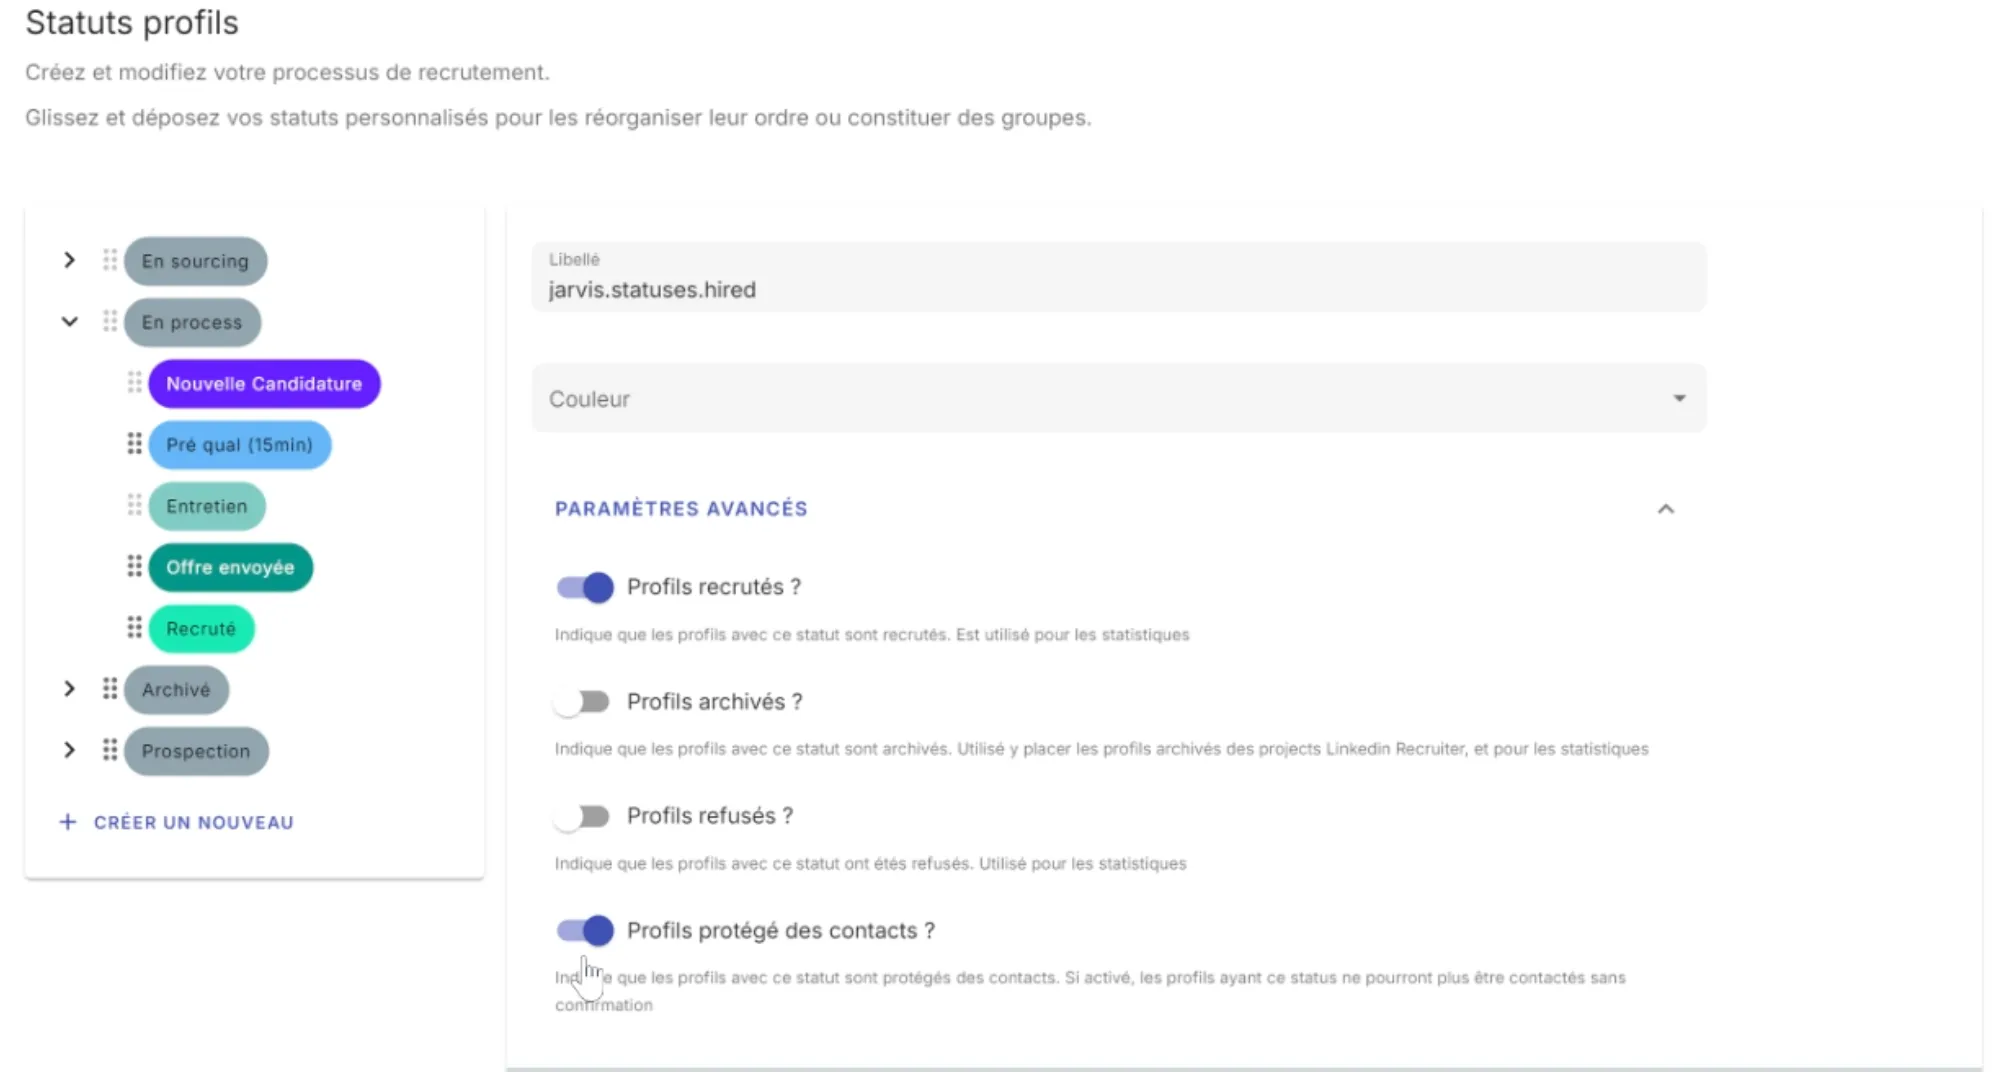
- Set a protected status:
- Select an existing status or create a new one.
- In the advanced settings, check “Protected profile from contacts”.
- Apply the status to the profile:
- Open a profile.
- Change its status to a protected status.
- Verify the protection:
- If you try to send a message, an alert will appear asking you to confirm the send.
2. Protecting a company and its employees
You can also protect an entire company so that all its employees are protected from unintentional contacts.
Steps:
- Access the CRM:
- Go to the CRM tab and search for the relevant company.
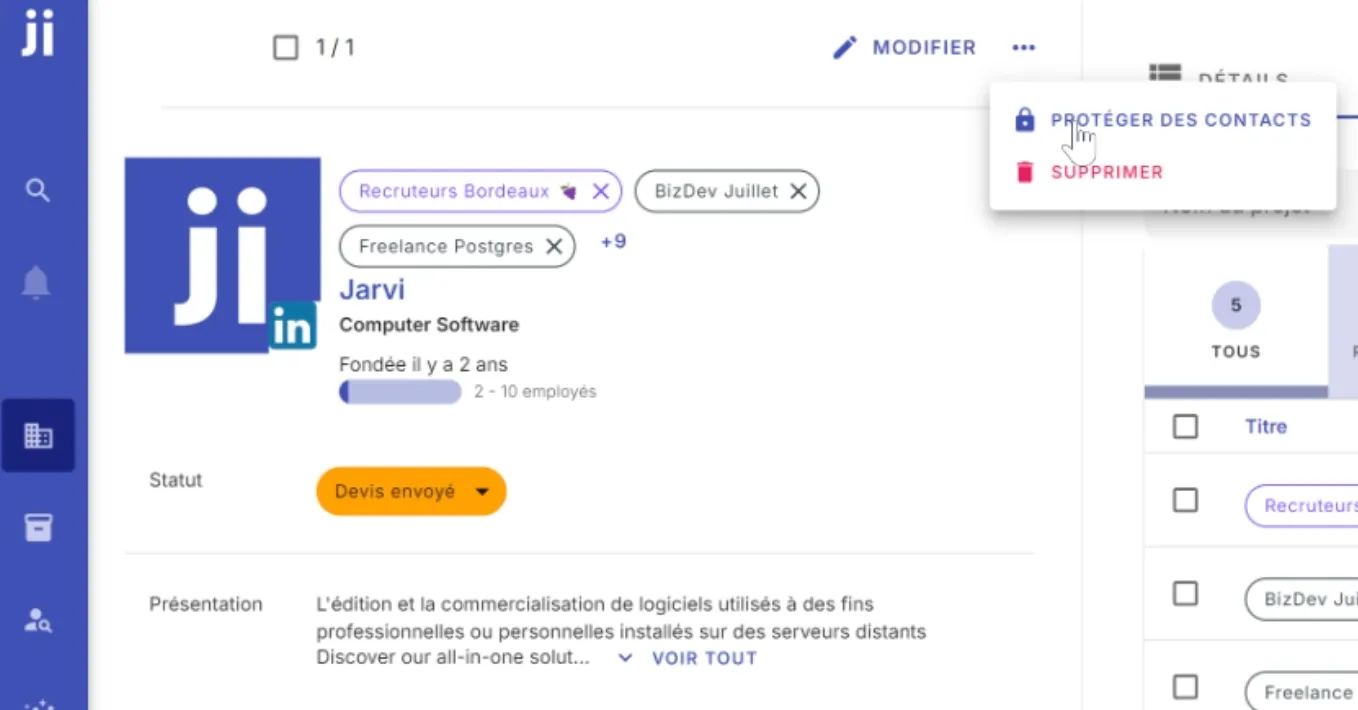
- Enable protection:
- Select the company.
- Check the “Protect from contacts” option.
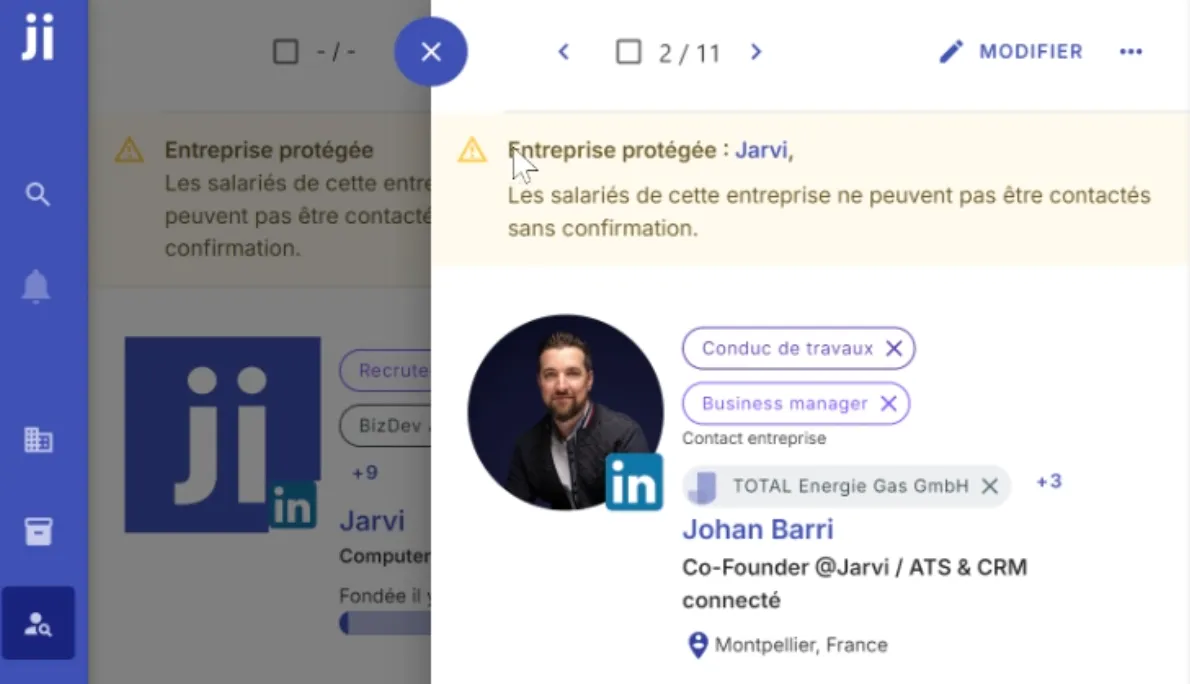
- Verify employee protection:
- All employees of the company will now be protected.
- When viewing an employee from this company, you’ll see the protection indicator.
Practical cases and best practices - Use case example: You want to avoid sending multiple offers to the same candidate after a first offer has been sent. - Tip: Set statuses like “Offer sent” to automatically enable protection. - Check regularly: Remember to audit your statuses to avoid unintentional protections.
Protecting a profile or company on Jarvi allows you to better manage your communication and avoid potential mistakes. Try this feature now to ensure optimized management of your contacts!