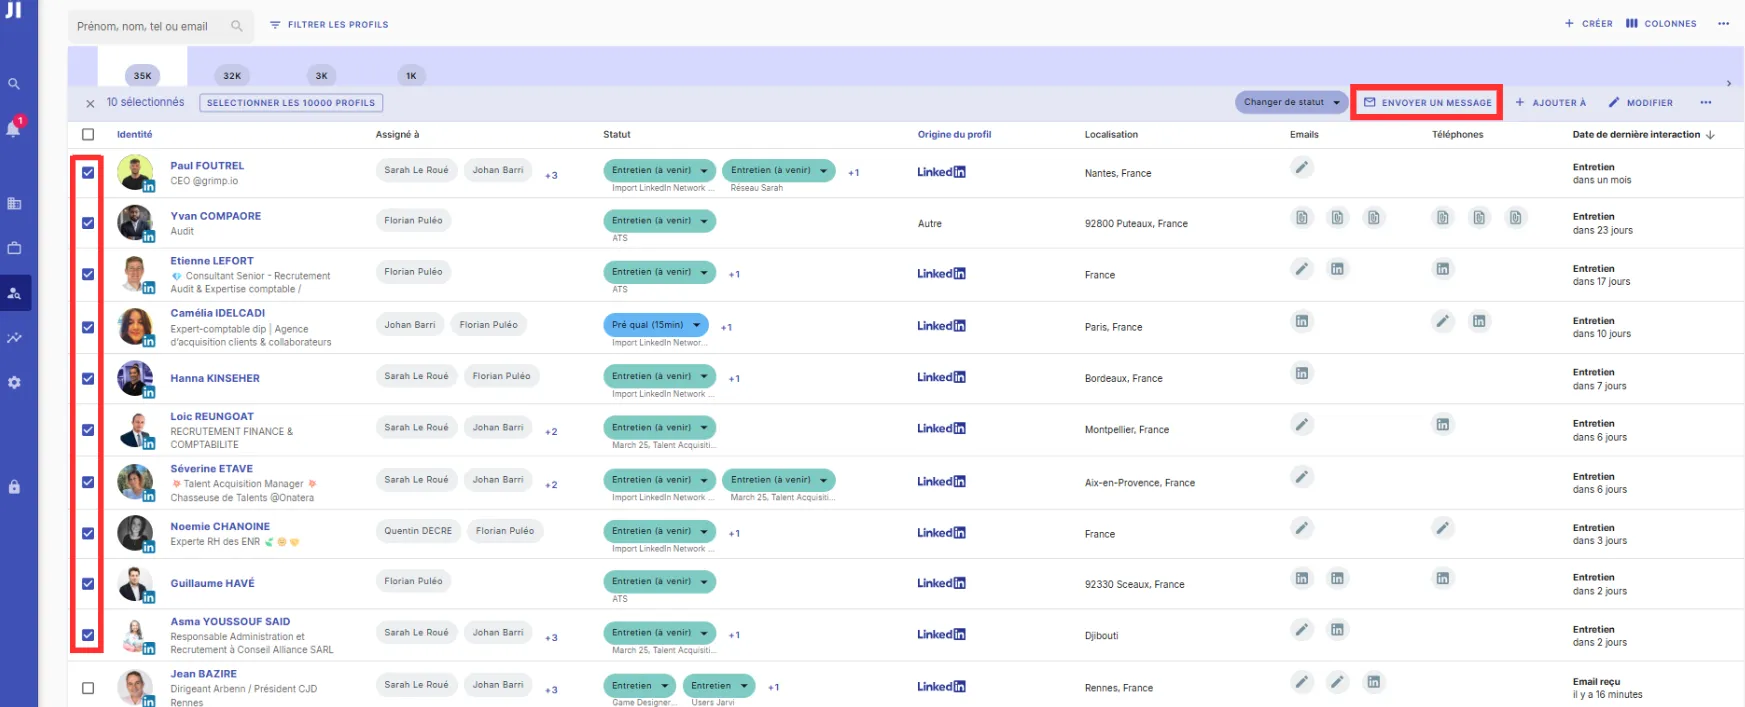
1. Selecting profiles and preparing the message
- Go to the list of profiles you wish to contact. This can be in a project or another talent pool.
- Select profiles by clicking the box next to their identity.
- Click on “Send a message”.
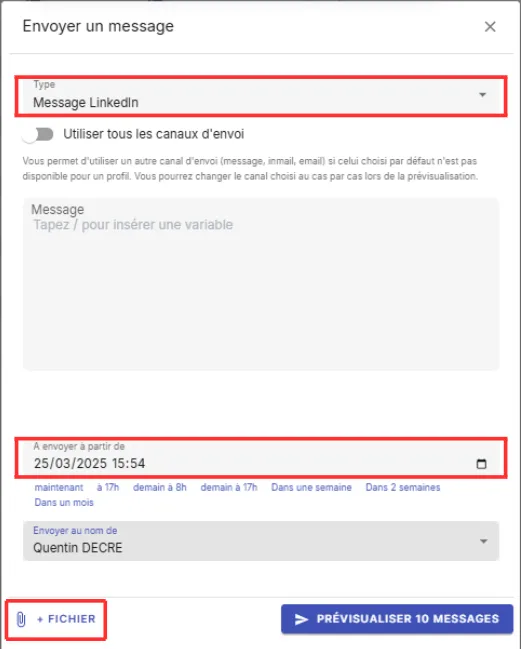
2. Choose the message template and schedule the sending
- Select the sending channel, then choose an existing message template or write your own message.
- To schedule the sending, choose the date and time when you want the message to be sent. You can fully customize this date and time, or use a shortcut for quick scheduling (for example, tomorrow at 5pm).
- If needed, add a file as an attachment.
- Click on “Preview X messages” to check the messages before sending.
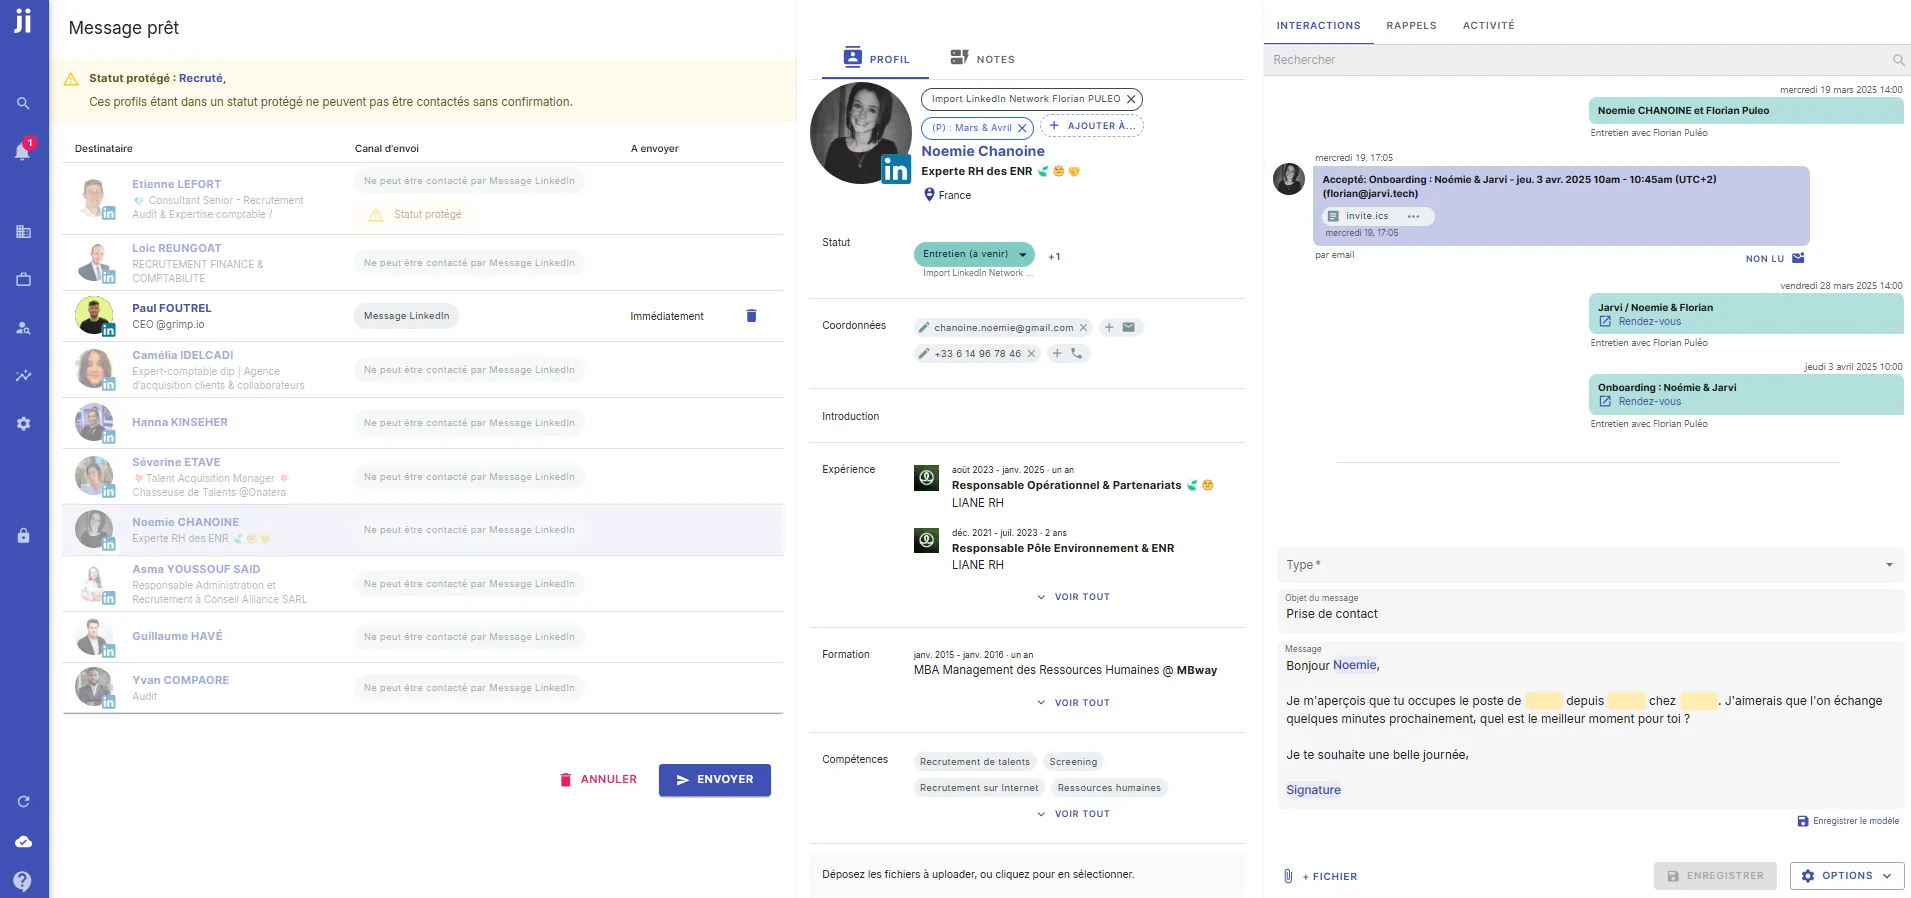
3. Finalizing the schedule
- Review the different messages prepared by Jarvi.
- If you wish, customize the messages to better adapt them to your target audience.
- Click on “Send” to schedule the campaign. The messages will only be sent from the specified date and time.
Canceling scheduled sending
If a profile responds before the message sending date, Jarvi will automatically cancel the scheduled sending. This
allows you to avoid sending a message to someone who has already interacted with you.