Connecting your email address to Jarvi allows you to centralize all your communications and easily manage your interviews and video conference invitations. Follow this step-by-step guide to add your email address to Jarvi and enjoy seamless management of your exchanges with candidates.
Accessing the feature
-
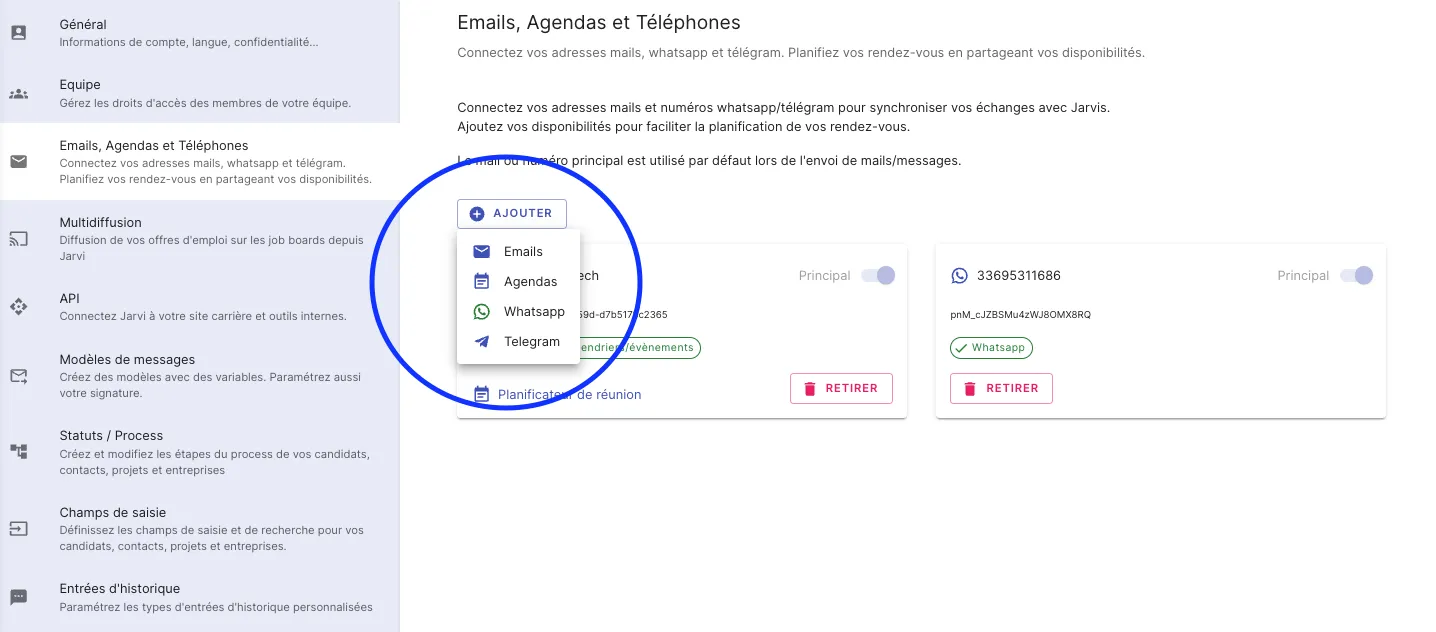
Go to your Jarvi preferences
- Open Jarvi and access your preferences by clicking on your profile icon, then select Emails, calendars and phones.

-
Add a new email address
- Click on Add then select Email.
-
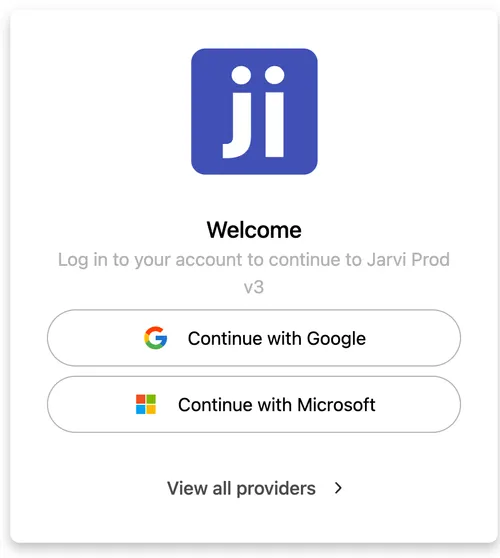
Choose your email provider
- Select your email provider from the available options.
- If your provider isn’t Google or Microsoft, click on View all providers, then select IMAP.
Step-by-step guide
-
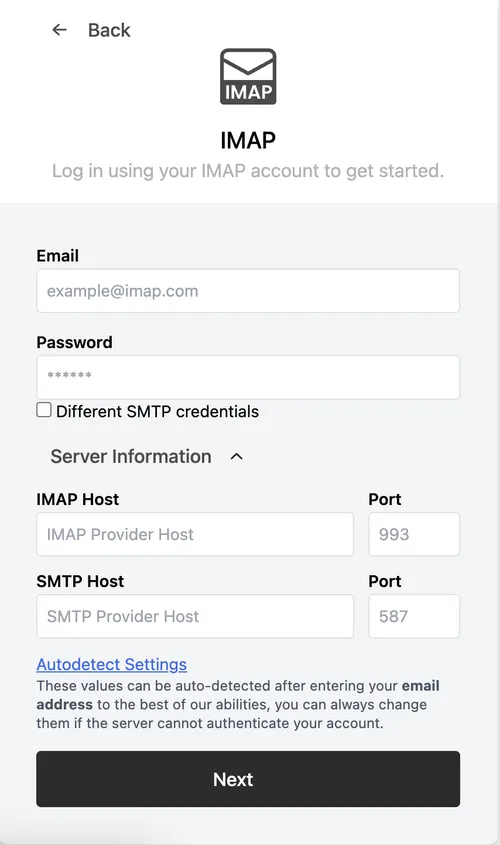
Enter IMAP and SMTP information
- Fill in the required fields by retrieving your IMAP and SMTP information from your mailbox settings.
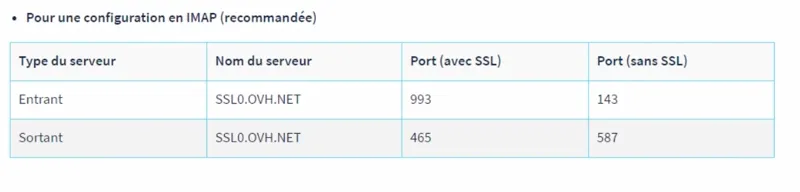
- For example, for an OVH account, here’s a sample IMAP configuration:
-
Connection verification
- Once this information is entered, your email address will appear as connected. You can then send and receive your emails directly from Jarvi!
Practical use cases and bulk actions
- Video conference management
- Jarvi automatically detects video conferences with candidates through your calendar. Interviews will automatically be moved to the Upcoming interview or Interview categories based on the event date.
- Centralized email exchanges
- All email exchanges with your candidates will be retrieved in the profile histories, allowing you to centralize all useful information in one place.
You’re all set! In just a few simple steps, you’ve connected your email to Jarvi and can now easily manage your exchanges with candidates. Try this feature to optimize your recruitment and centralize all important information directly in Jarvi.